
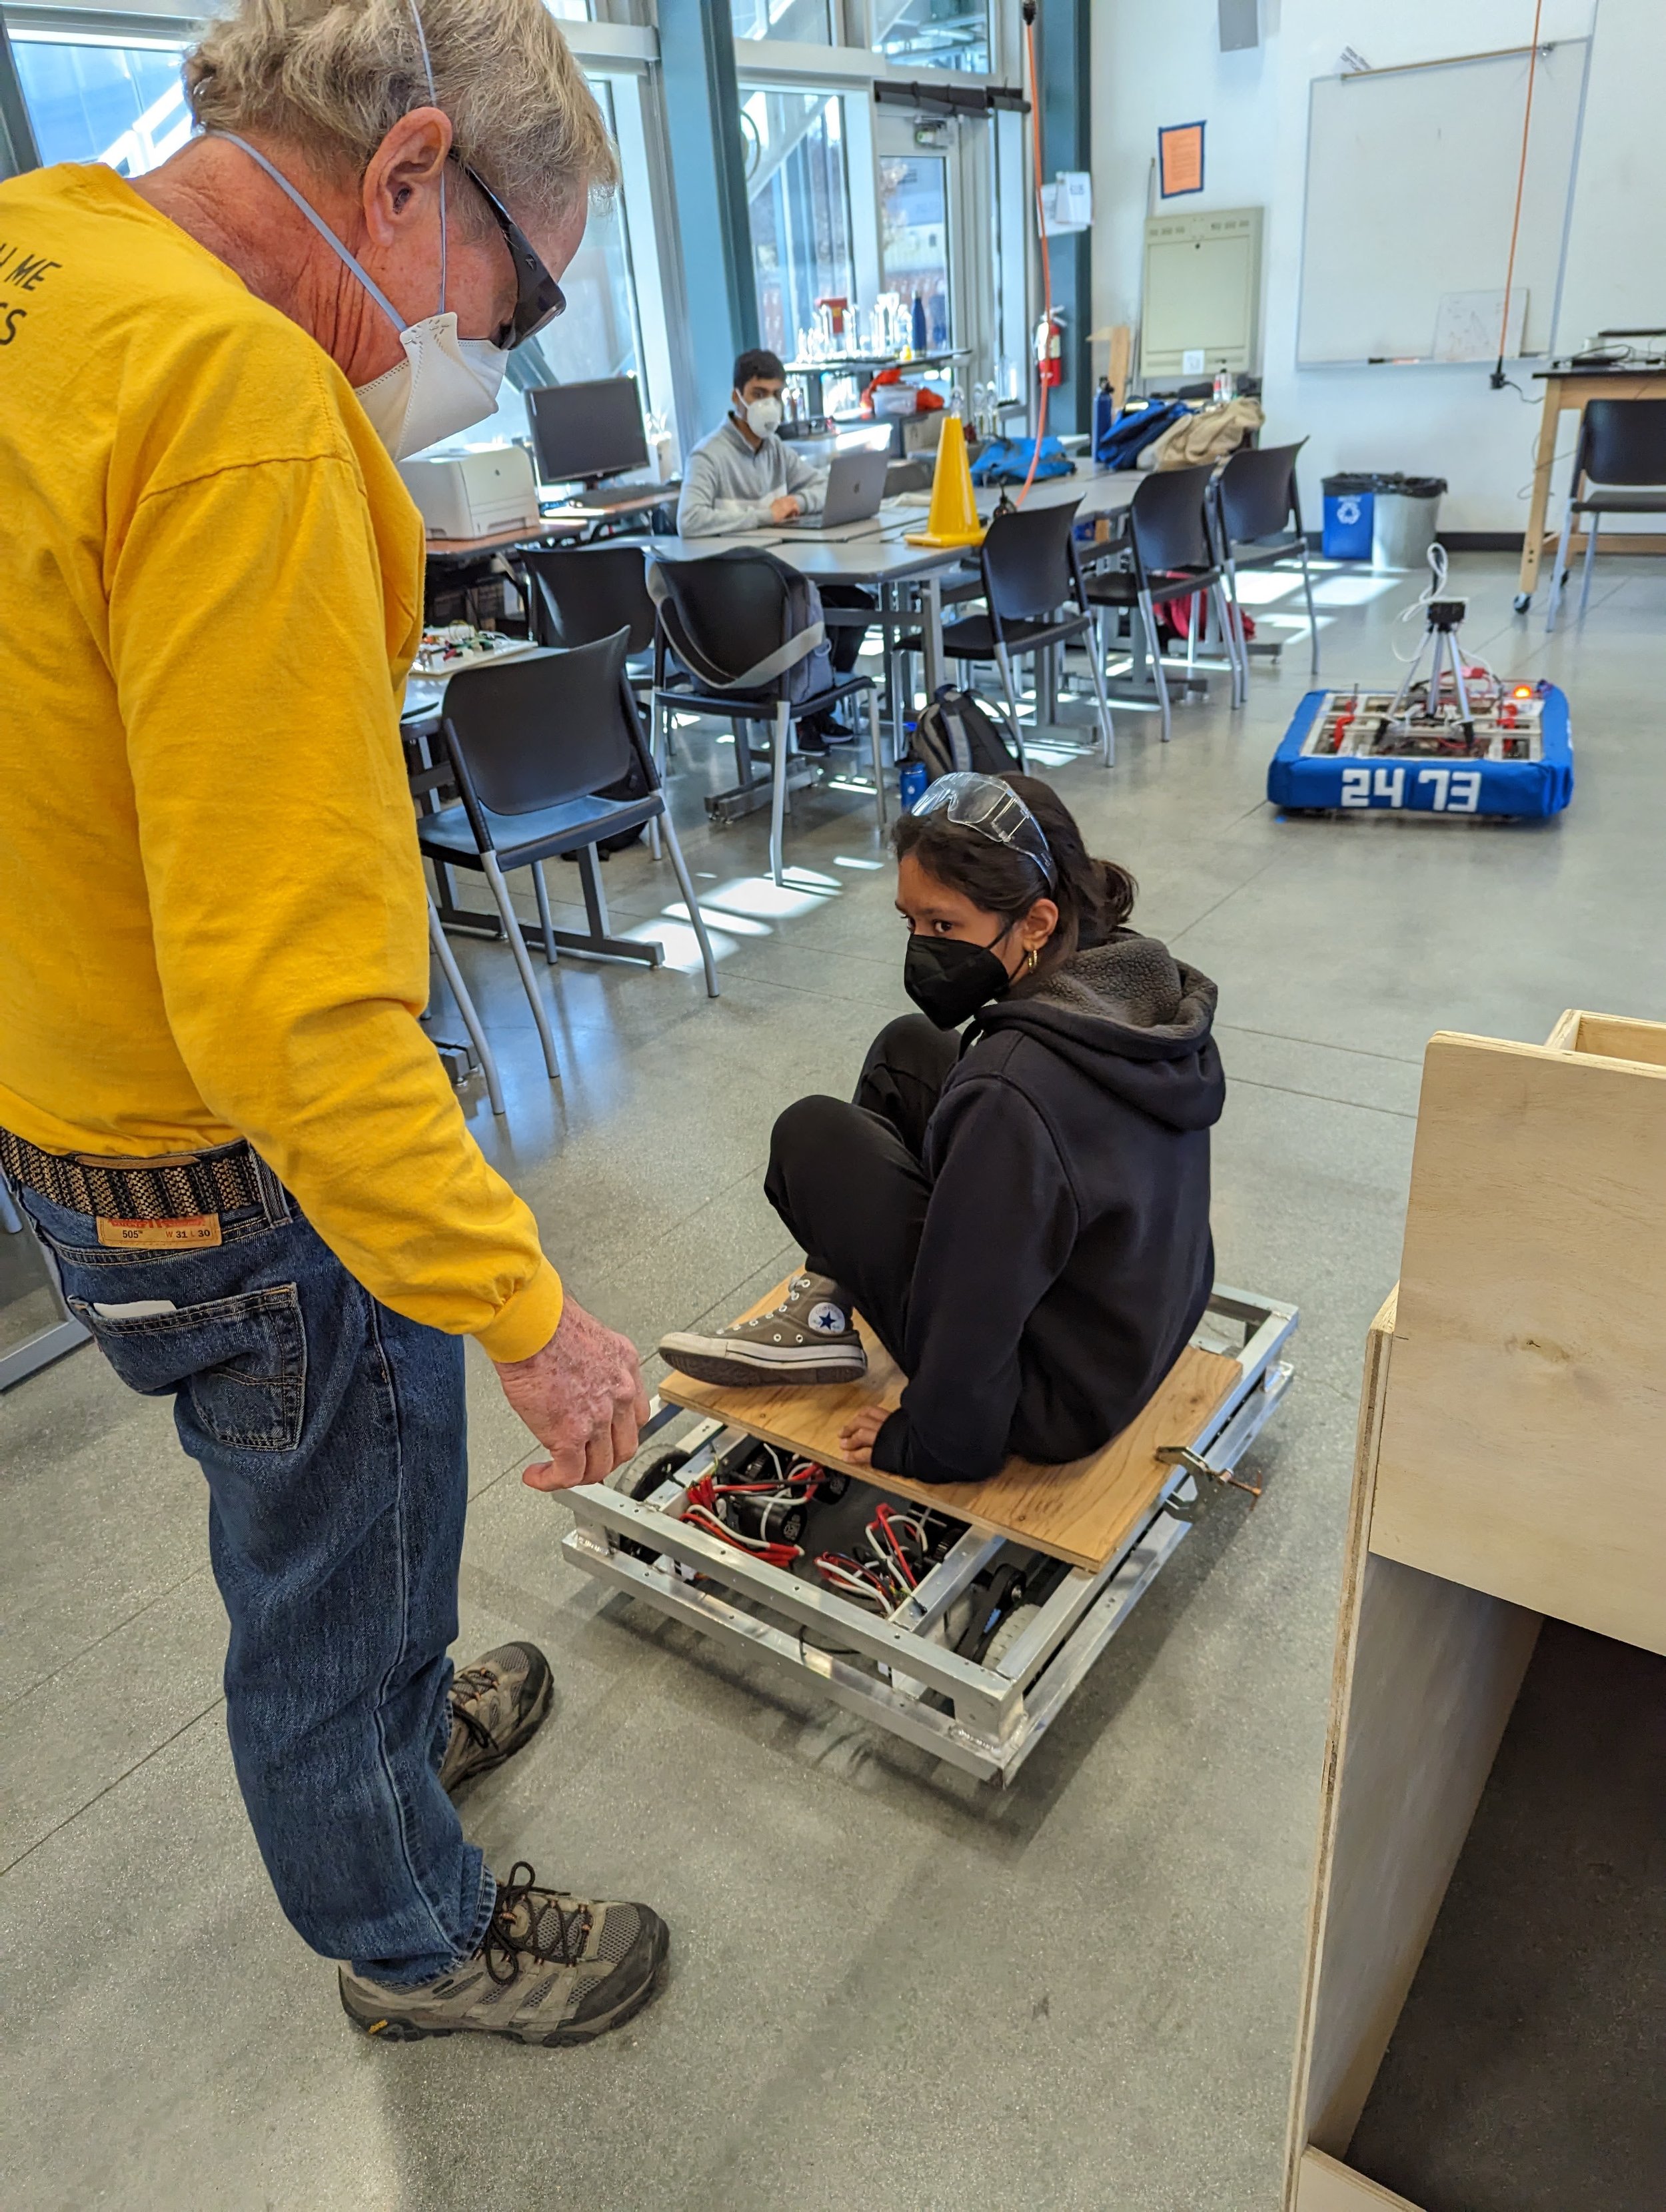
Meet Dusty XVI
Charged Up
In the challenge Charged Up, robots work together in attempts to energize their alliance. Robots have the choice of scoring elements, cones or cubes, into different levels of nodes. During the autonomous period, elements scored in the lower nodes earn their alliance 3 points, elements scored in the middle nodes score 4 points, and elements scored in the upper nodes are 6 points. Robots can also earn 3 points through mobility by leaving the community area and 8 or 12 points by docking or engaging (balancing) on the charging station. During the tele-op period, elements scored in the lower nodes are 2 points, elements scored in the middle node are 3 points, and elements in the high node are 5 points. An extra 5 points are rewarded for any links of three elements scored in adjacent nodes. Once it's endgame, the last 30 seconds of the match, robots can choose to keep scoring elements or try to dock and engage on the charging station. At the end of the match each robot docked on the charging station is 6 points and each robot docked and engaged is 10 points. 3 points are awarded to any robot parked in the community.
Our Strategy:
Autonomous: four different paths with one being one element on the high node, mobility, and engaging on the charging station, earning us 21 points
Tele-op: score elements into the lower, middle, or high nodes after picking them up from the ground or single substation. Usually, we score around 3-5 times during this period.
Endgame: mainly dependent on alliance partners but generally if we have any elements still on the robot, score them and engage on the charging station or park.
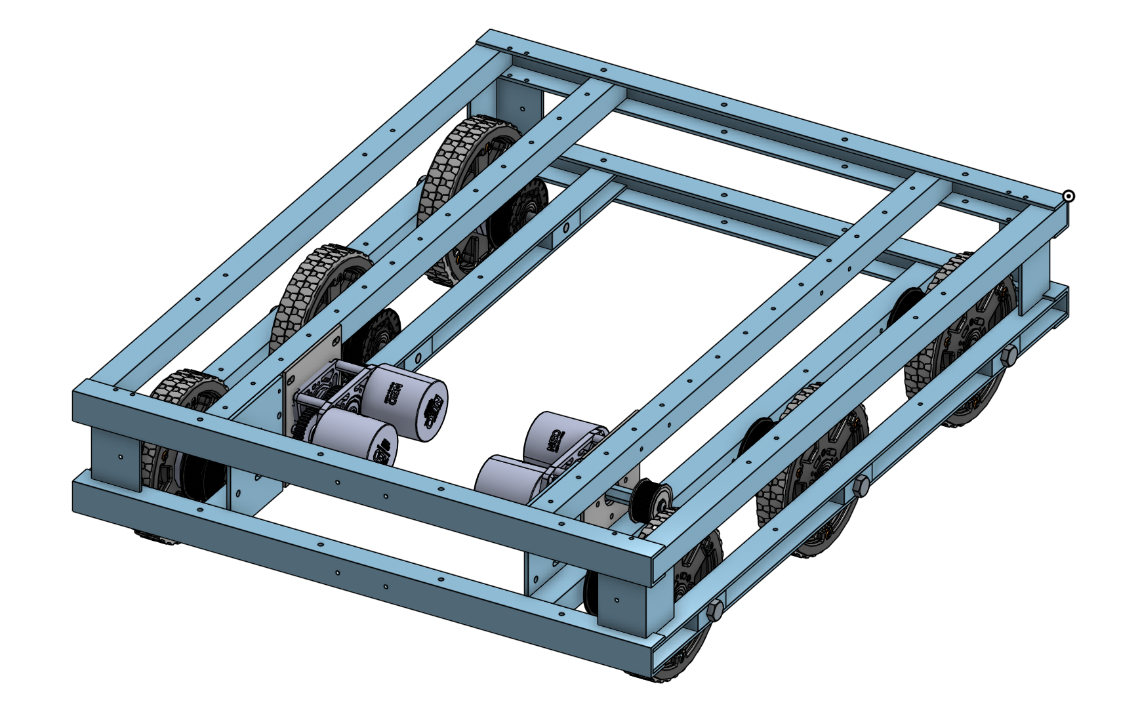
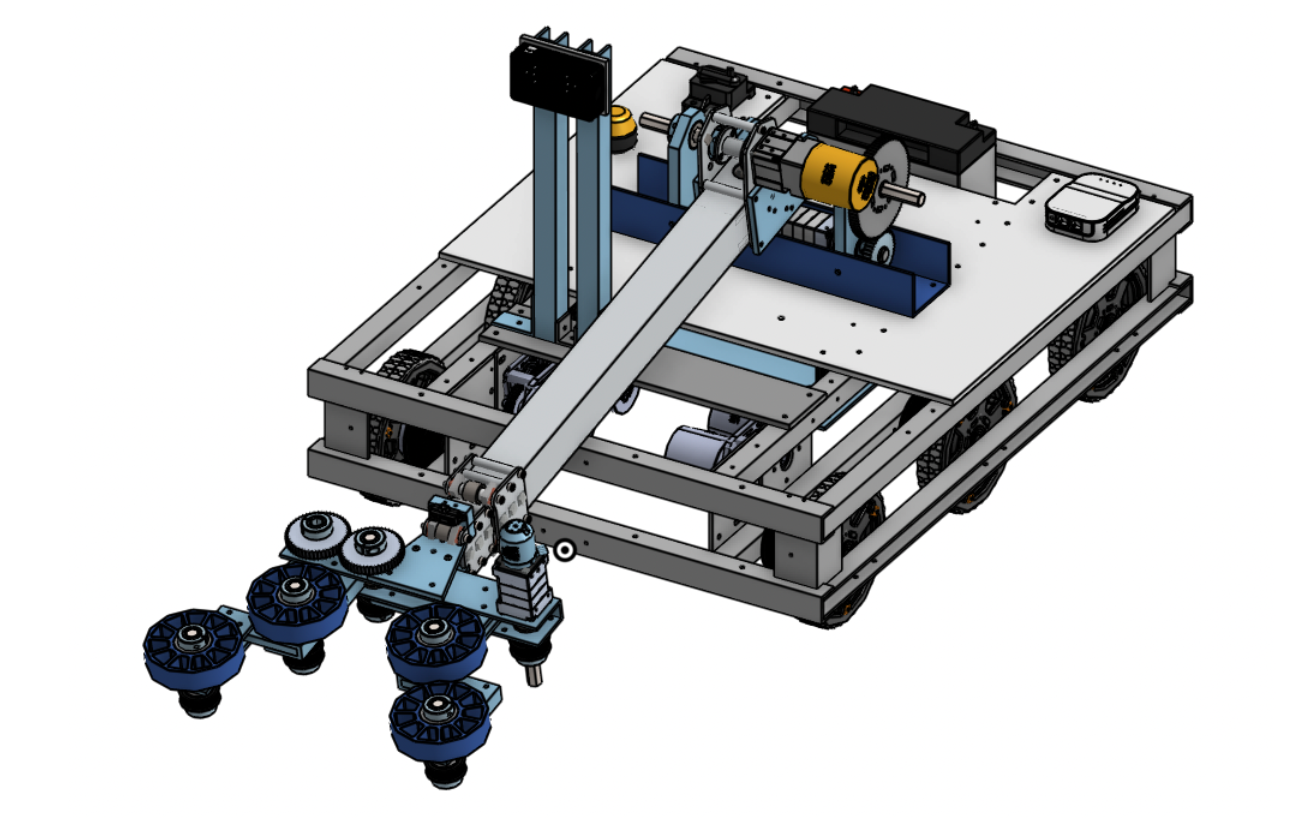
CHassis
2473 worked with a 6 Wheel Western Drive and a 30x24in Chassis. We selected a Western Drive because we decided that we wanted to prioritize speed in the challenge. Additionally, we wanted a smaller size chassis, especially in width, with consideration cooperation with other teams for the charging station.
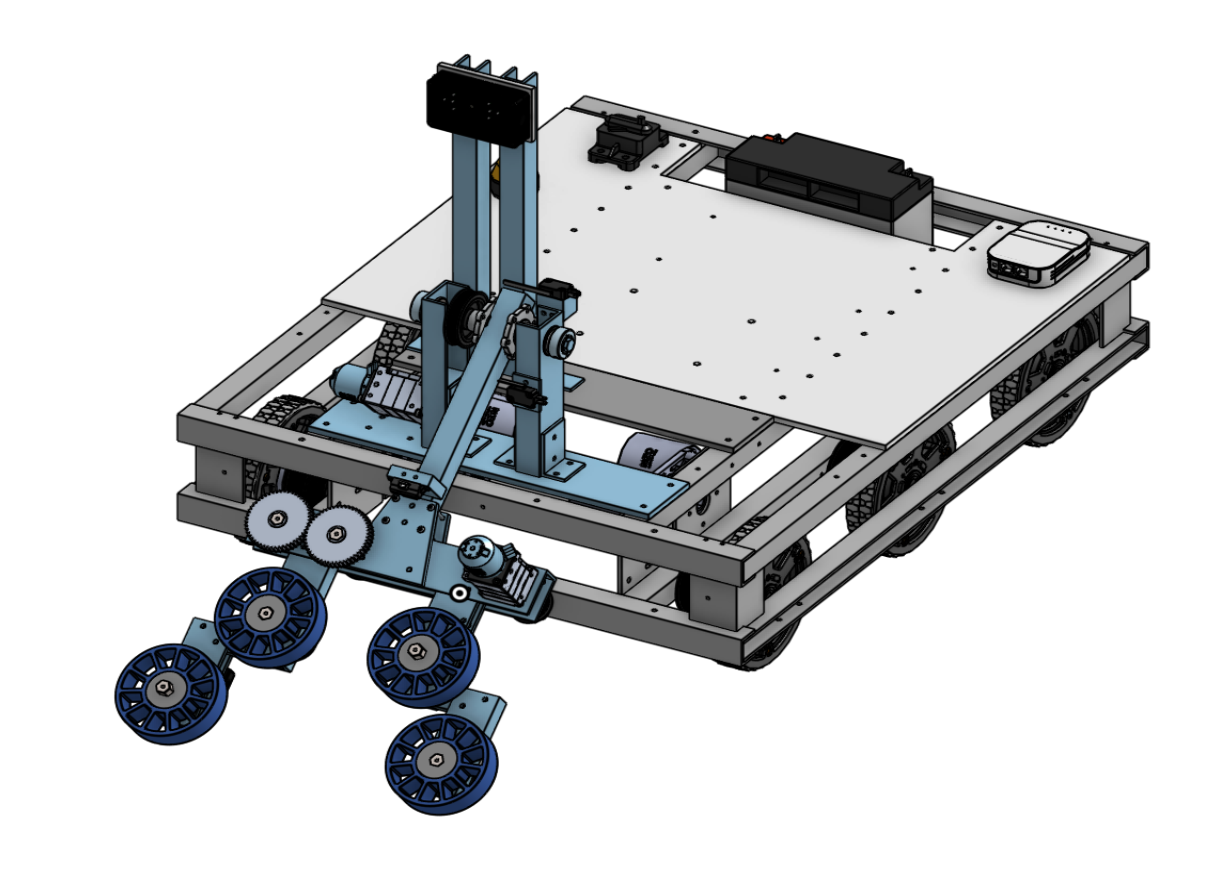
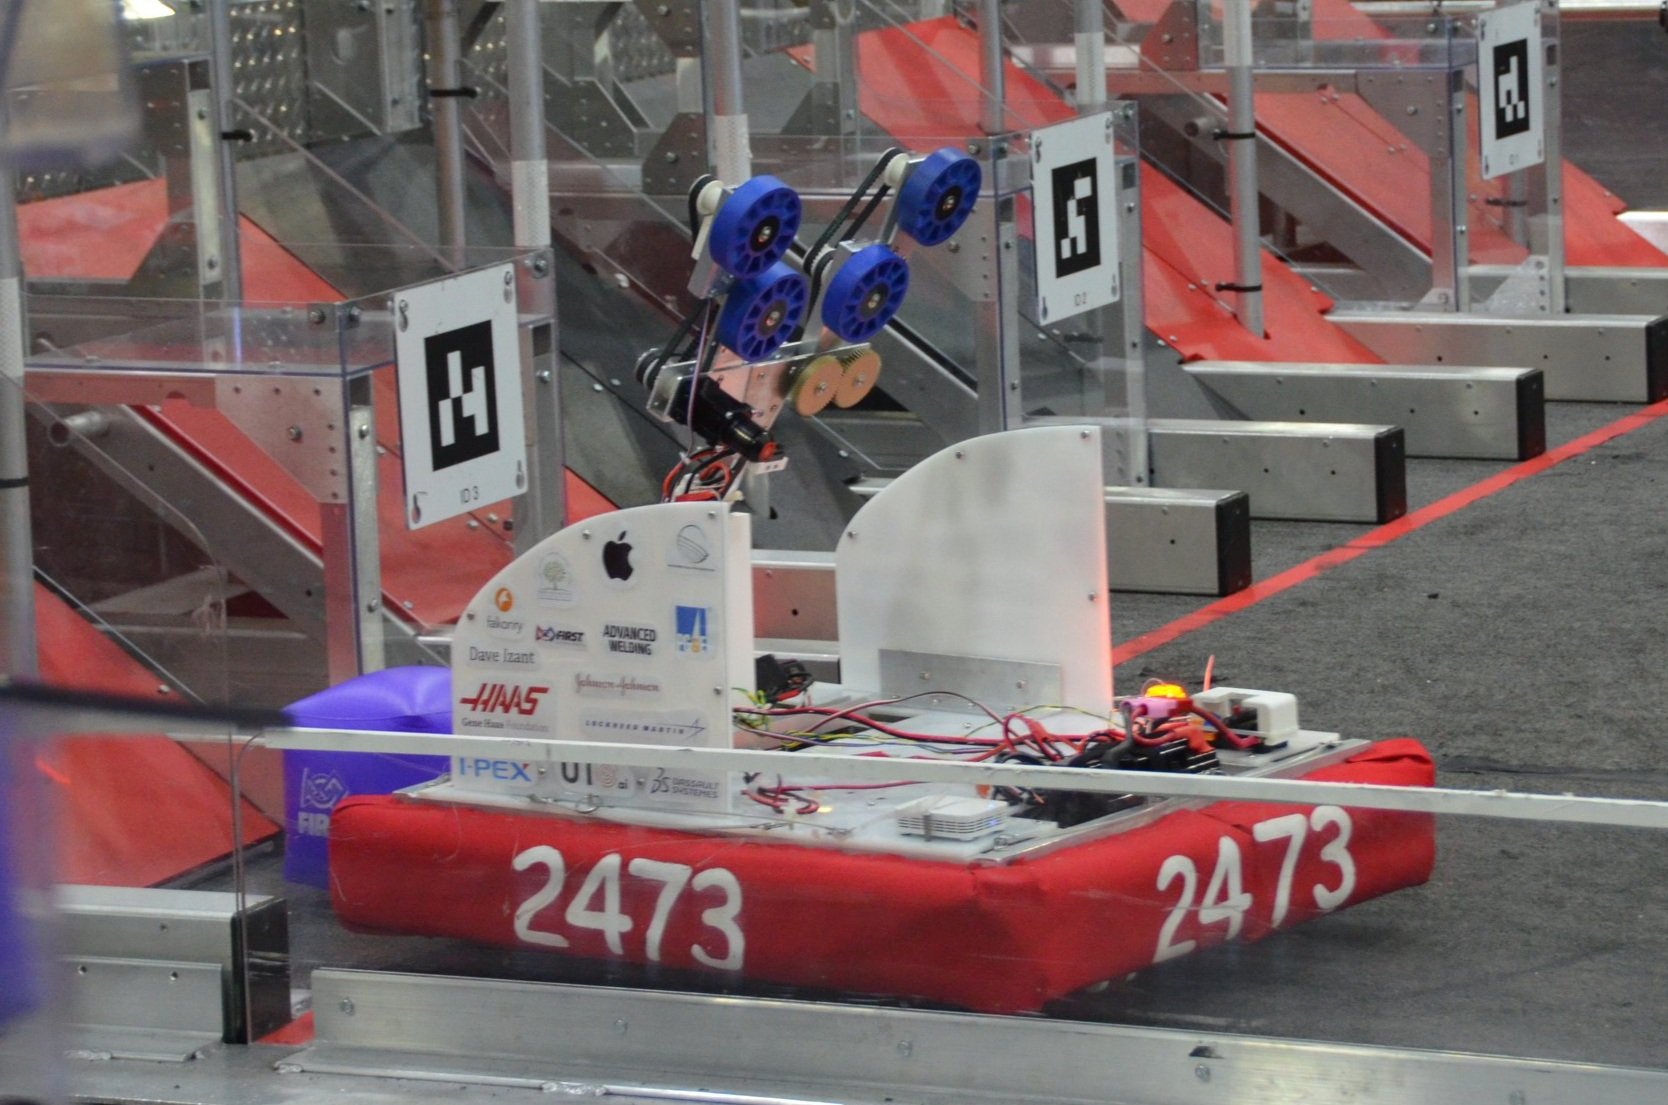
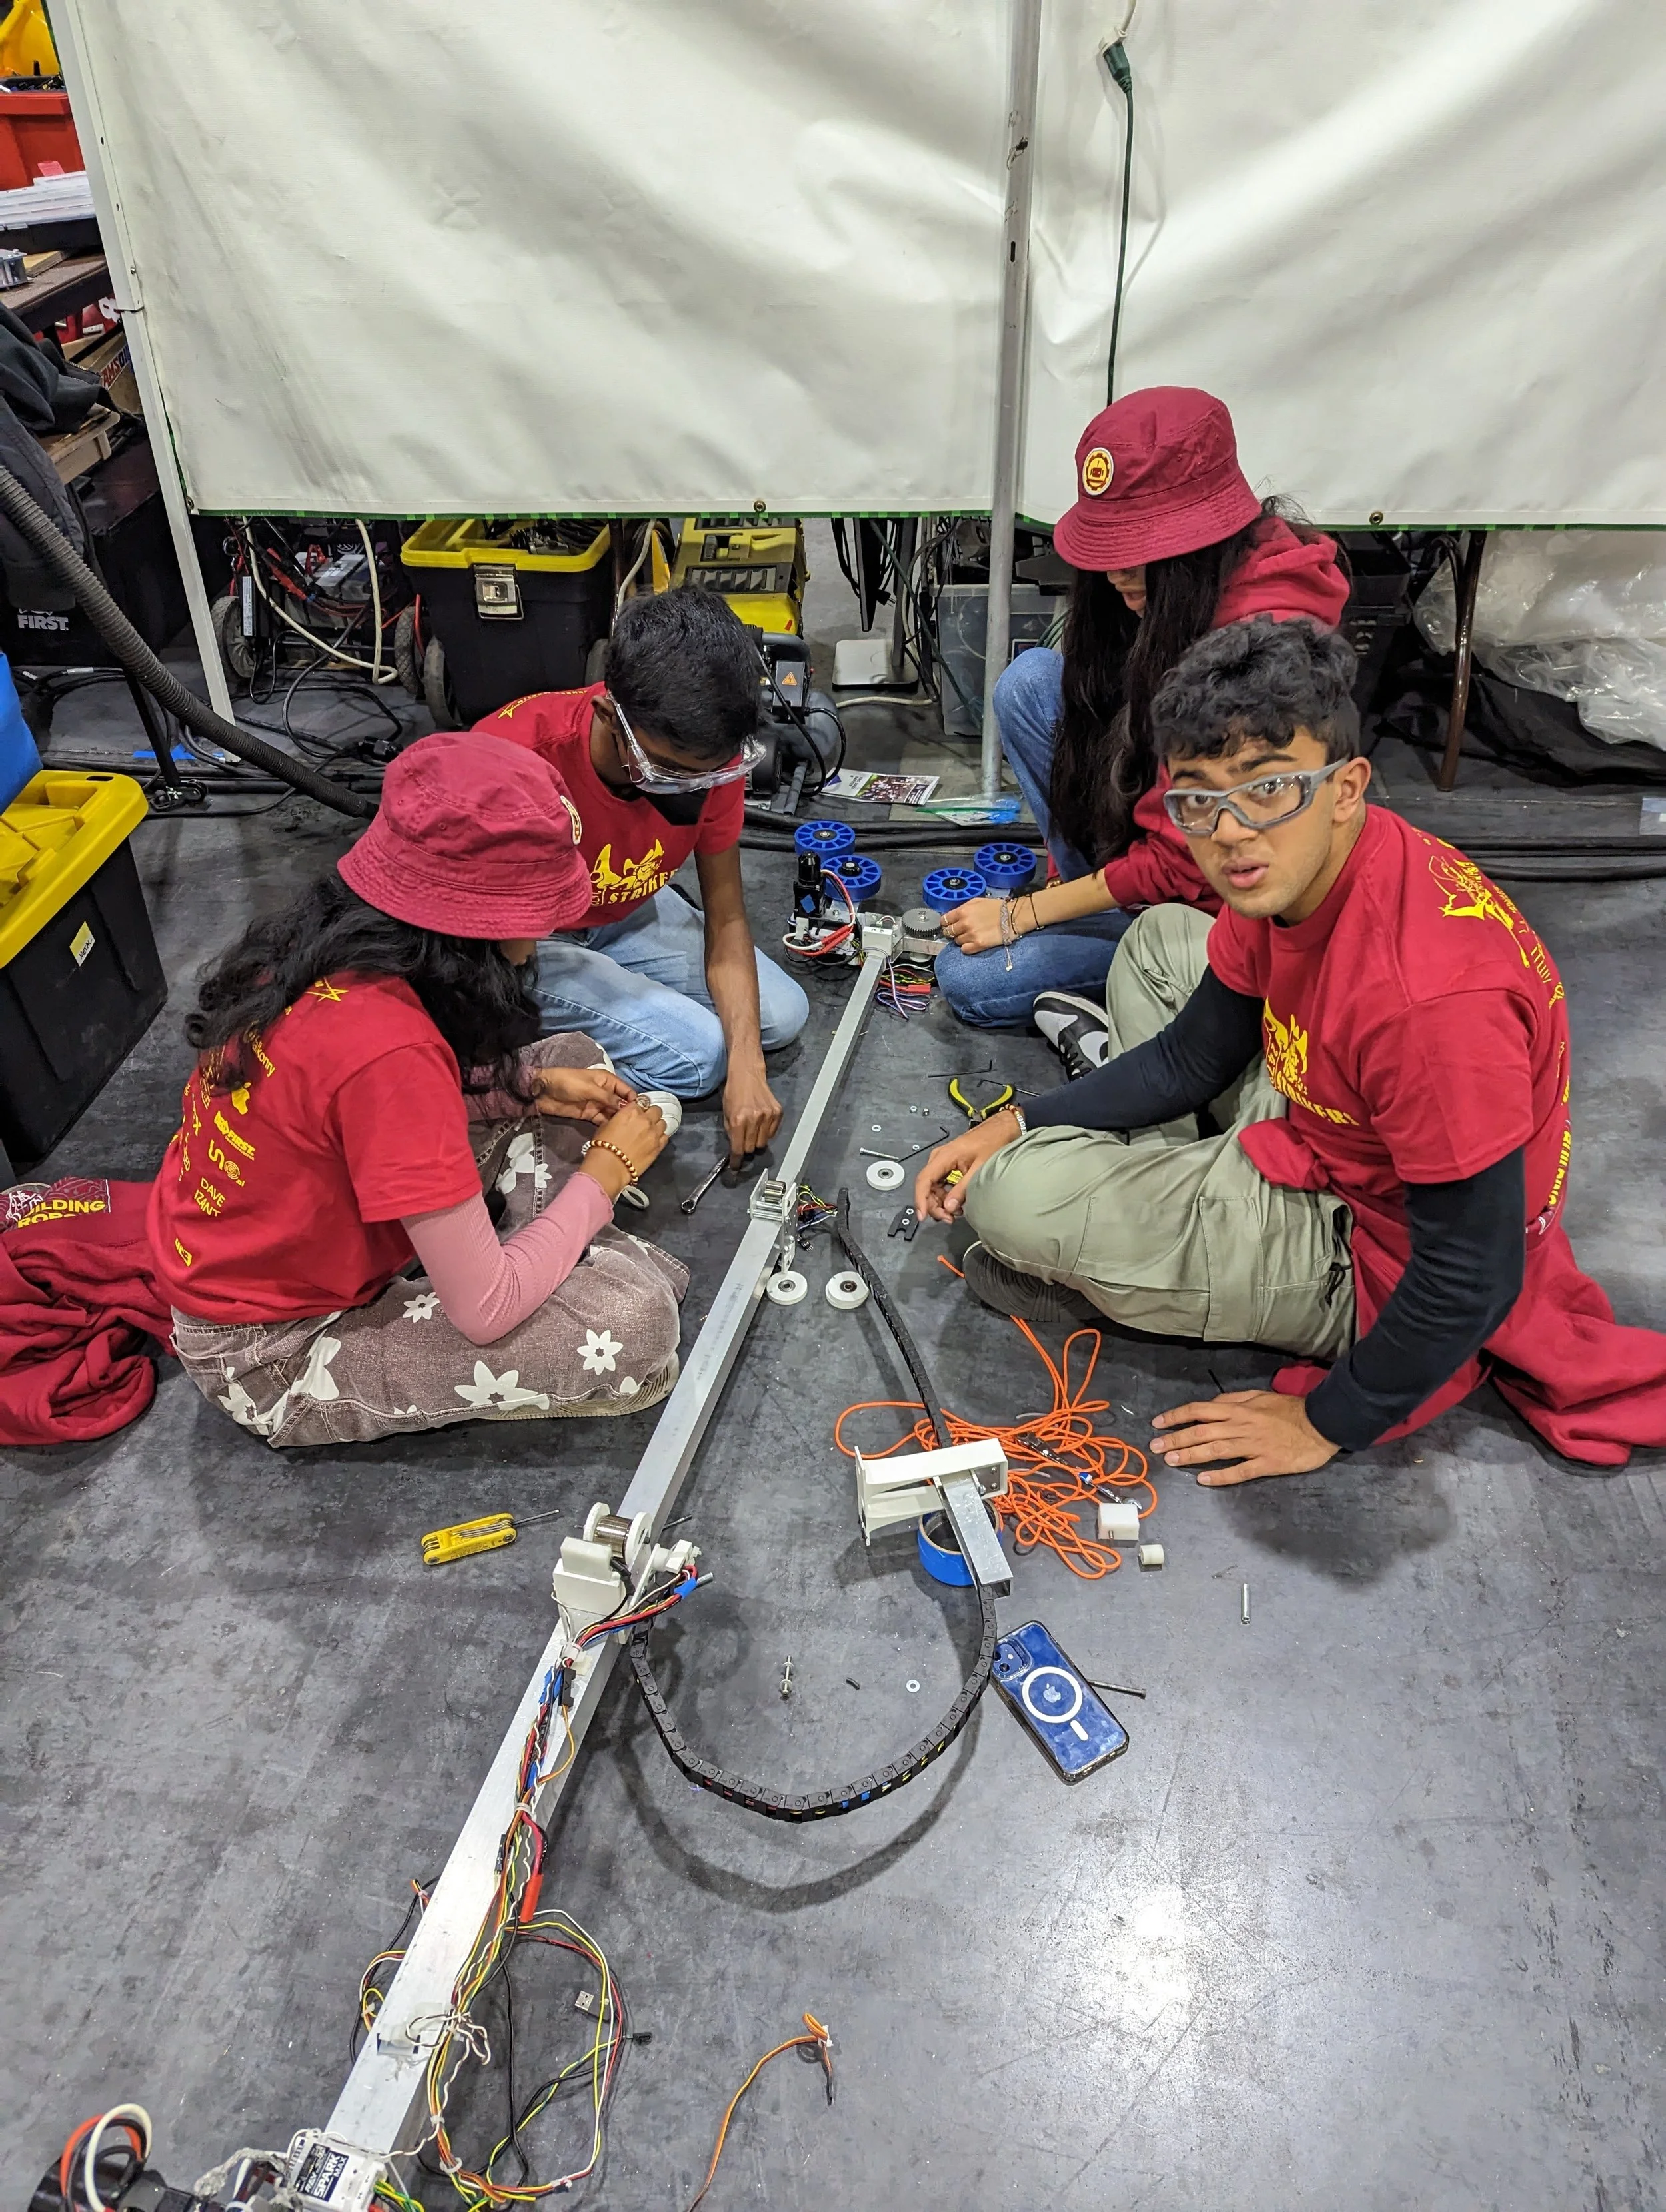
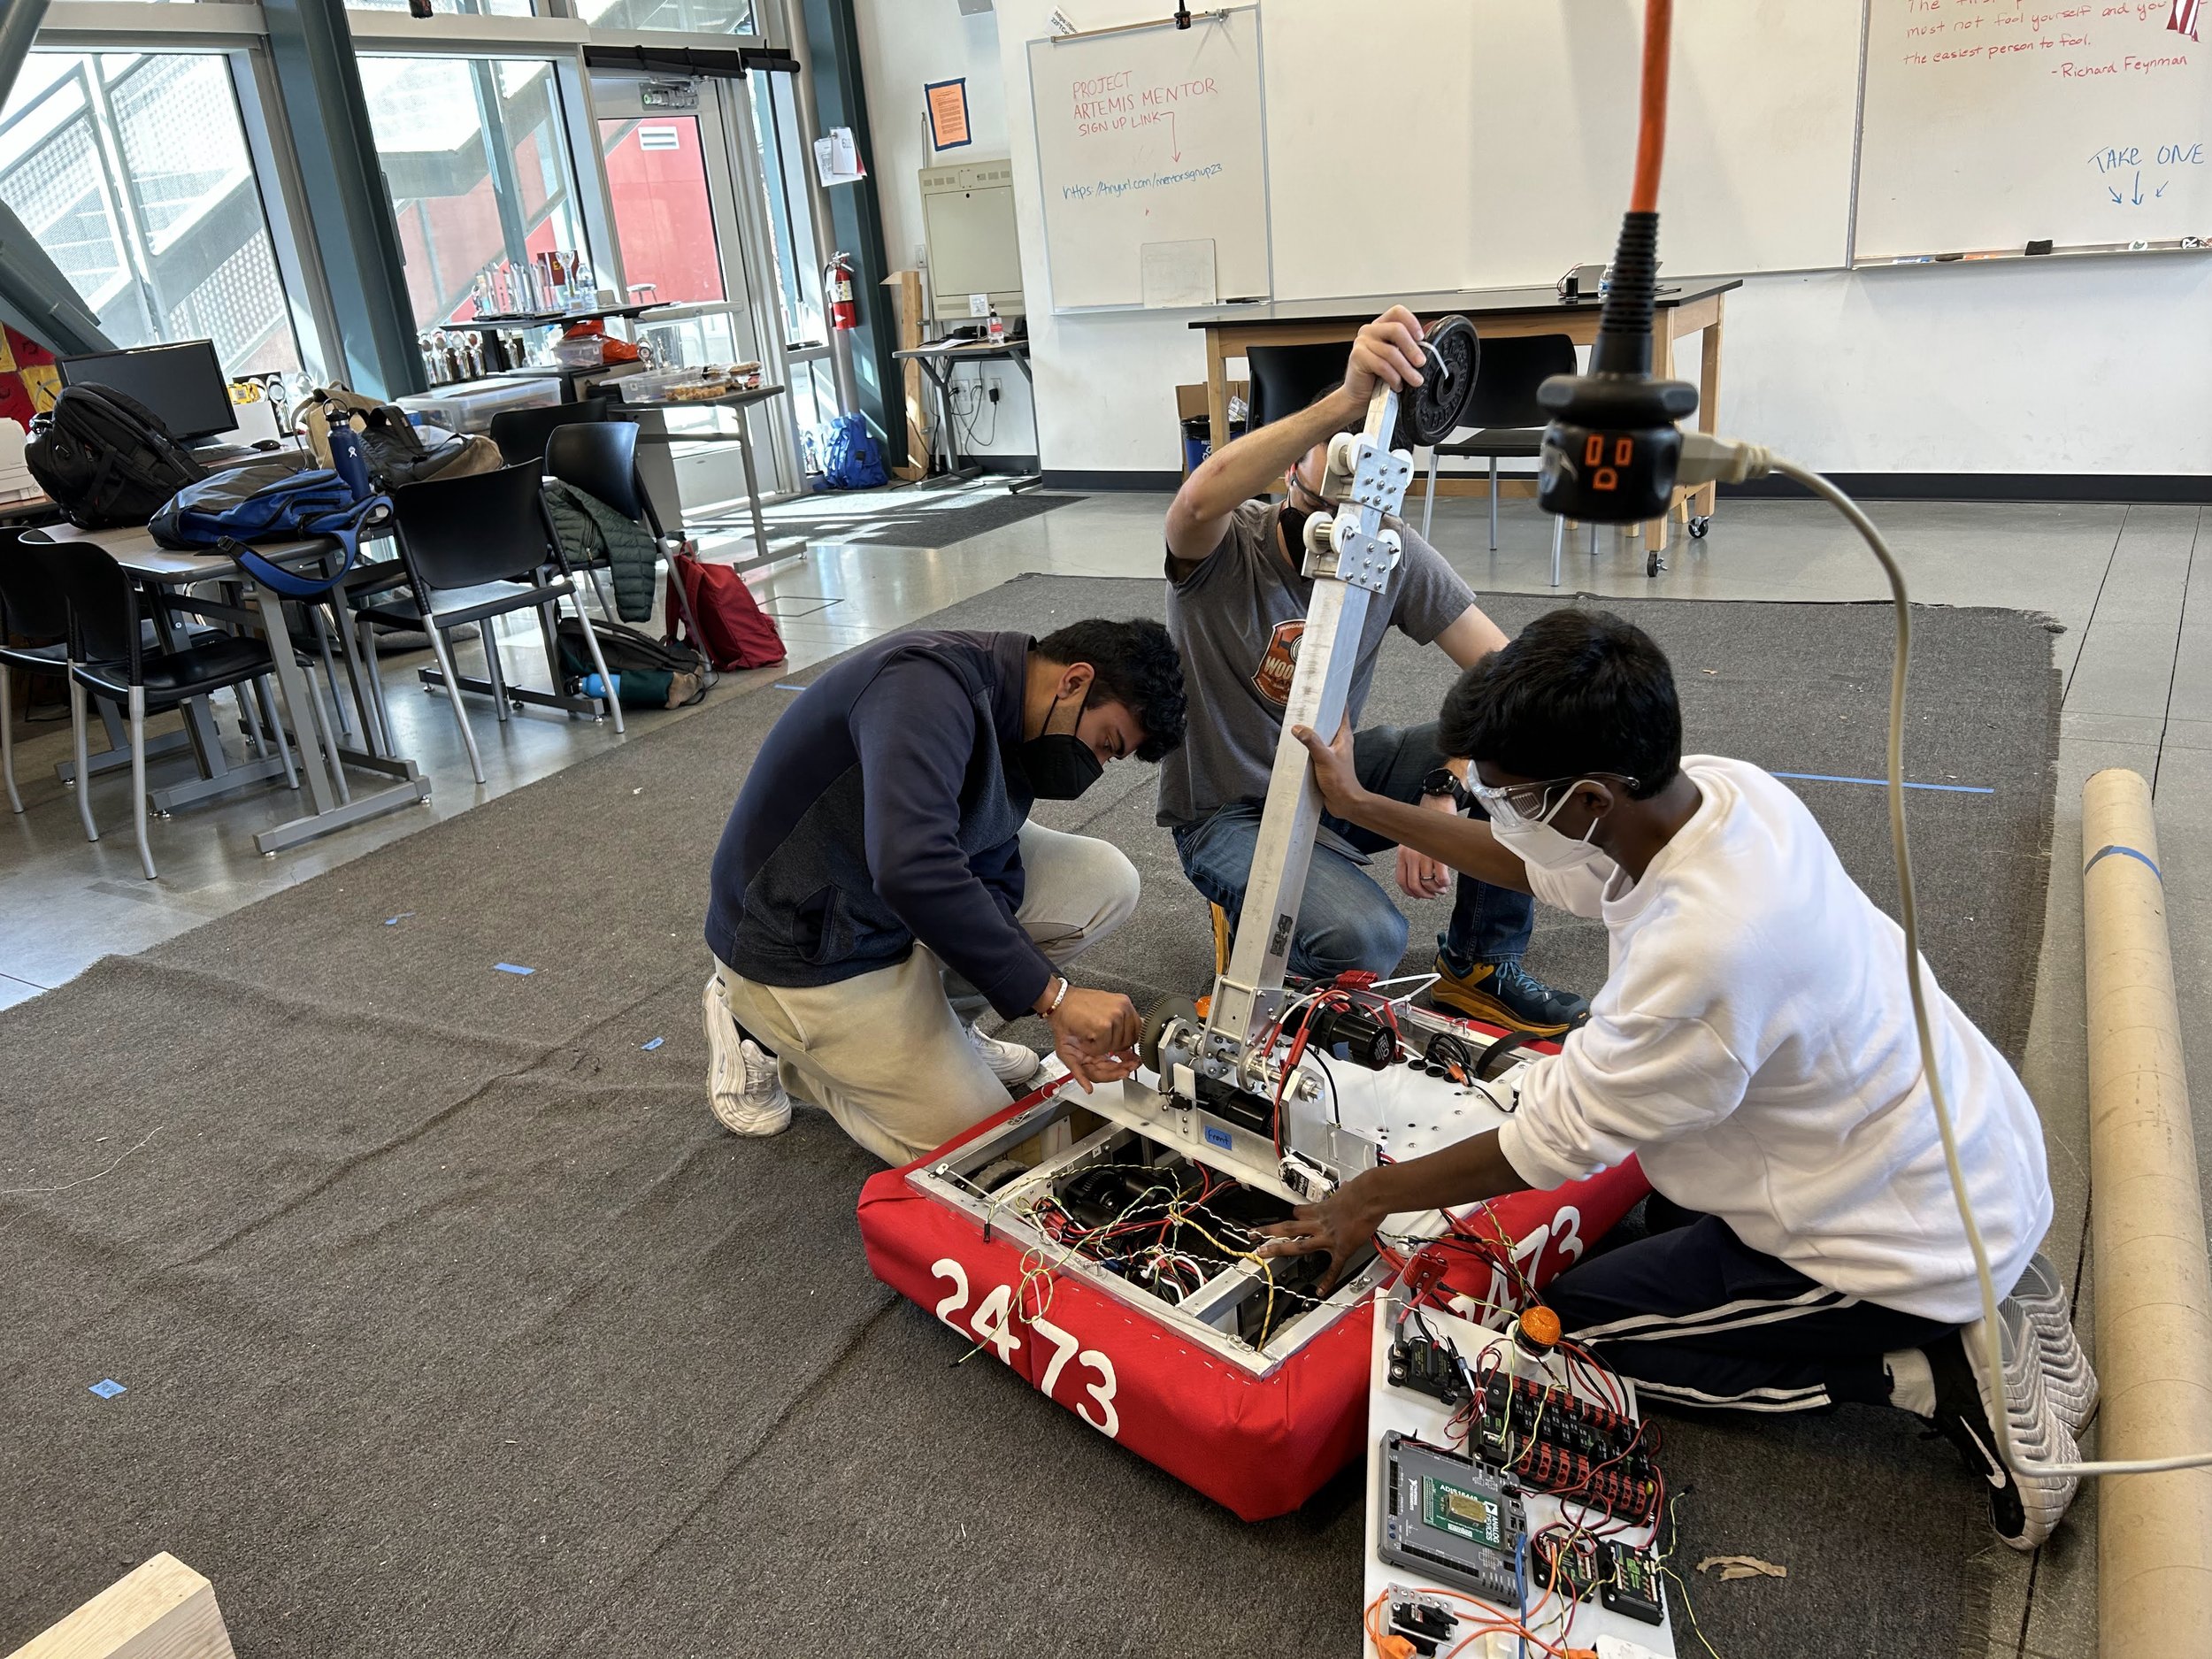
Element Manipulation
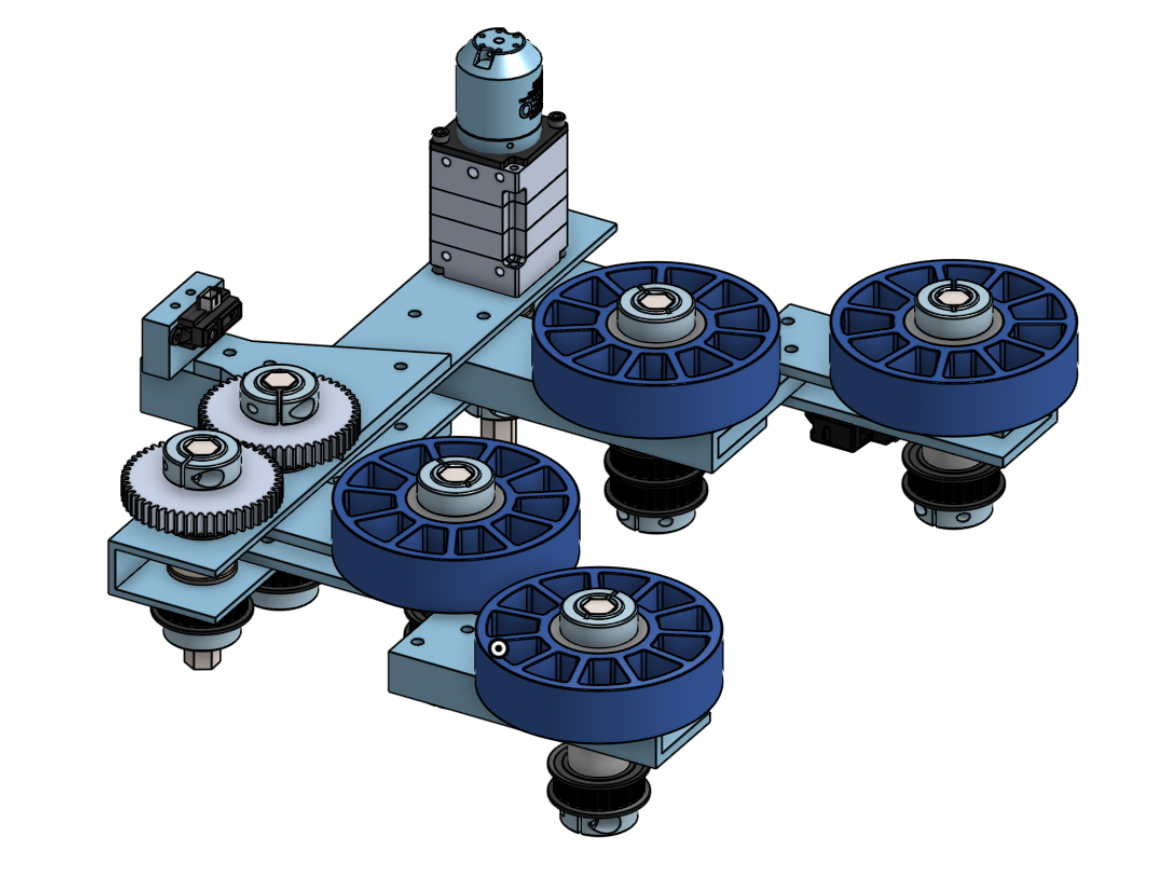
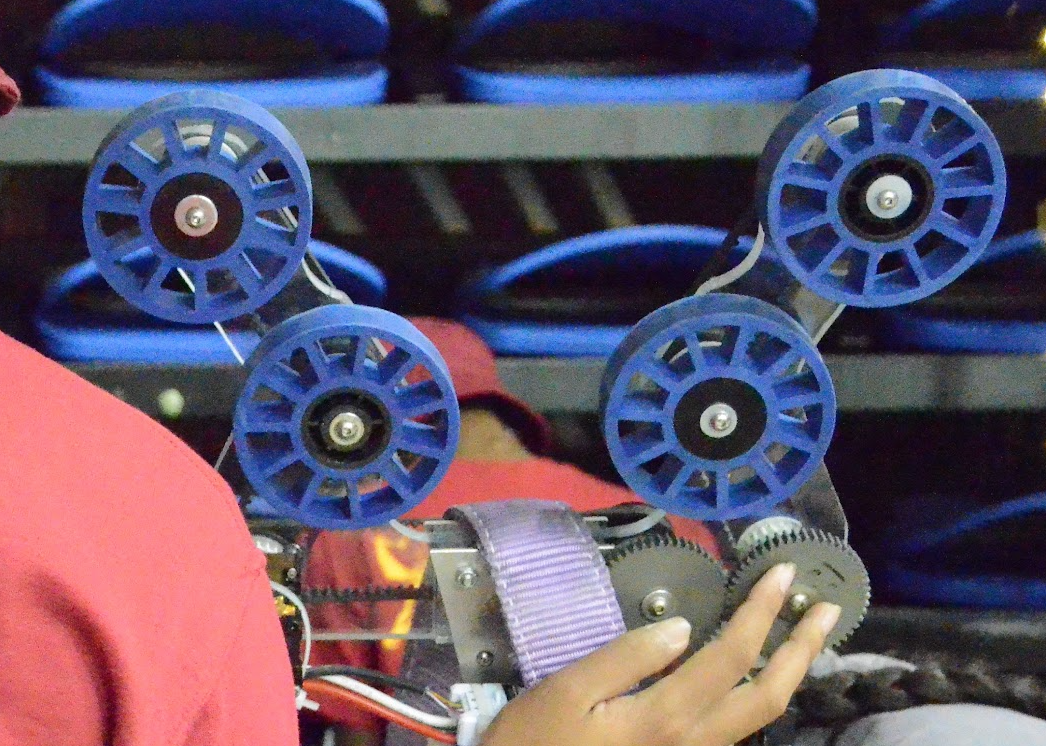
One of our Hardware Mechanism Subteams focused on finding a way to grab and hold onto the cones and cubes. Our grabber mechanism initially consisted of an aluminum frame and four wheels in an angled formation. The outer wheels intake the cubes and the inner wheels intake the cones. A later version of the grabber was made with the same wheel layout but instead of aluminum a polycarbonate frame to reduce the weight of the mechanism. The grabber is attached to the end of the arm which the other Hardware Mechanism Subteam worked on.
This subteam also worked on the ground mount which is a smaller version of the arm and is capable of scoring cubes in the low and mid nodes and the cones in the low nodes. The goal of the ground mount was to ensure a quick pick-up and scoring in the lower nodes.
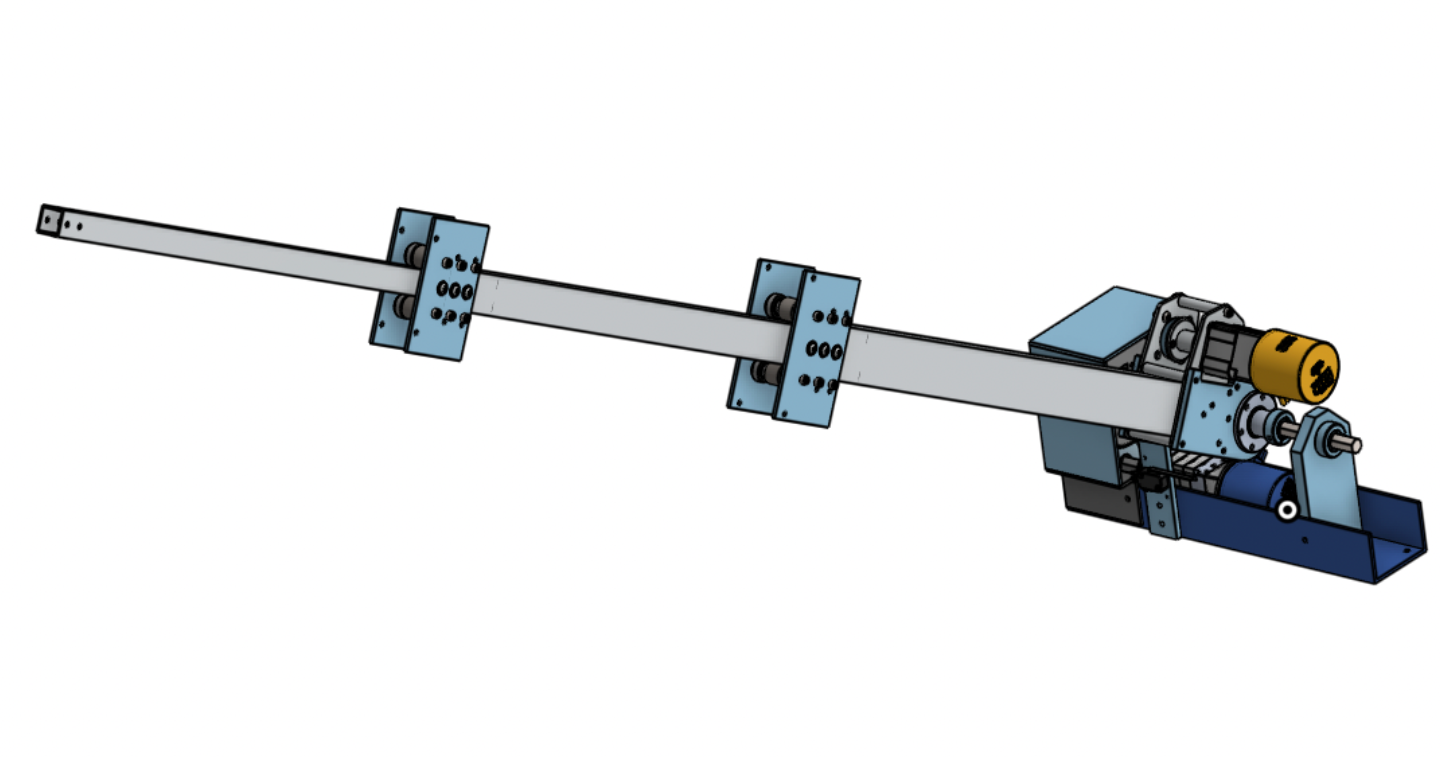
Extension and Scoring
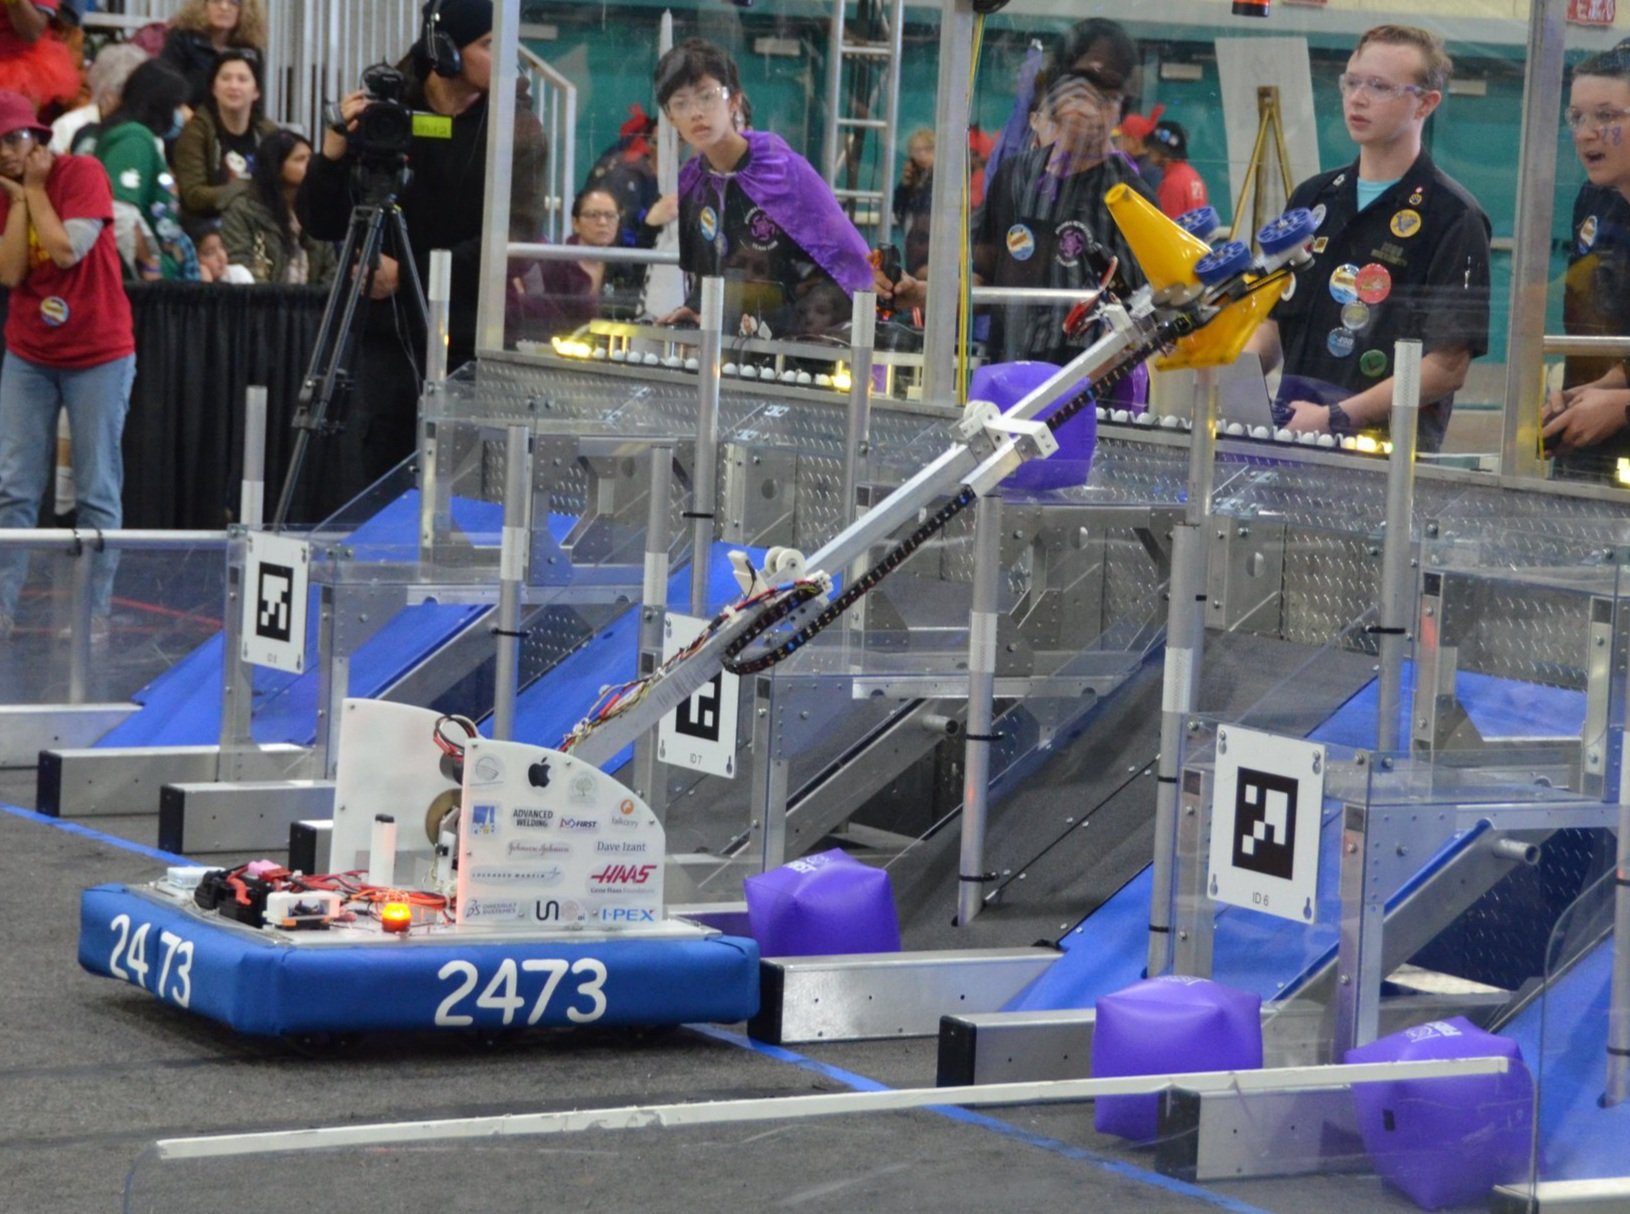
For this season, the Hardware Arm subteam focused on creating a mech that would allow the intake to pick up something from the ground and then transport it all the way to the high goal, 4 feet away from the robot. The arm mech consists of a telescoping arm and pivoting system. This setup allows us to position the arm to pick up something from the floor and then pivot it to an angle where can extend and score in any one of the 3 goals. Overall, the arm system consisted of 2 motors, the winch system used to extend and retract the arm, and 2 gearboxes that produced the necessary torque required for the pivoting and extension/retraction systems.


Drive Code
This year, we are using a tank drivetrain with 6 wheels and 4 motors which allow for a powerful chassis as well as rollers to help it ascend onto the charge station. Steering is divided between a joystick for linear motion and a wheel for turning to make it easier for drivers to control the robot. Beyond basic movement, we have implemented multiple autonomous functions such as using the robot's pitch to balance it onto the charge station. Additionally, the robot quickly aligns to cones and cubes with CV. For the autonomous period, drivers can choose among 4 different paths where the robot will deposit a cone, exit the community zone, and balance on the charging station. Through odometry, the robot relies on a gyro and encoder counts to determine its position on the field which is further used to accurately navigate it to a specific location during the autonomous interval.
The mechanism code for our robot utilizes Finite State Machines (FSMs) in order to give the driver optimal and easy-to-drive robots with clear inputs. For example, for our arm mechanism, we use the joystick in order to control the extension and retraction of the arm, as well as the speed at which this occurs, and we use buttons for the pivoting. This ensures that our drivers have full control of the arm at any point in the game. In addition to giving our drivers free control, we added buttons in order to autonomously move to starting, scoring, and pickup angles to minimize the work the driver has to do in a real game. Our arm mechanism also utilizes sensors in order to make sure that the arm does pivot or extend too far to keep the mechanism from breaking. Our grabber mechanism continuously intakes by default and will stop on its own when an object is detected. This means that it only requires one button to release the game element, allowing the mechanism driver to focus on moving the arm or ground mount. Similarly, we opted to use the simplest design possible for the ground mount, setting buttons to move the ground mount to the high, score, and pickup angles.
Essentially, our robot is able to precisely complete tasks through the successful integration between the drive, mech, and computer vision software teams. Through various other systems, safety checks, and automated functions implemented in software, our team produced a robot that is both very driver friendly, and performatively consistent.
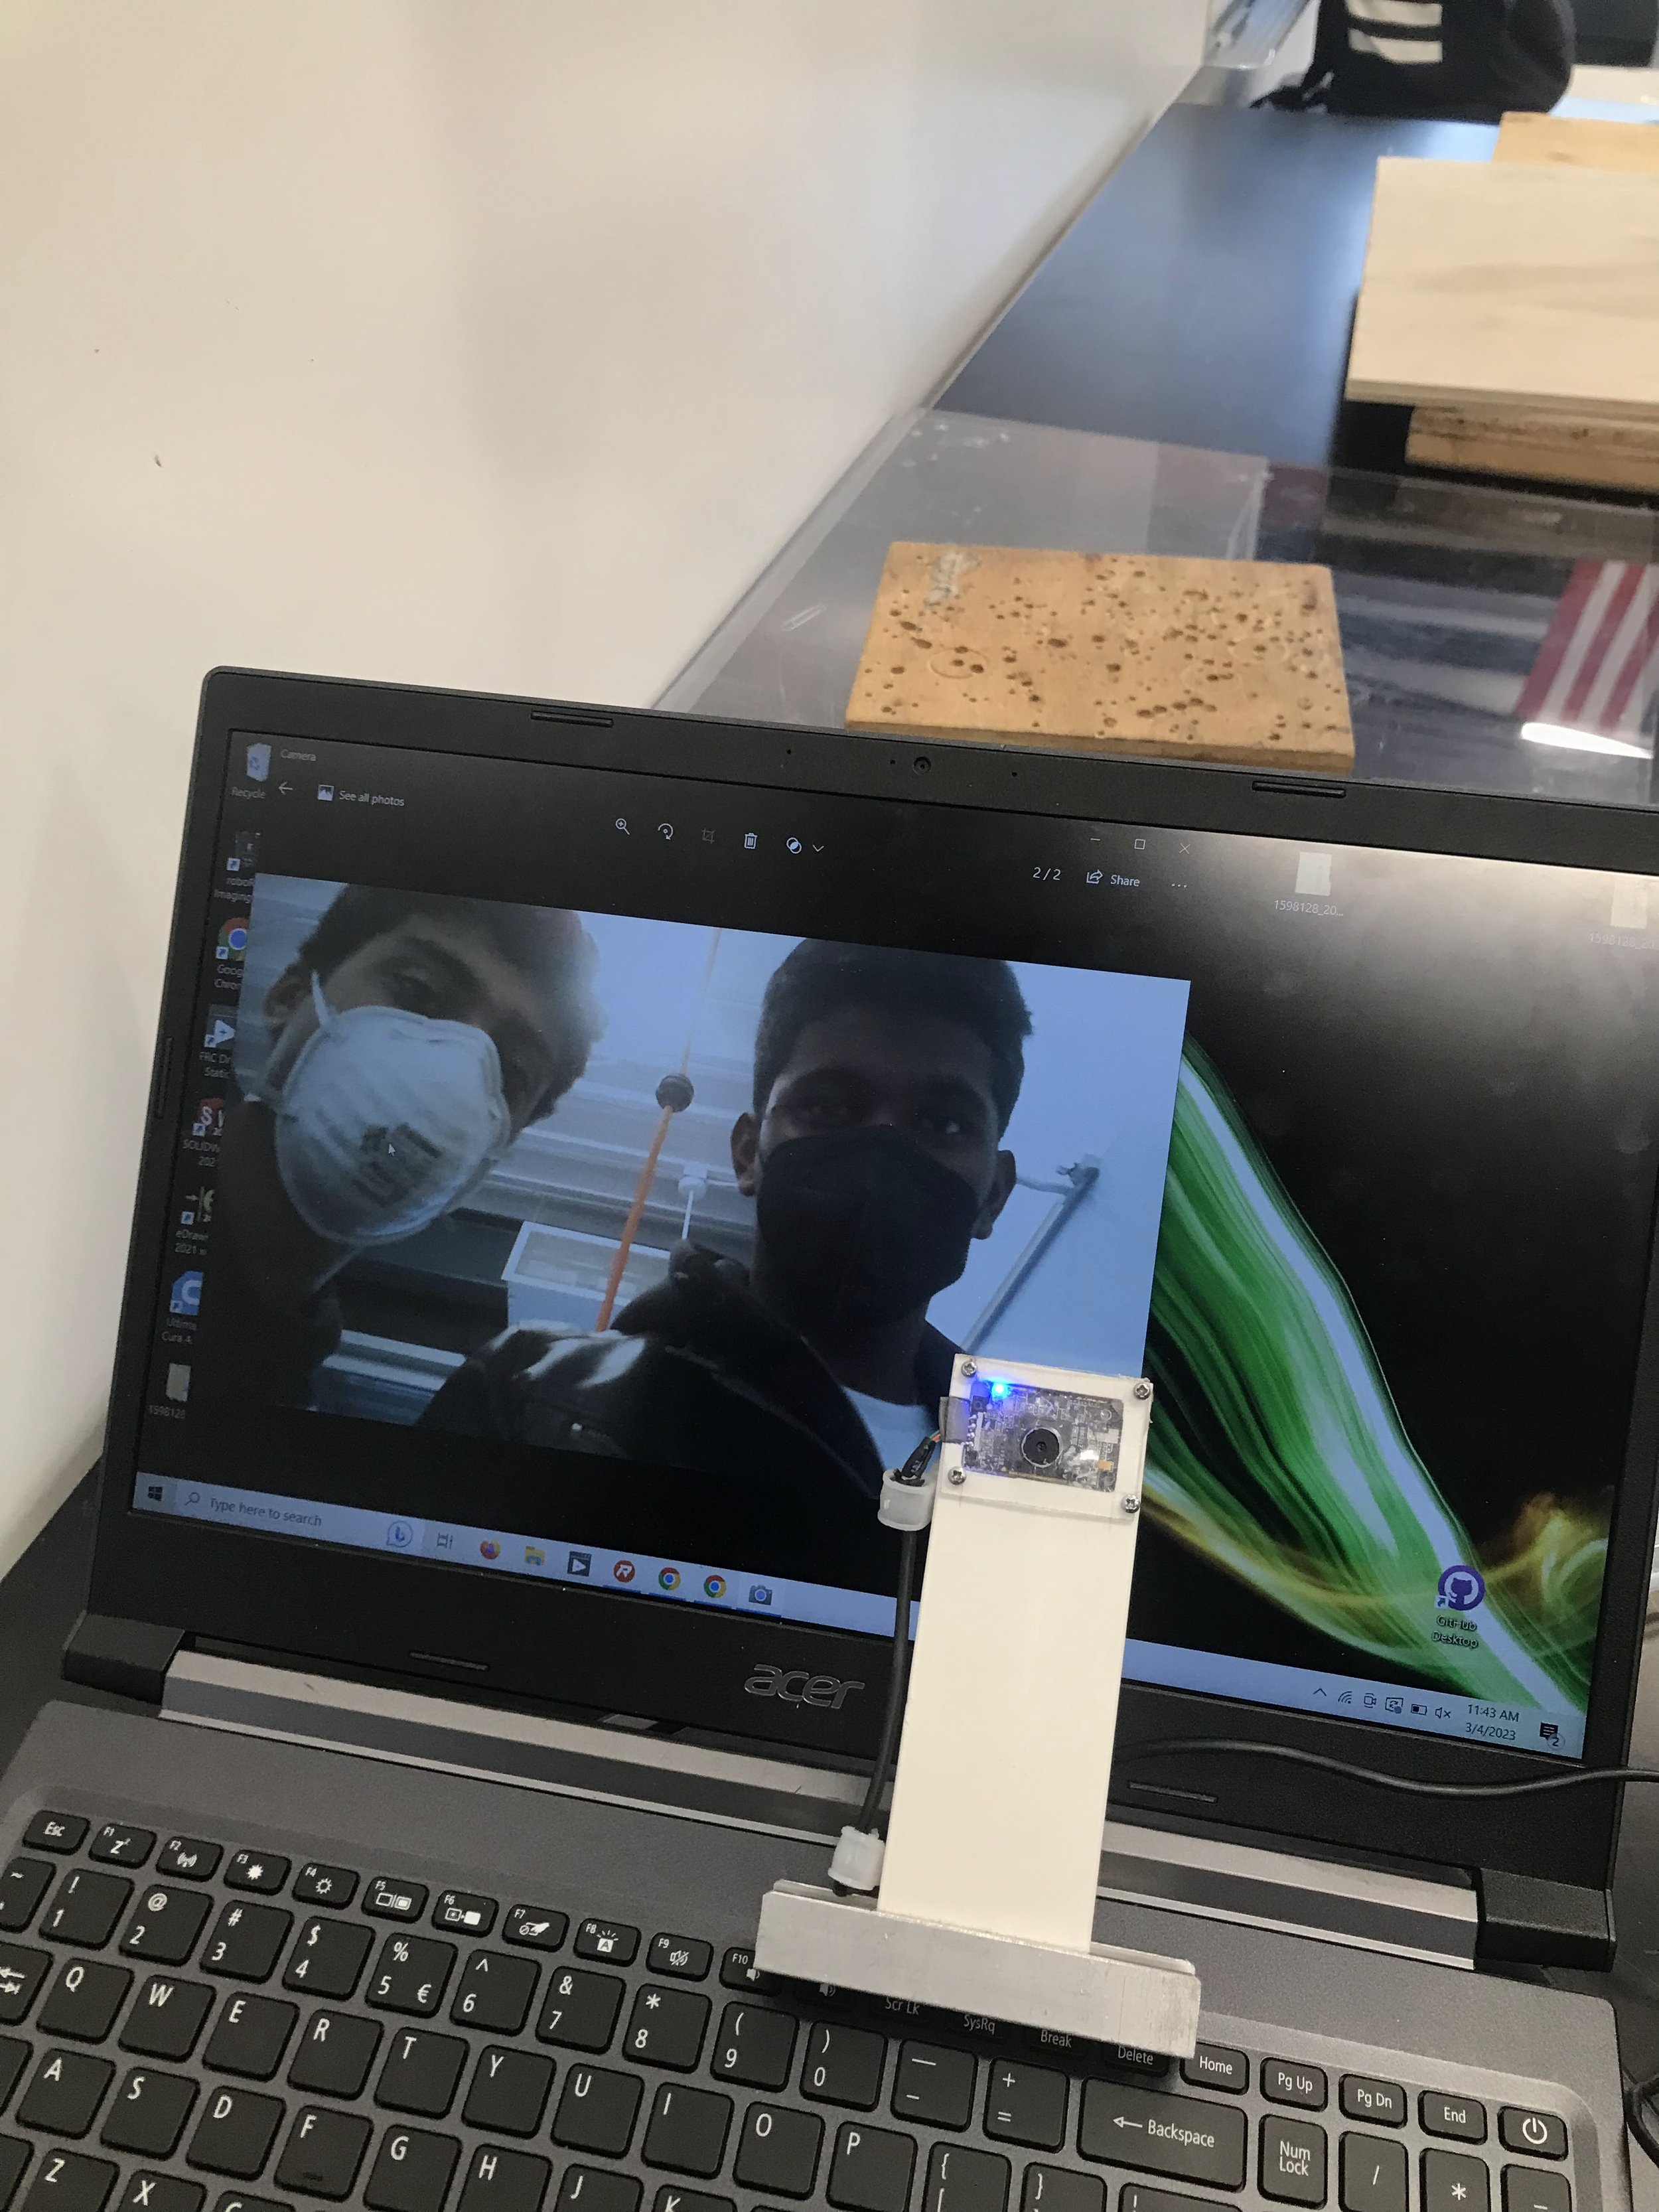

Computer Vision
This year, the CV team used our limelight camera and the photonvision library to recognize both AprilTags and reflective tape. Our main goals were: 1) calculate the distance from the robot to the scoring grid and game elements, 2) align the robot arm with the scoring grid, and 3) detect and align the robot to the game elements for easier pickup. We used the photonvision dashboard to determine a color range for detection of game elements, reflective tape, and AprilTags, taking lighting conditions into account. We then created a PhotonWrapper class which processed the data from photonvision. This allowed us to see the angle between the robot and the object we were aligning to. Finally, we added CV states to the drive FSM which allowed drivers to simply click a button during the match and have CV run. By the end of the season, distance code and alignment code for game elements and the scoring grid were both accurate to within 2 cm/2 degrees; during our last competition, however, drivers opted to only use game element alignment.
Our next steps
We are currently working on making the mechanisms on our robot more efficient to reduce the total time it takes to score a point, while still maintaining accuracy. Our mechanism teams are designing different scoring mechanisms to explore the different options. Our team is also working on implementing a swerve chassis into our robot by first experimenting with different modules. Our ultimate goal with swerve is to be able to reduce the amount of time it takes to get across the field and to reduce the time it takes to orient the robot to ensure quicker and more frequent scoring.
