
Meet Dusty DT-24 A & B
Crescendo
In the challenge Crescendo, robots work together to score notes, amplify a speaker, harmonize on stage, and take the spotlight. During the autonomous period, notes scored in the speaker earn their alliance 5 points, and notes scored in the amp score 2 points. Robots can also earn 2 points through mobility by leaving the starting zone. During the tele-op period, notes scored in the amp are 1 point while notes scored in the speaker are 2 points. Each note scored in the speaker when it’s amplified is worth 5 points. To amplify the speaker, alliances must score 2 notes in the amp and the human player must press the amp button. The amplification period lasts 10 seconds or until 4 notes are scored in that alliance’s speaker, whichever occurs first. Once it’s the endgame, the last 30 seconds of the match, robots can choose to keep scoring elements or try to climb onstage and score in the trap for 5 points. During the endgame, human players may also attempt to throw notes on the microphones. If they score, the alliance receives the spotlight bonus which gives them 4 points for each robot onstage whereas an alliance that is not spotlit would earn only 3. If two robots from an alliance are onstage on the same chain the alliance earns the harmony bonus which is 2 points. 1 point is awarded to any robot parked in the stage zone.
Our Strategy:
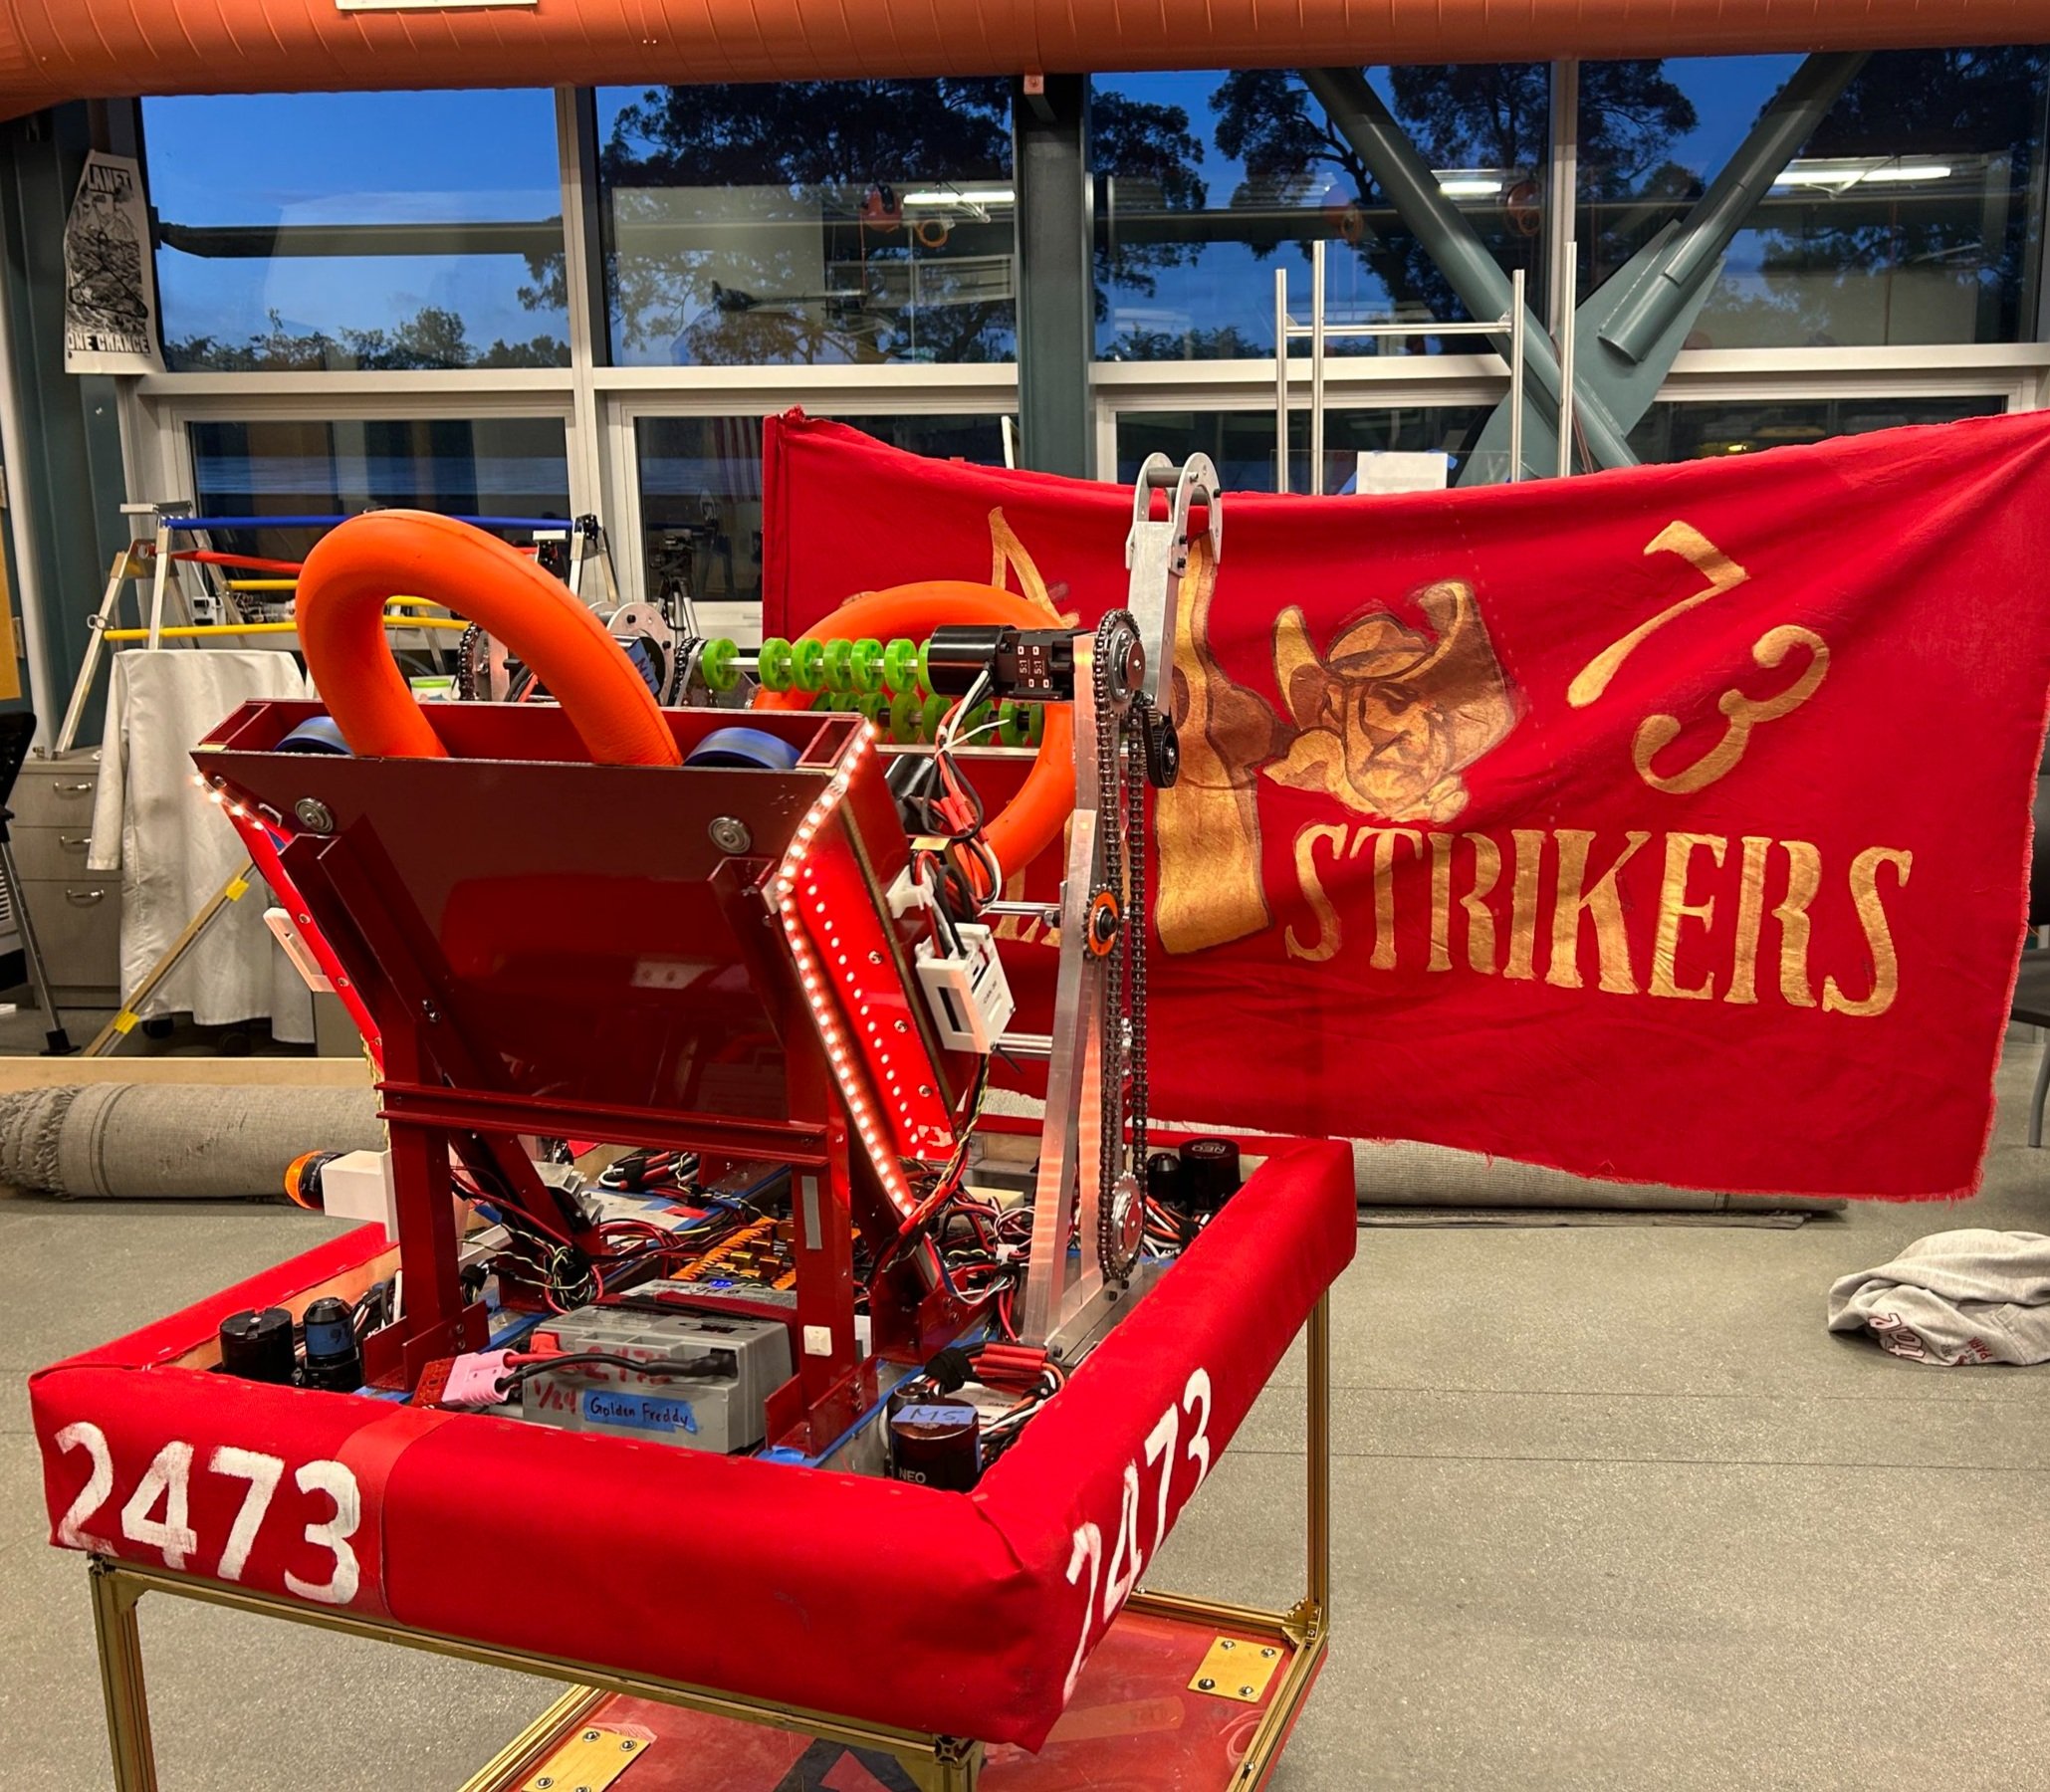
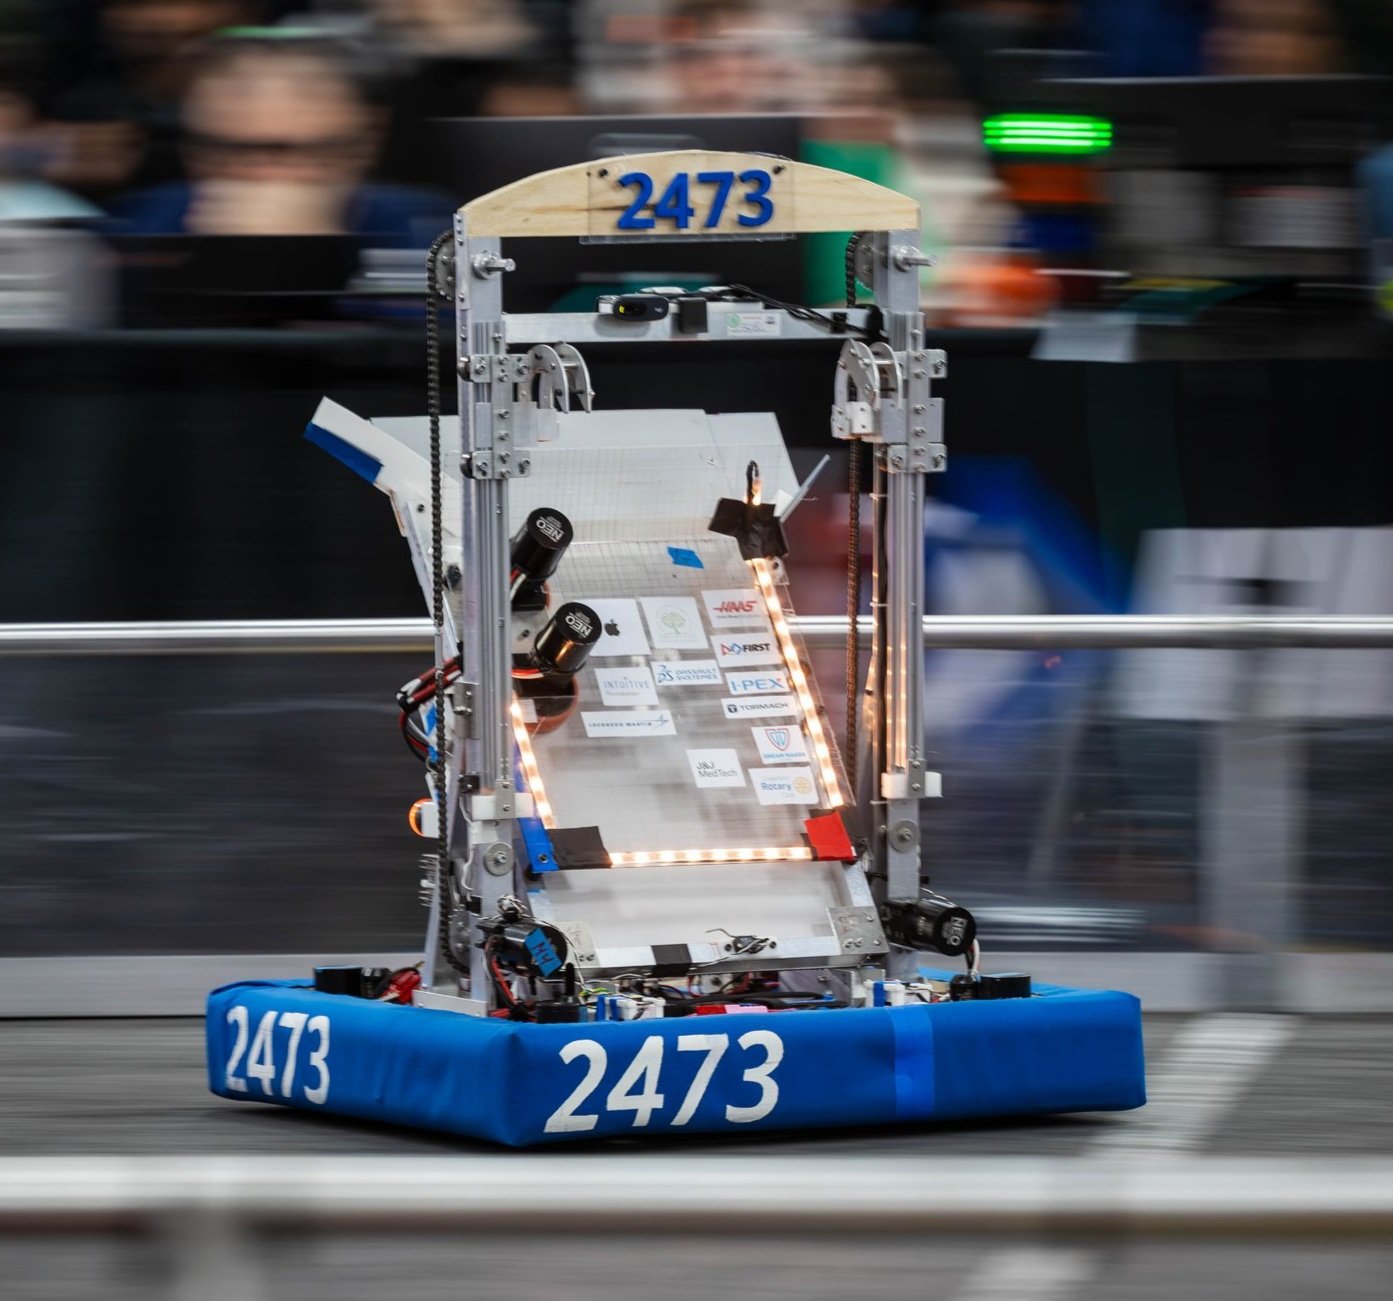
Our unique strategy revolves around a simple and consistent robot for our first tournament, SVR, and a more ambitious robot with more functionalities for our second tournament, MBR. For both tournaments, our robot will contain a shooter mechanism utilizing spinning wheels that can score notes in the speaker. Additionally, we will use a climber mechanism that allows us to latch onto the chain and lift the robot completely off the ground. For our MBR iteration, we are adding an additional roller intake that can pick up notes from the ground and either score them into the amp or place them into our shooter to score in the speaker. This ambitious addition to the robot gives us more flexibility as alliance partners and the potential to be a high-scoring team.


CHassis (SVR & MBR)
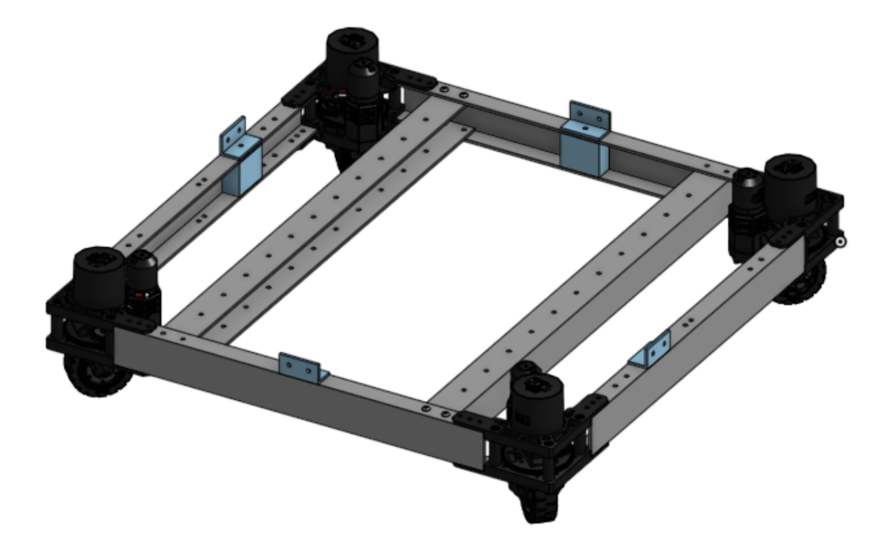
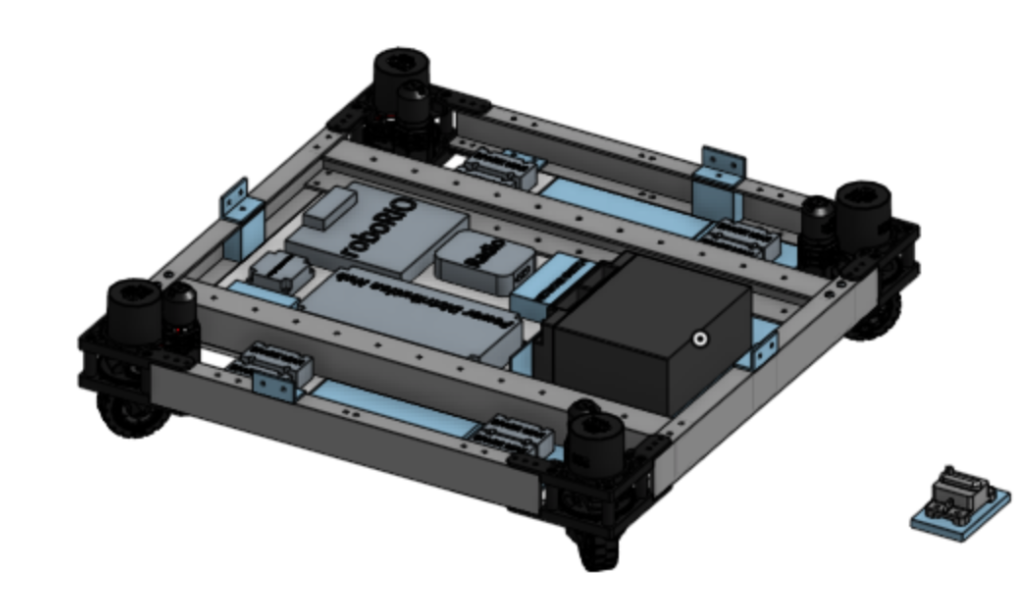
2473 worked to implement a swerve drive for the first time this offseason. By creating a swerve prototype with 3D printed modules, we started experimenting in early 2023. When the prototype seemed operative the 3D printed frames were replaced with Misumi channels. As we progressed, the Maxswerve kit was purchased and put together to finally be tested and run.
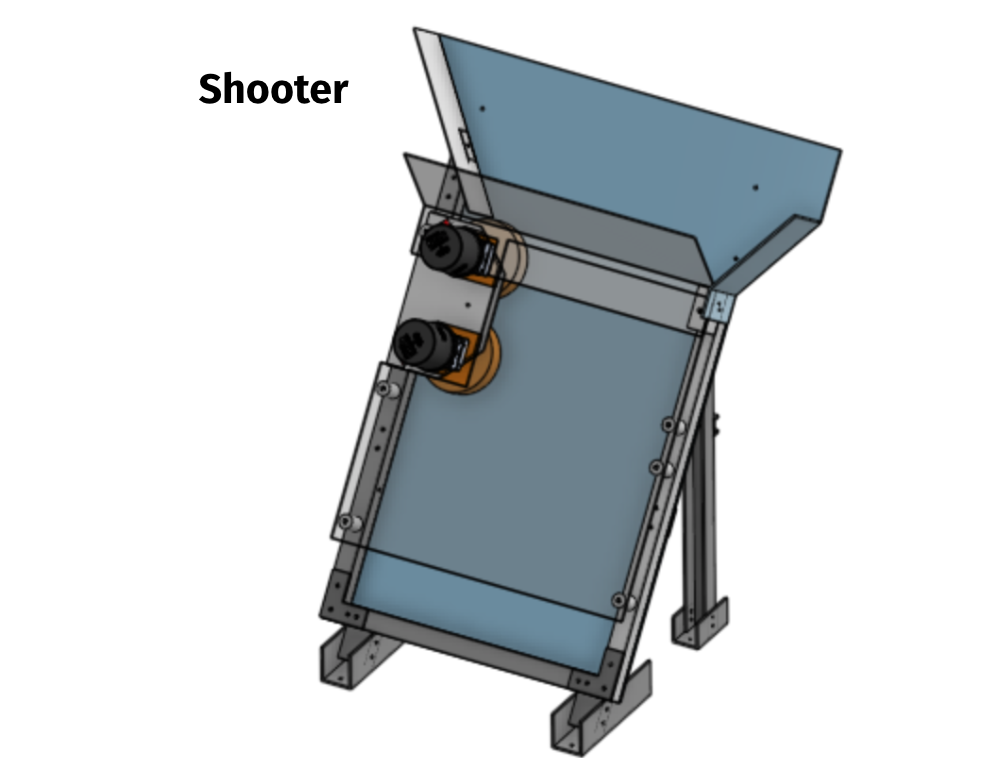
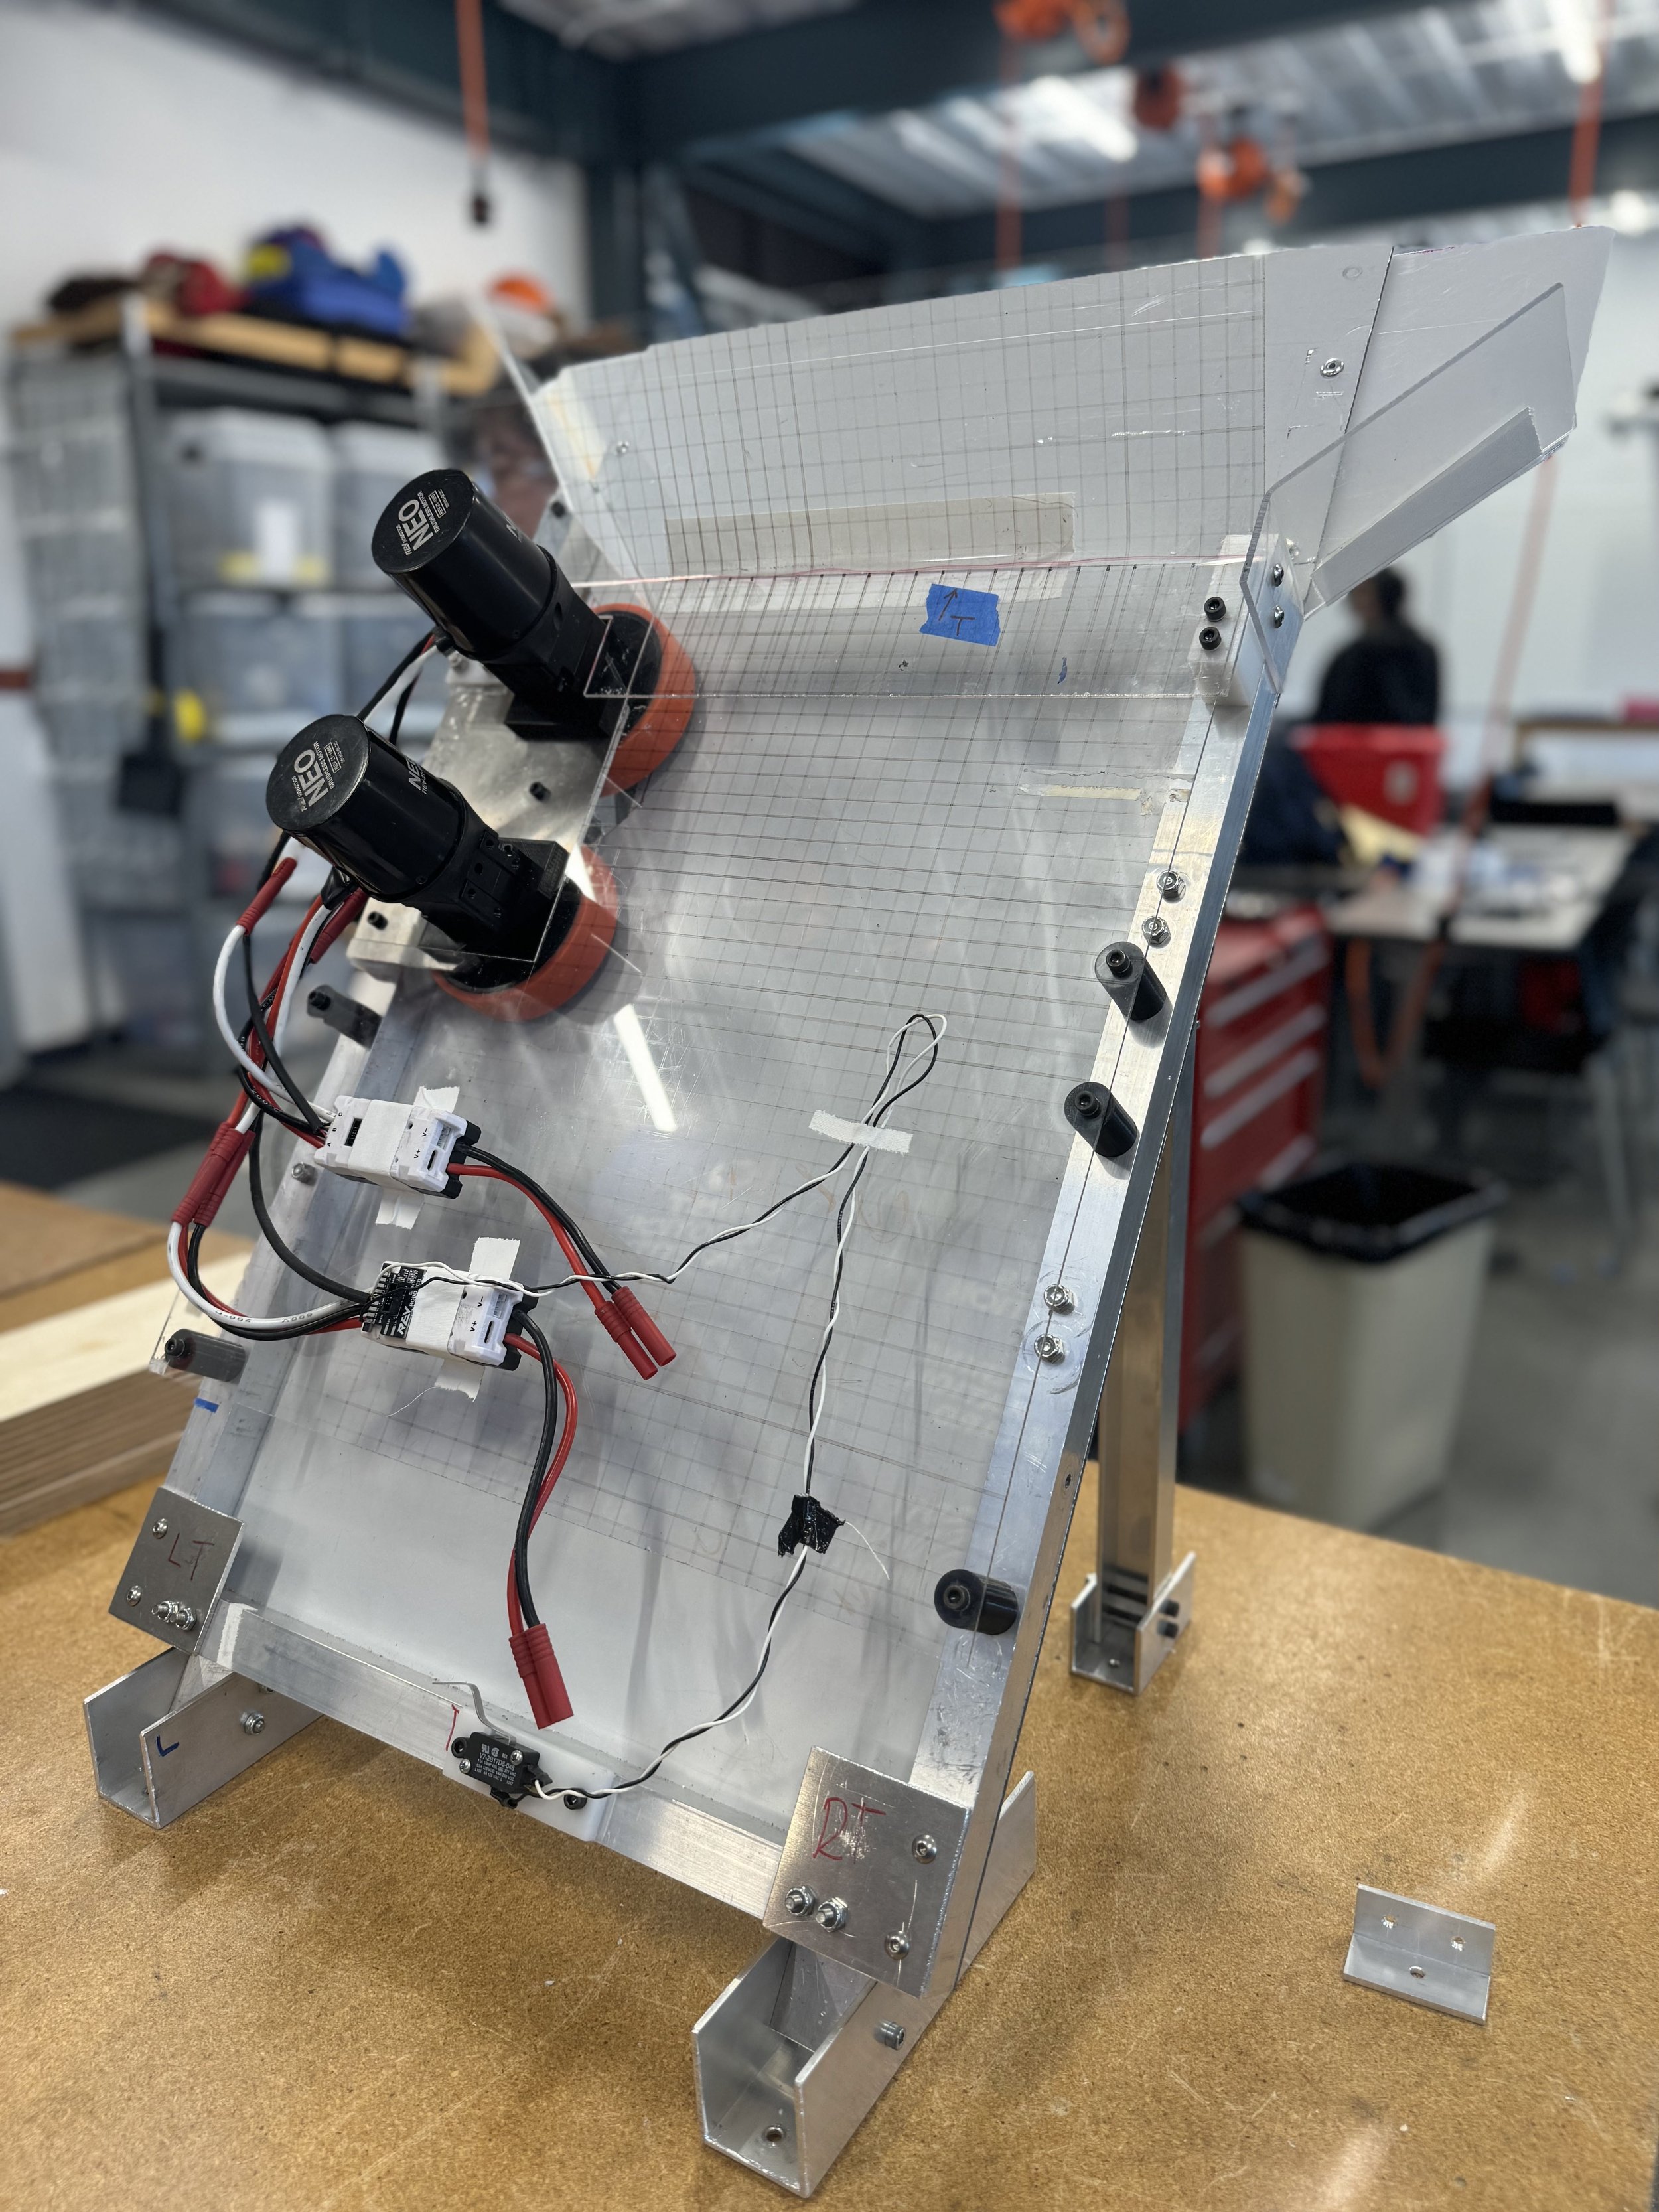

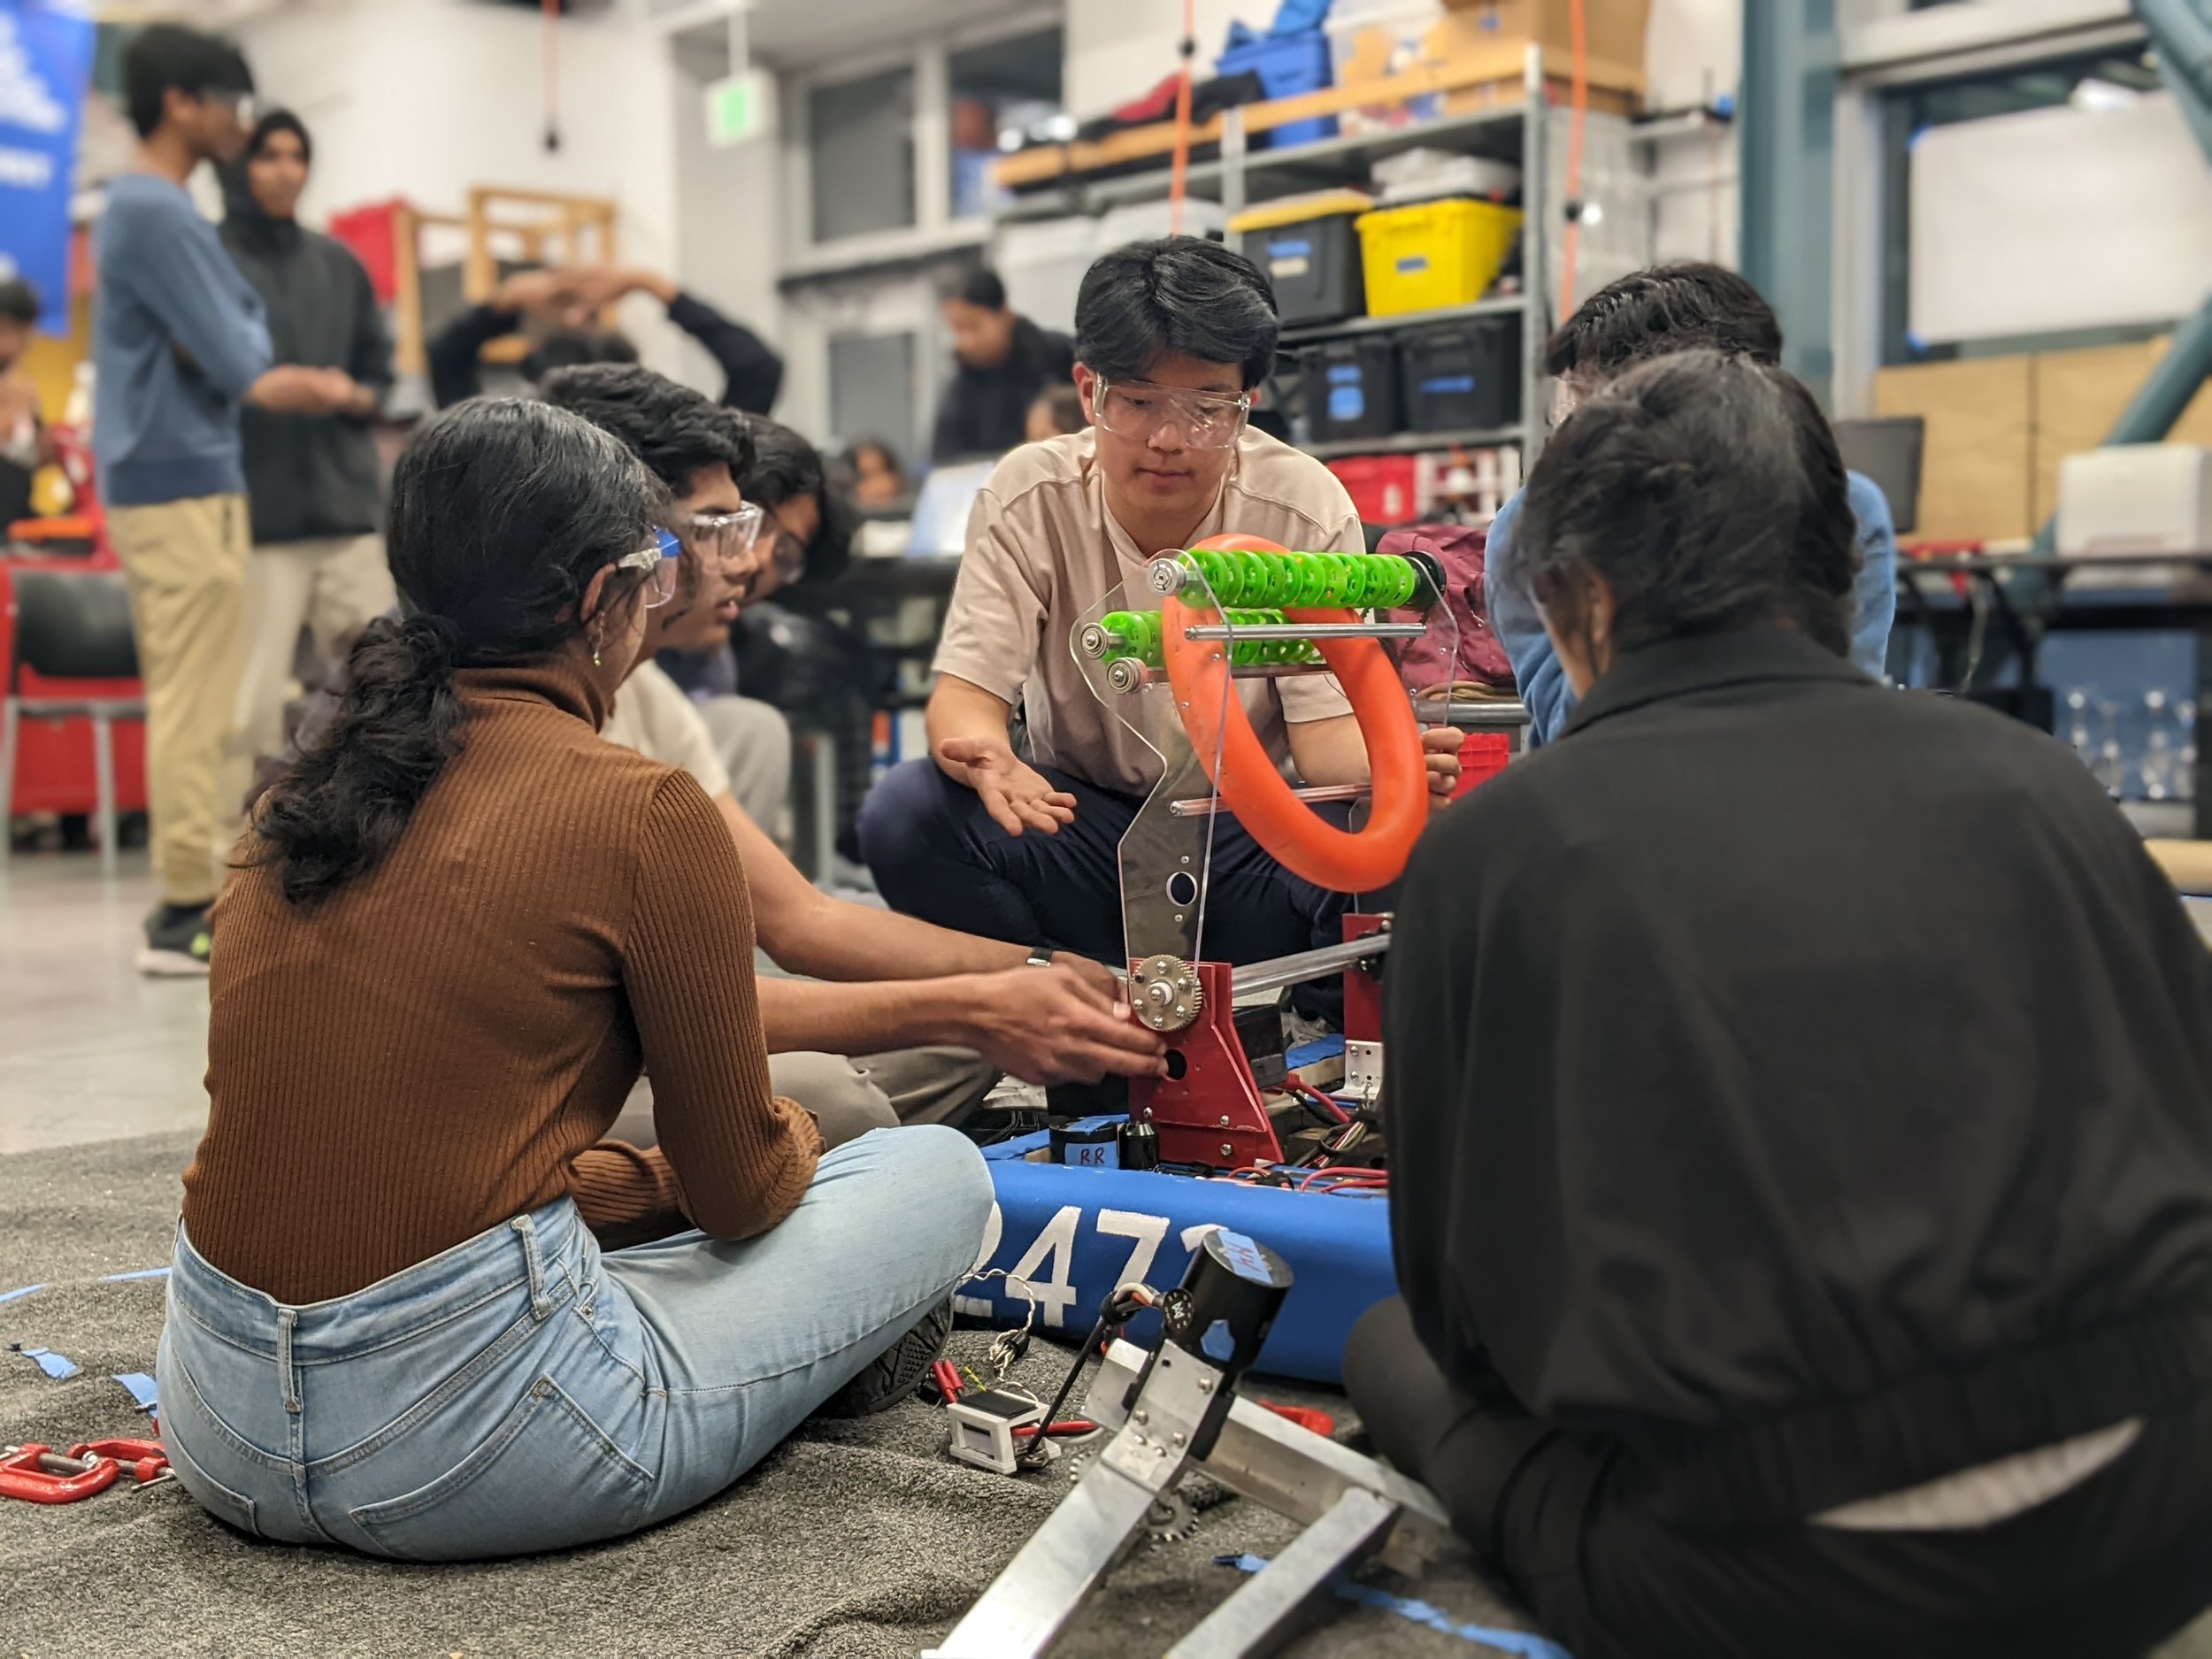
Shooter (SVR)
Since the Silicon Valley Regional was a week-1 event, our priority for our revision A mechanism was a quick build and consistent performance, giving as much time to the other divisions as we could. To that end we selected a very simple source pickup and fixed shooter design, drawing from the official kit-bot. One issue we ran into was the trajectory of the note. In our first revision, the note would curve leftwards, due to a later release on the right edge. We also further revised the mechanism by adding funnels extending outwards to the frame boundaries, increasing our tolerance on source pickup.
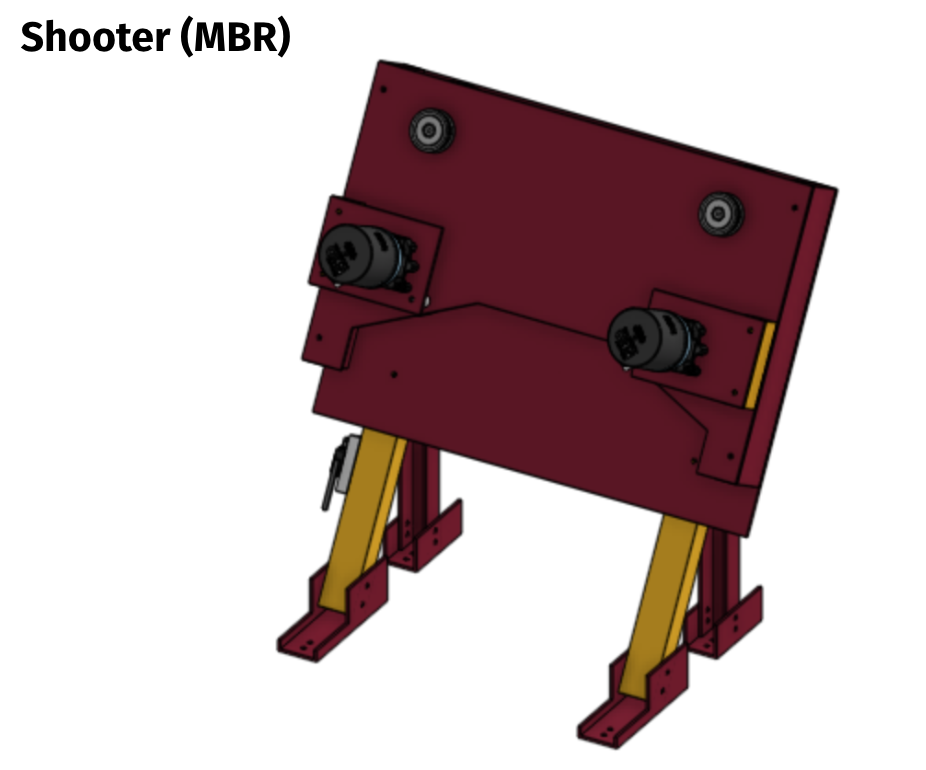
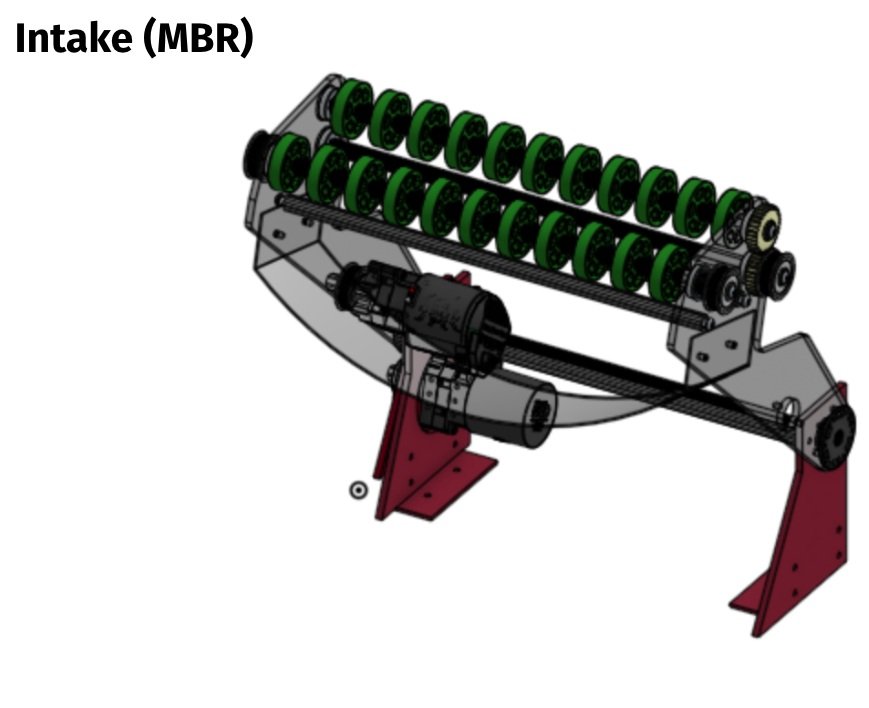
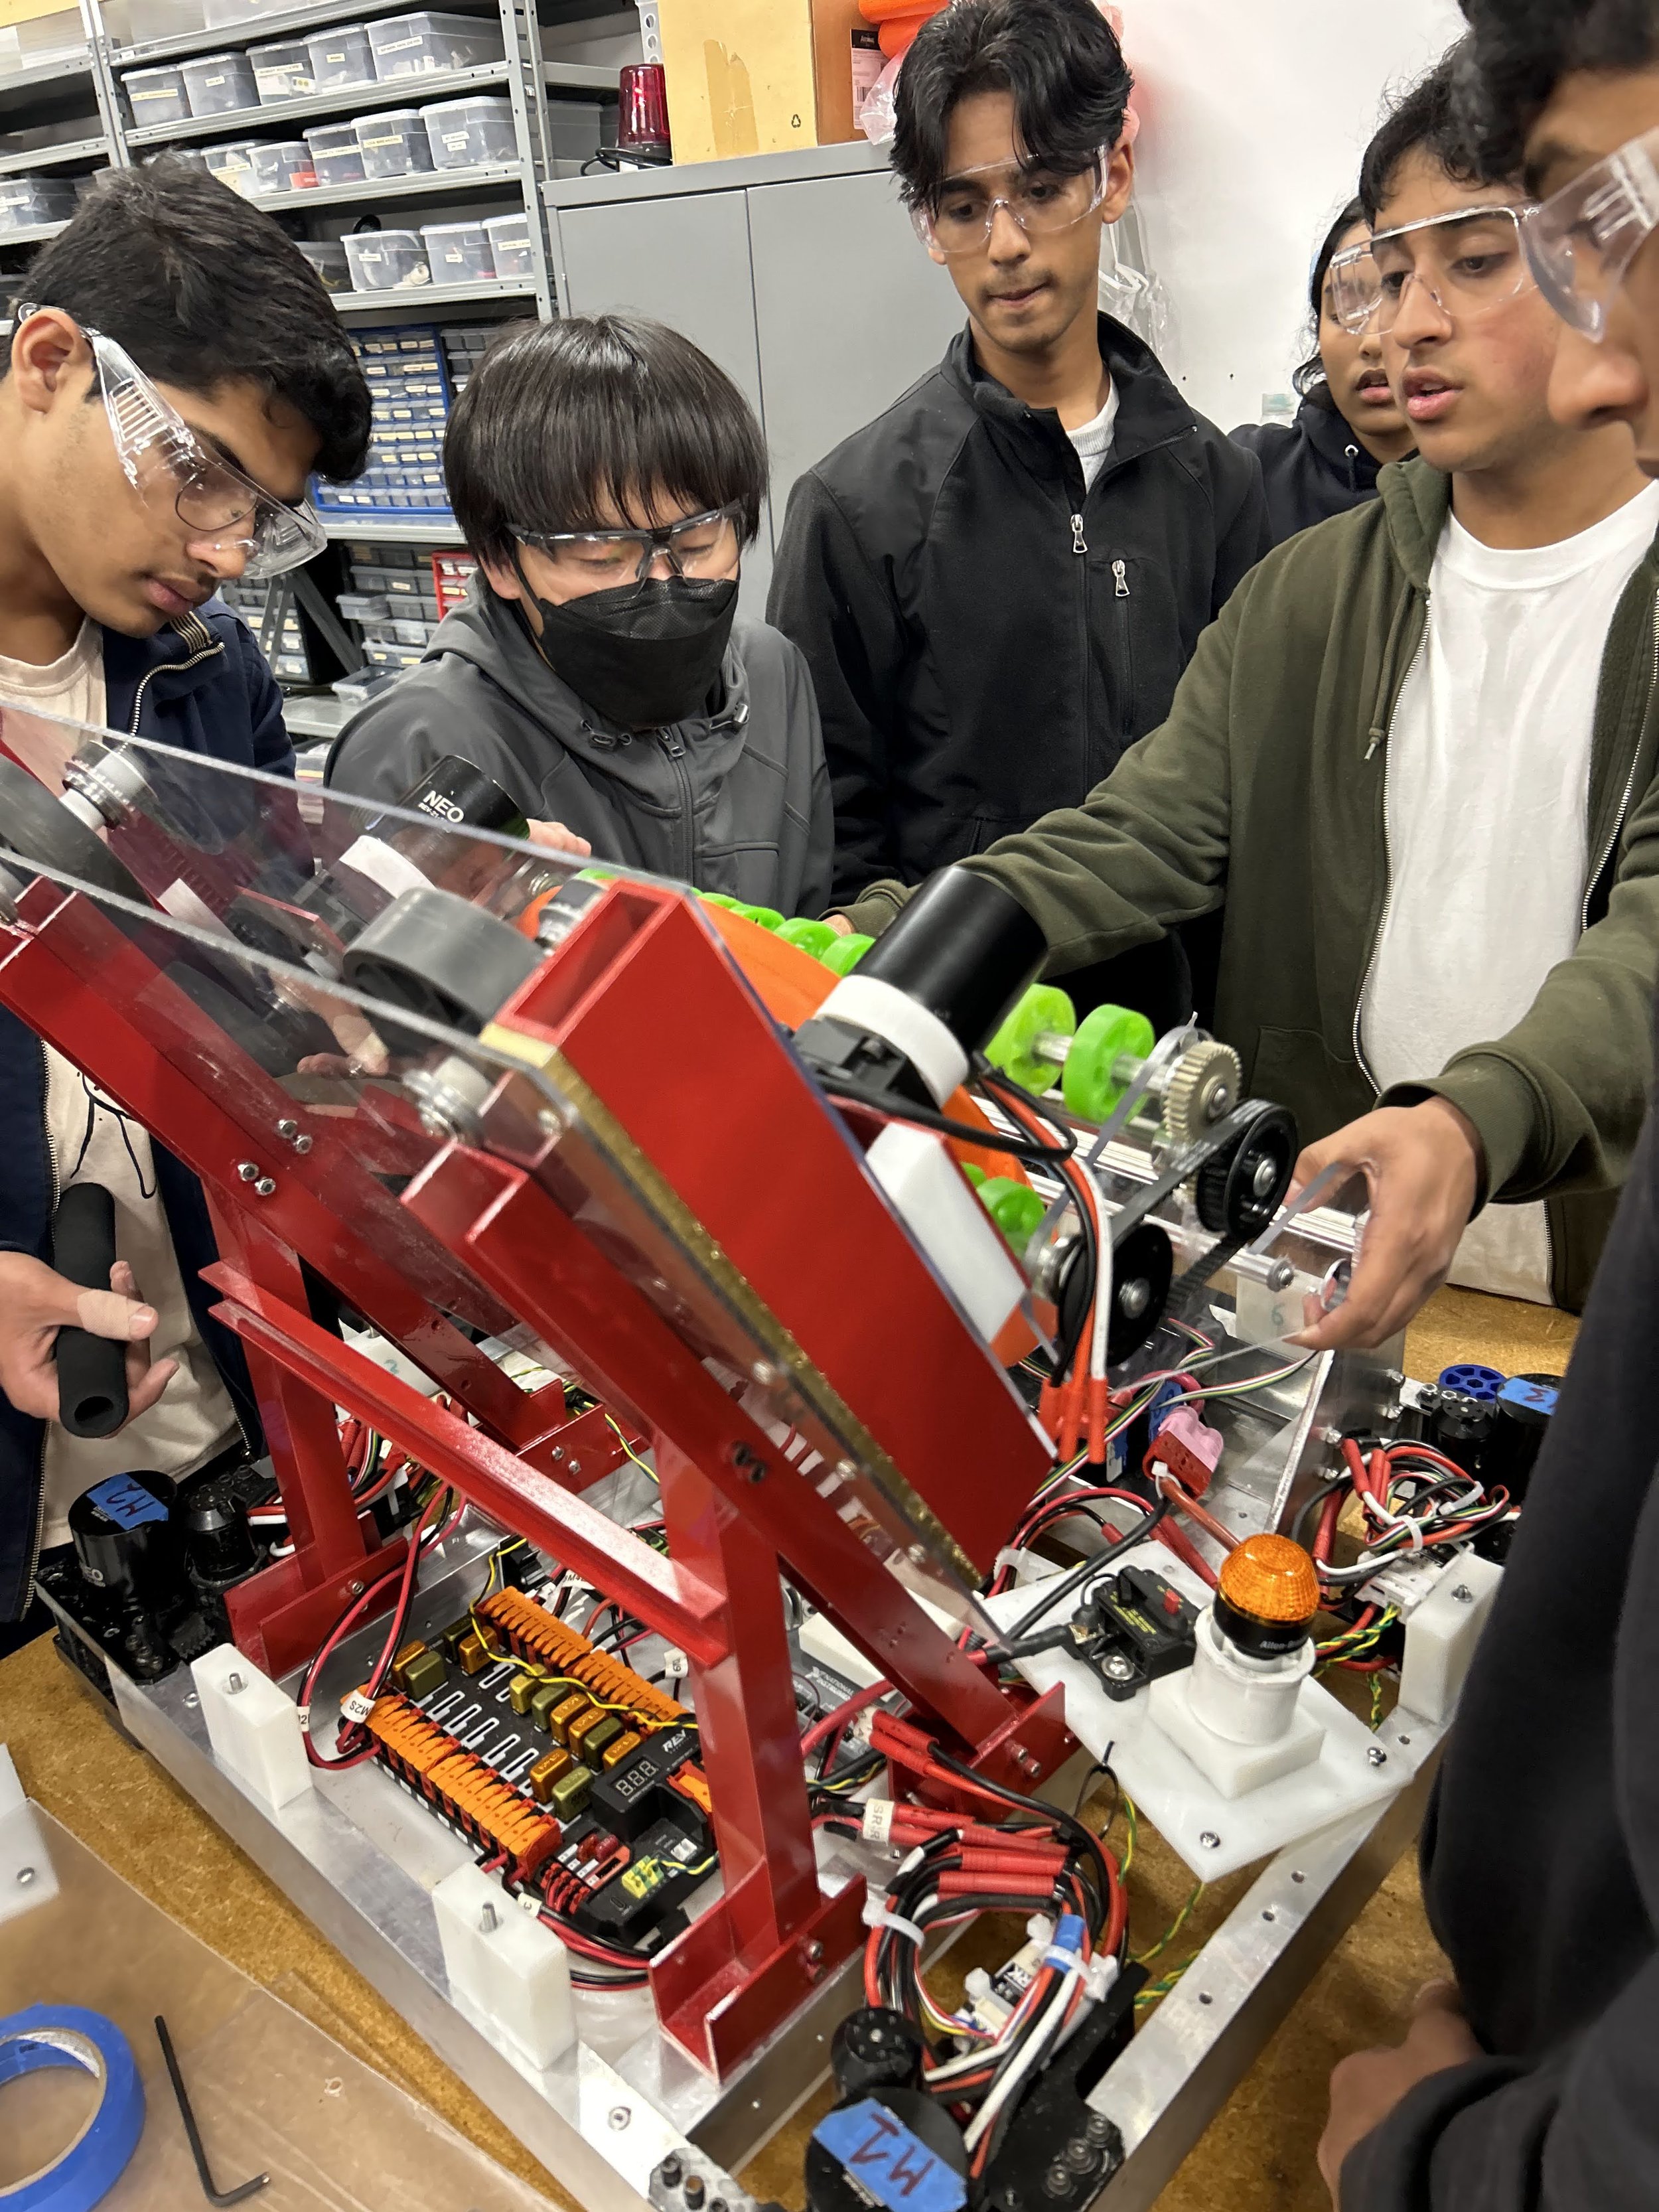
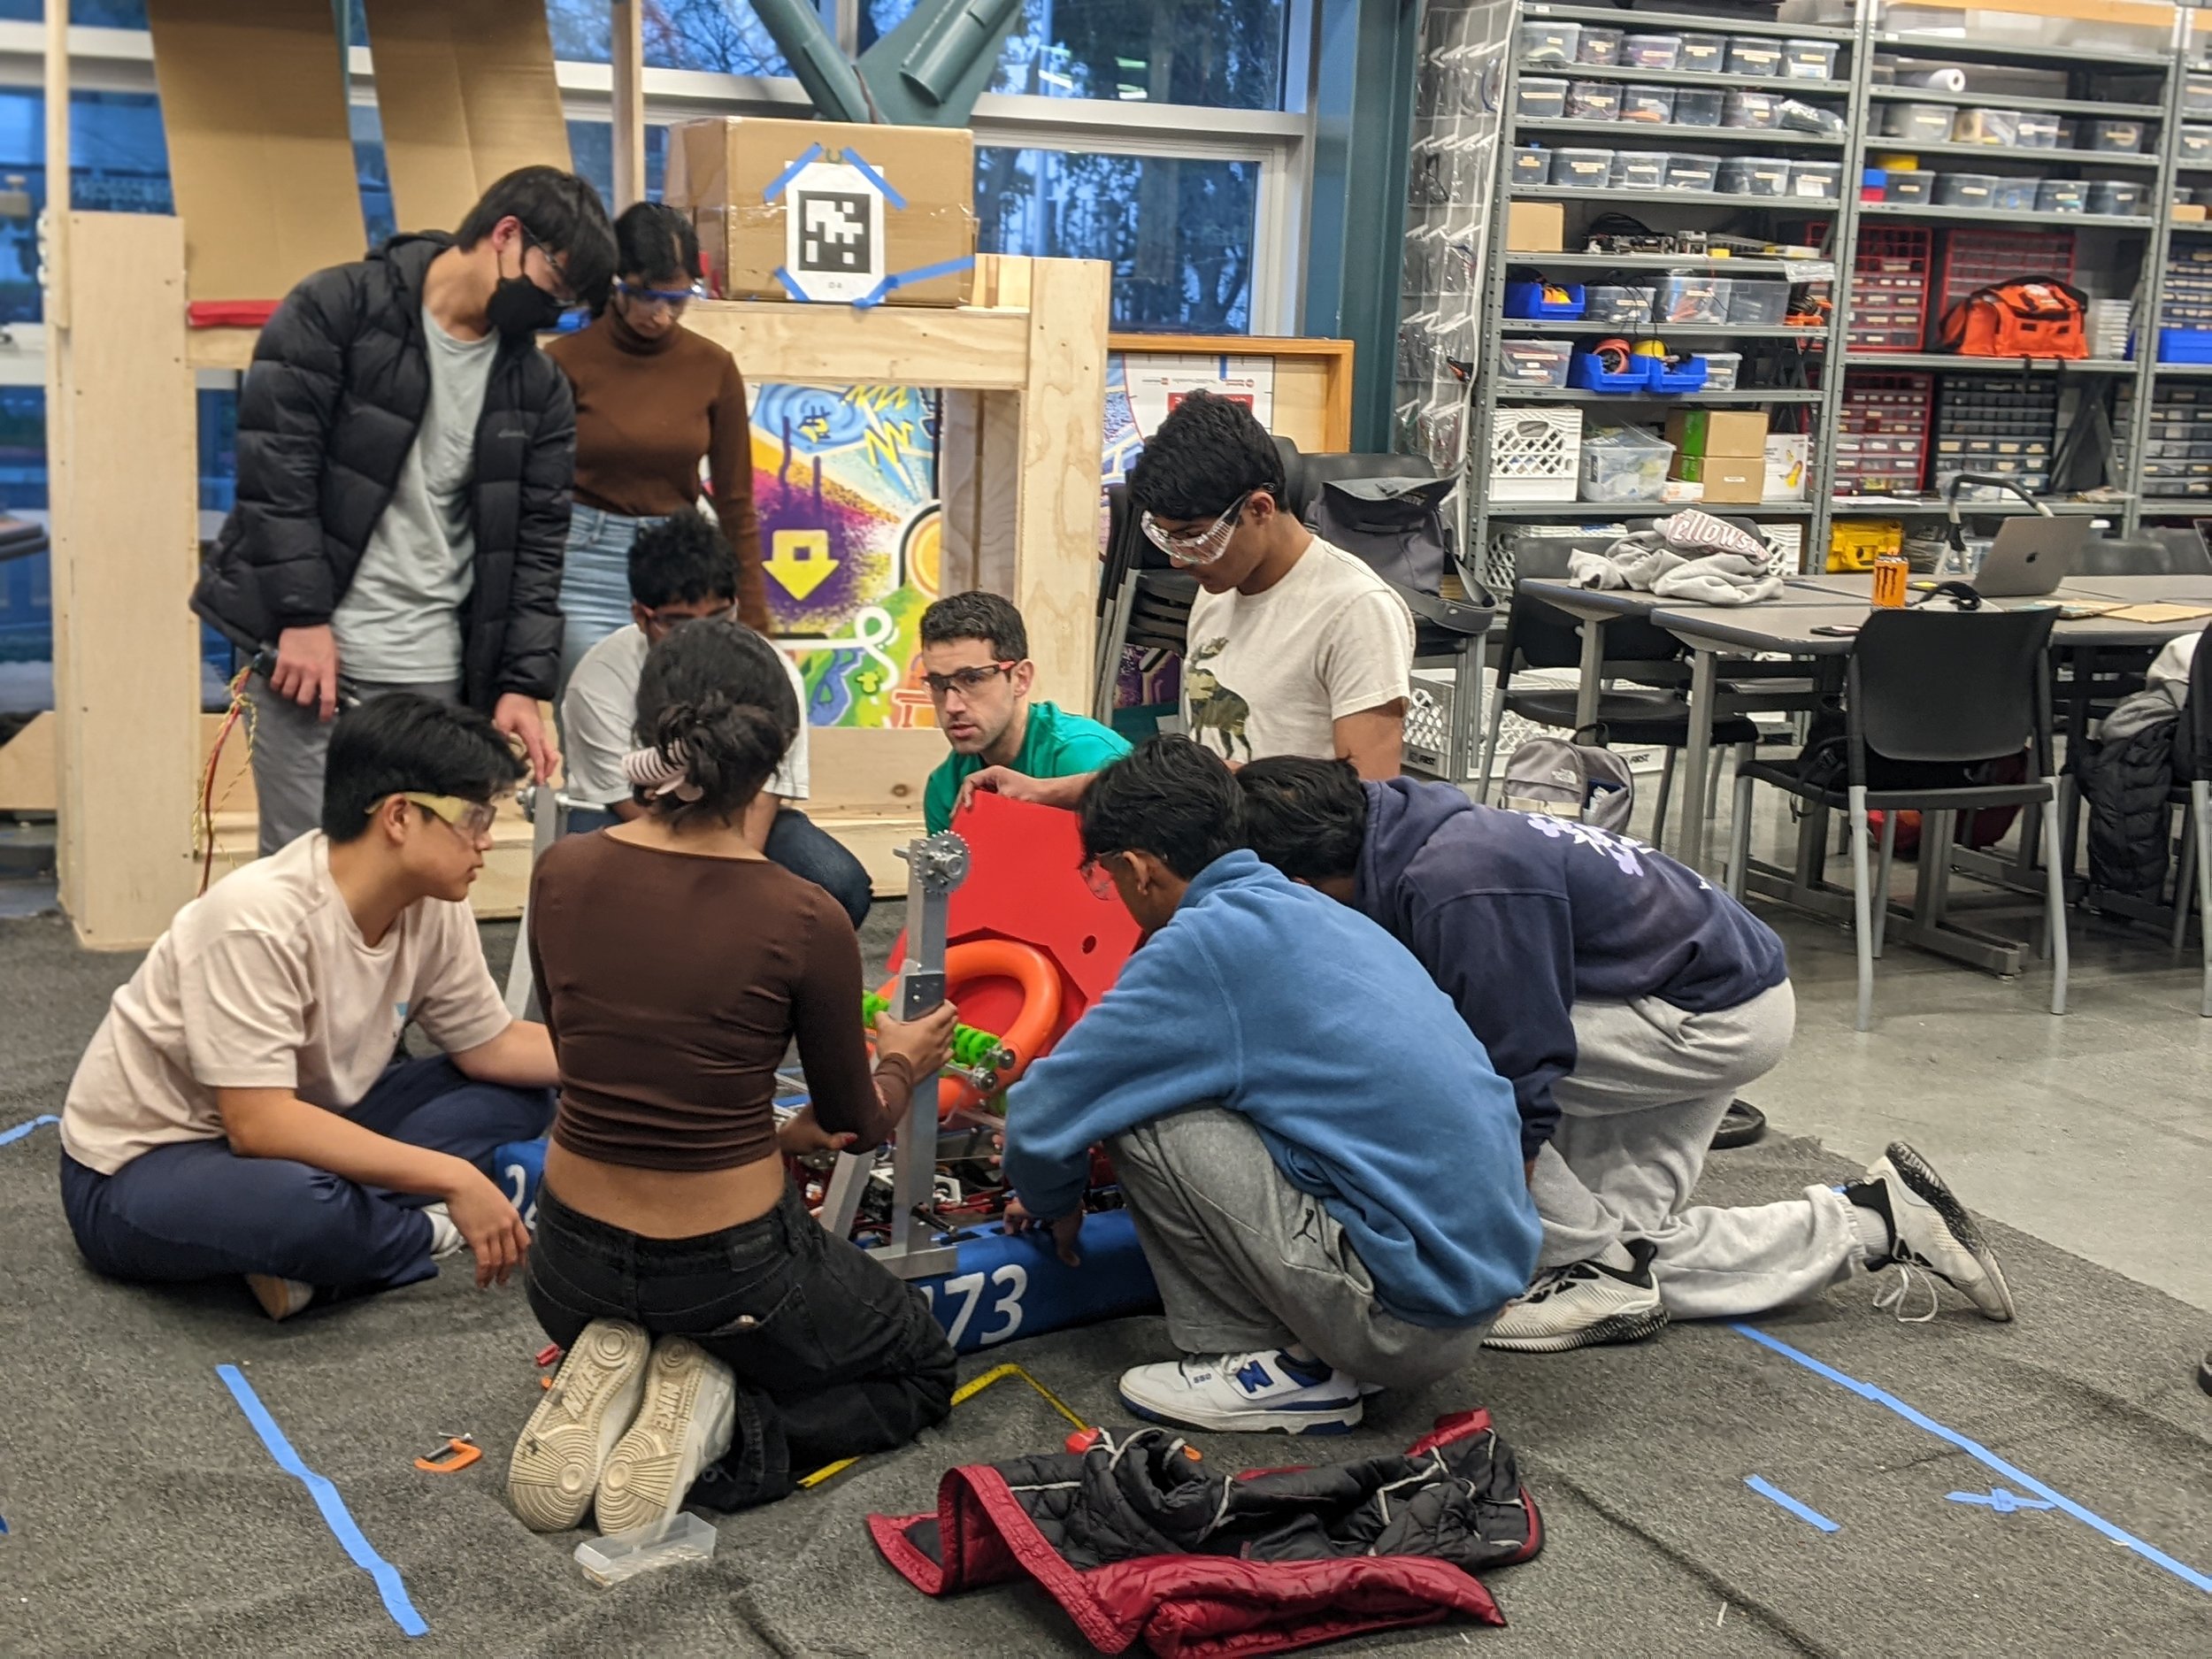
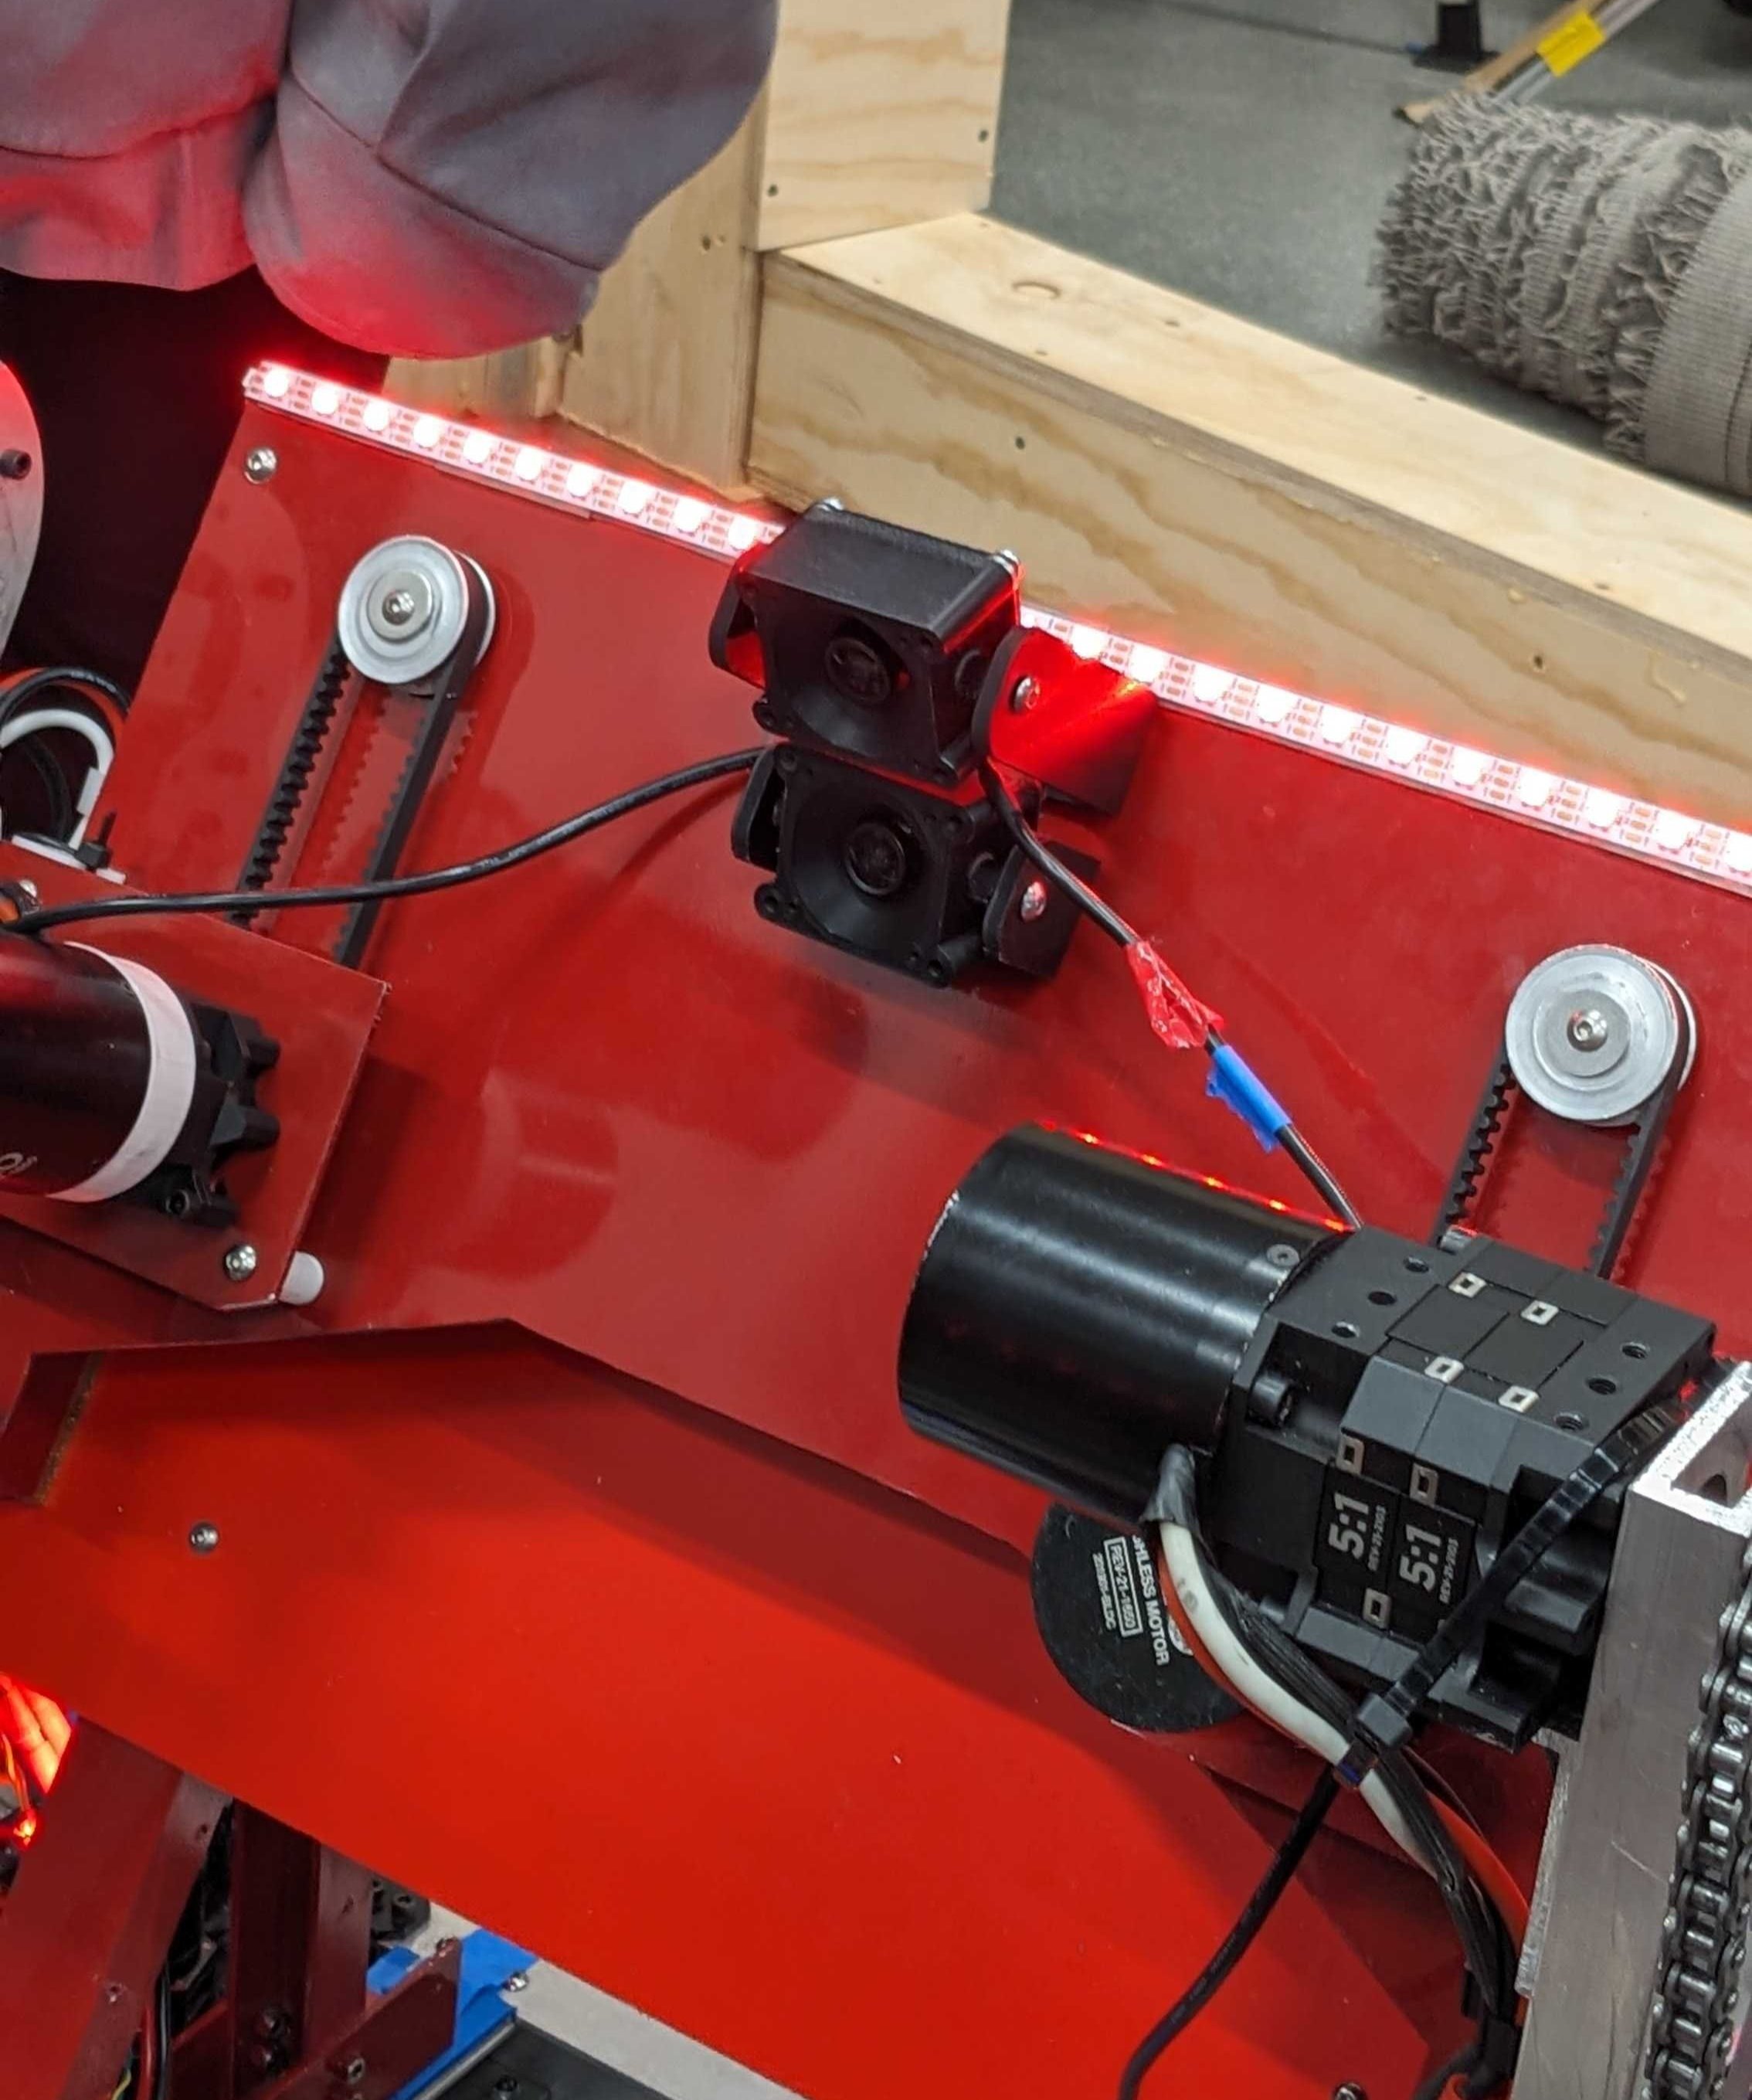
Shooter + intake (MBR)
For the Monterey Bay Regional, we prioritized a more ambitious robot. Our goal was to include a form of ground pickup to enhance our mobility and a shooter to quickly score notes during matches. The core mechanisms include a roller intake and a four-wheeled shooter. The intake uses two rows of green compliant wheels attached to a frame, gears, pulleys, and a motor on a pivot to intake notes from the ground. Once the notes are captured in the intake, a thin polycarbonate sheet catches the notes and holds them in the intake. The intake is then pivoted into the robot where it releases the notes into the shooter which shoots the notes into the speaker. We ran into many small manufacturing issues as the transfer between the intake and shooter needed to be accurate. For example, we replaced the top and bottom covers of our shooter to stronger material once we realized the polycarbonate sheets we originally used caused large vibrations when we ran the shooter wheel motors.
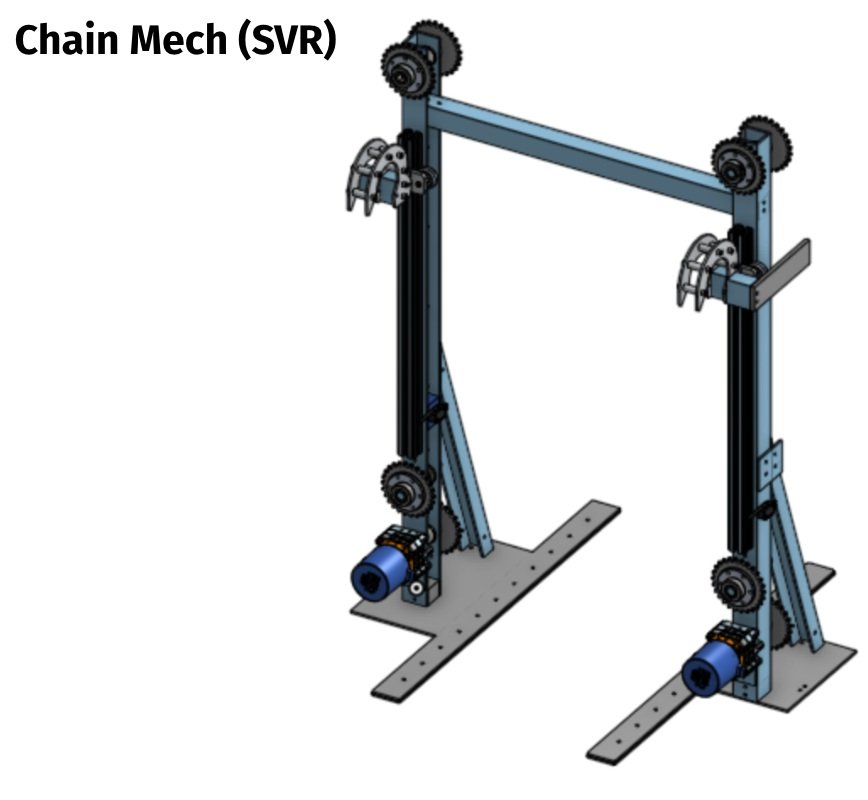

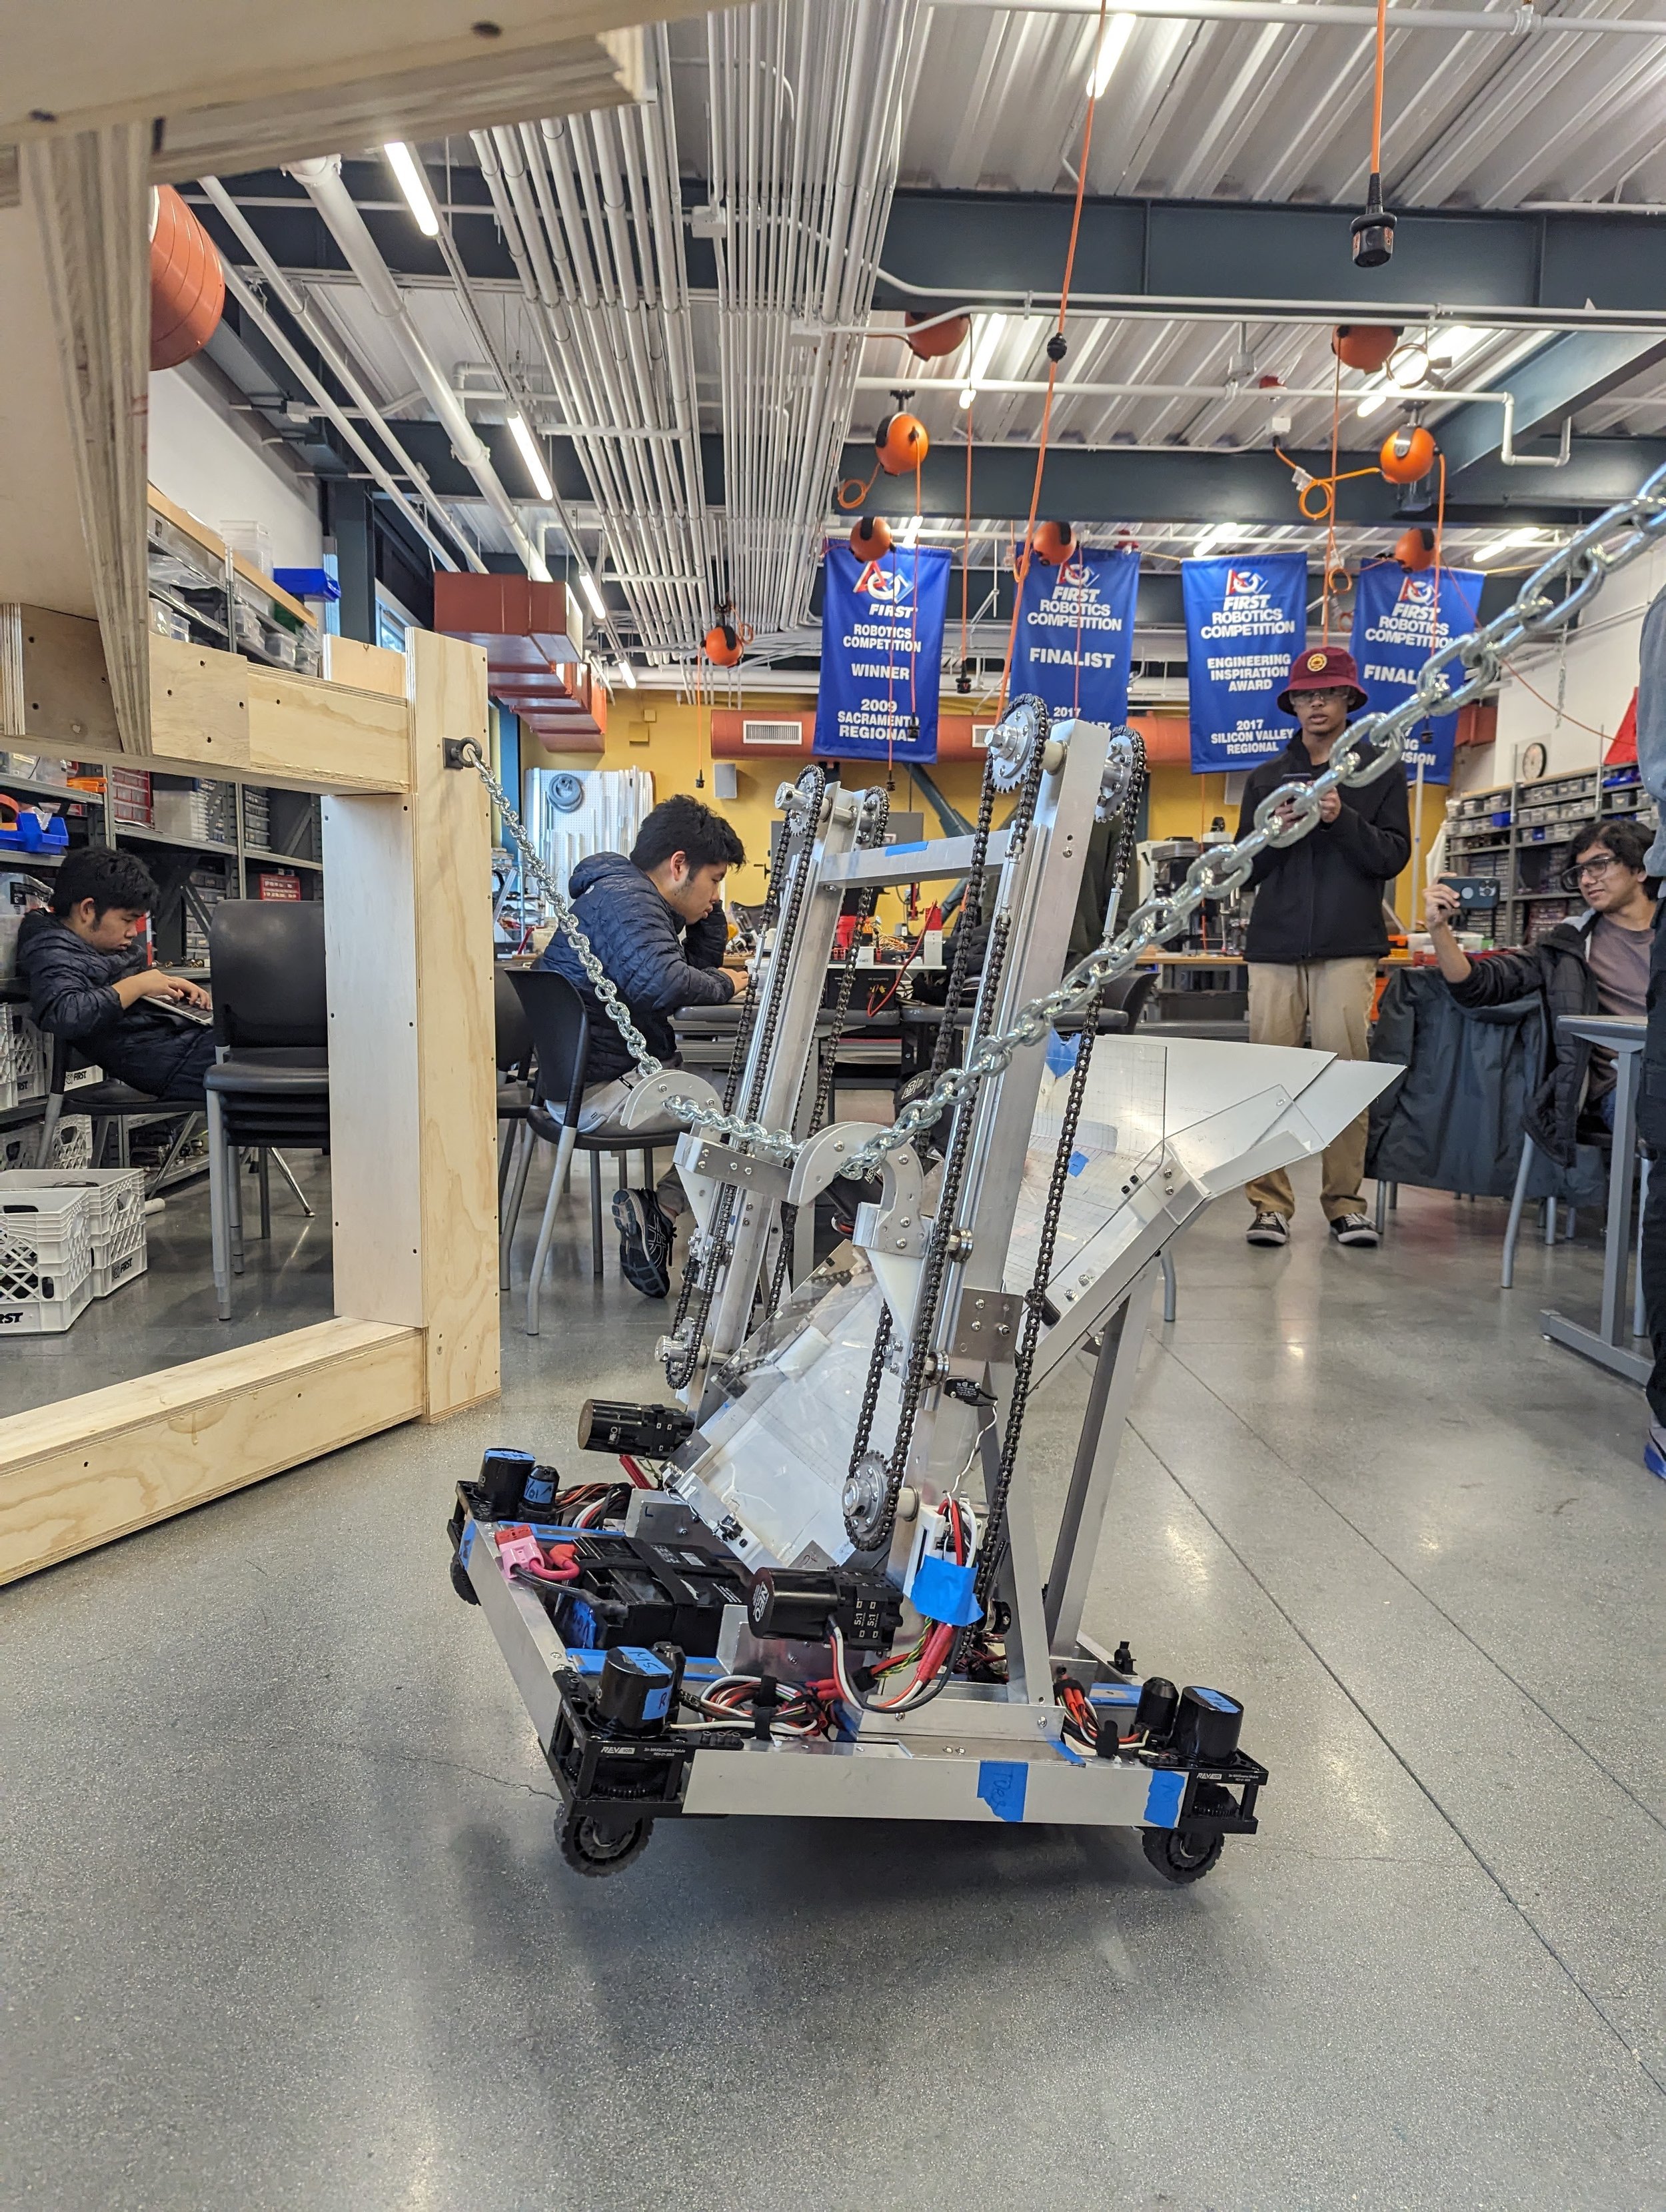
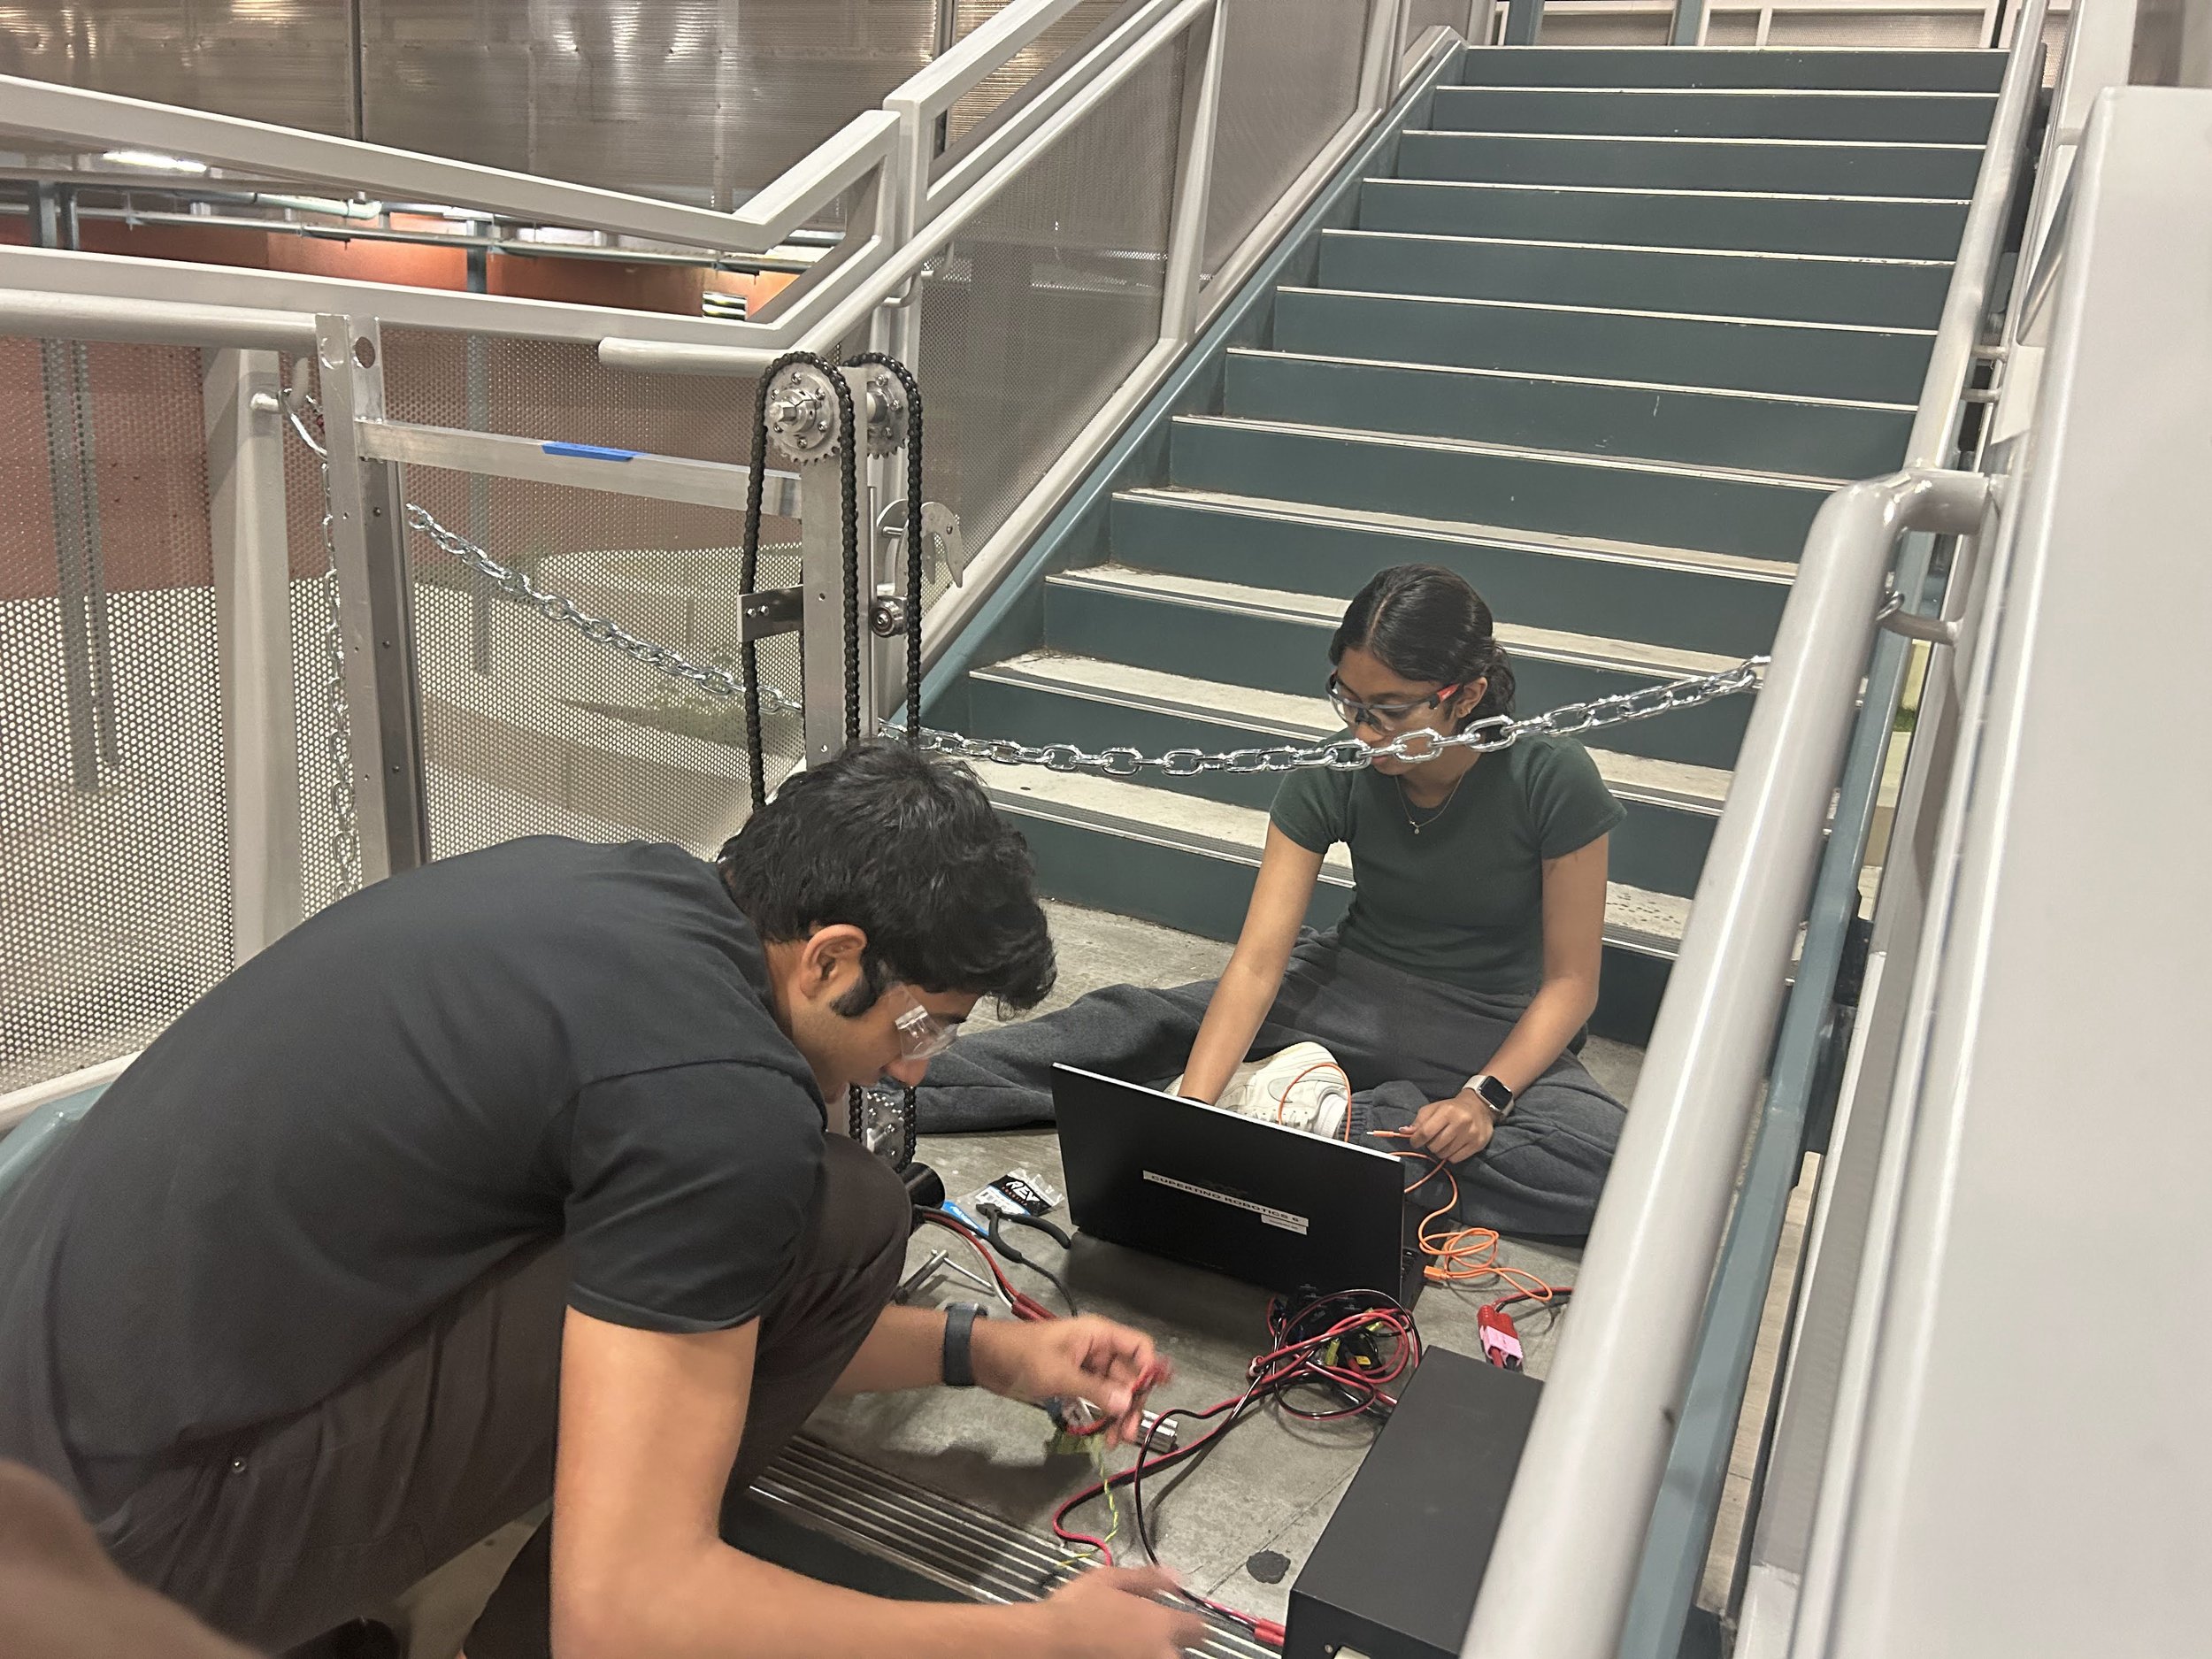
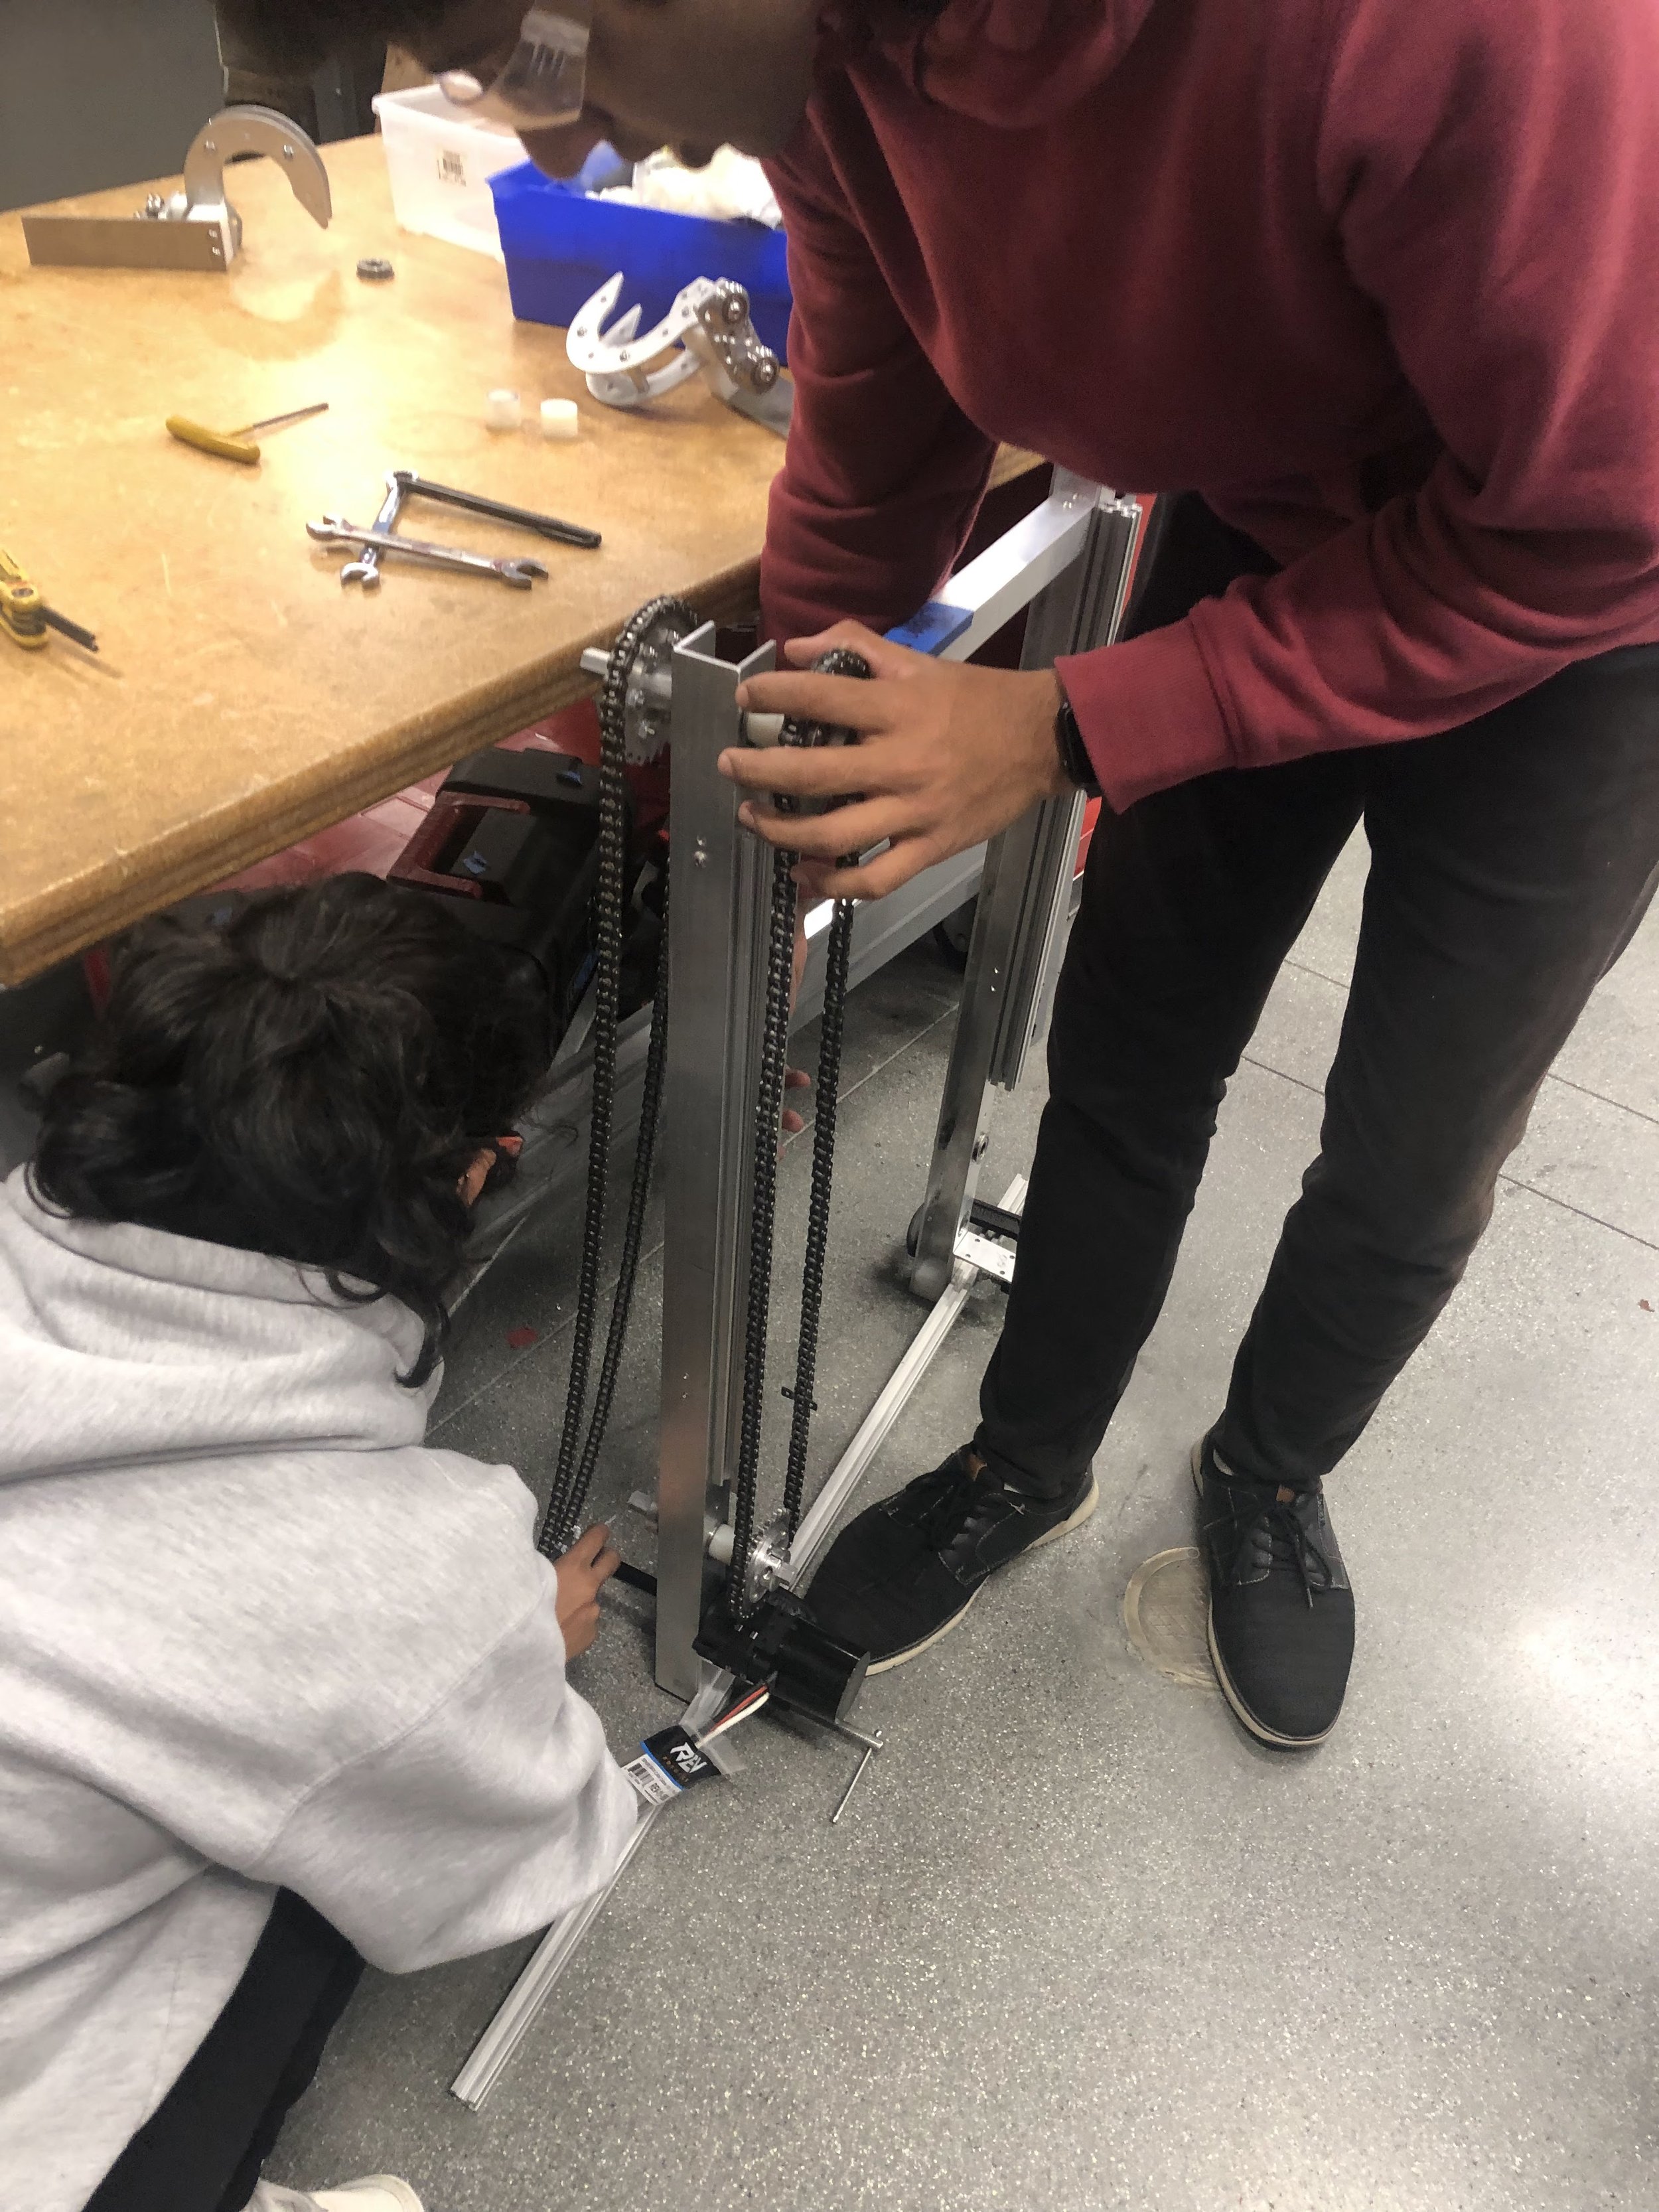
Chain Mech (SVR & MBR)
The Chain Mech has gone through two phases, SVR and MBR. However, both mechanisms hold their similarities. They are both powered by 25:1 NEO 1650s and use sprockets to make the hooks travel linearly. In addition, both mechanisms use a ratchet in order to take off much of the load off the motors. Our initial design used a set of sliders accompanied with the hook and chain pieces and used a limit switch sensor to detect when the mechanism has done its job. But for our MBR mech, we had to take another approach in order to travel underneath the chain. We used encoder counts instead of a limit switch, and made the mechanism much more compact, allowing it to easily fit underneath the stage and between our main mechanism.
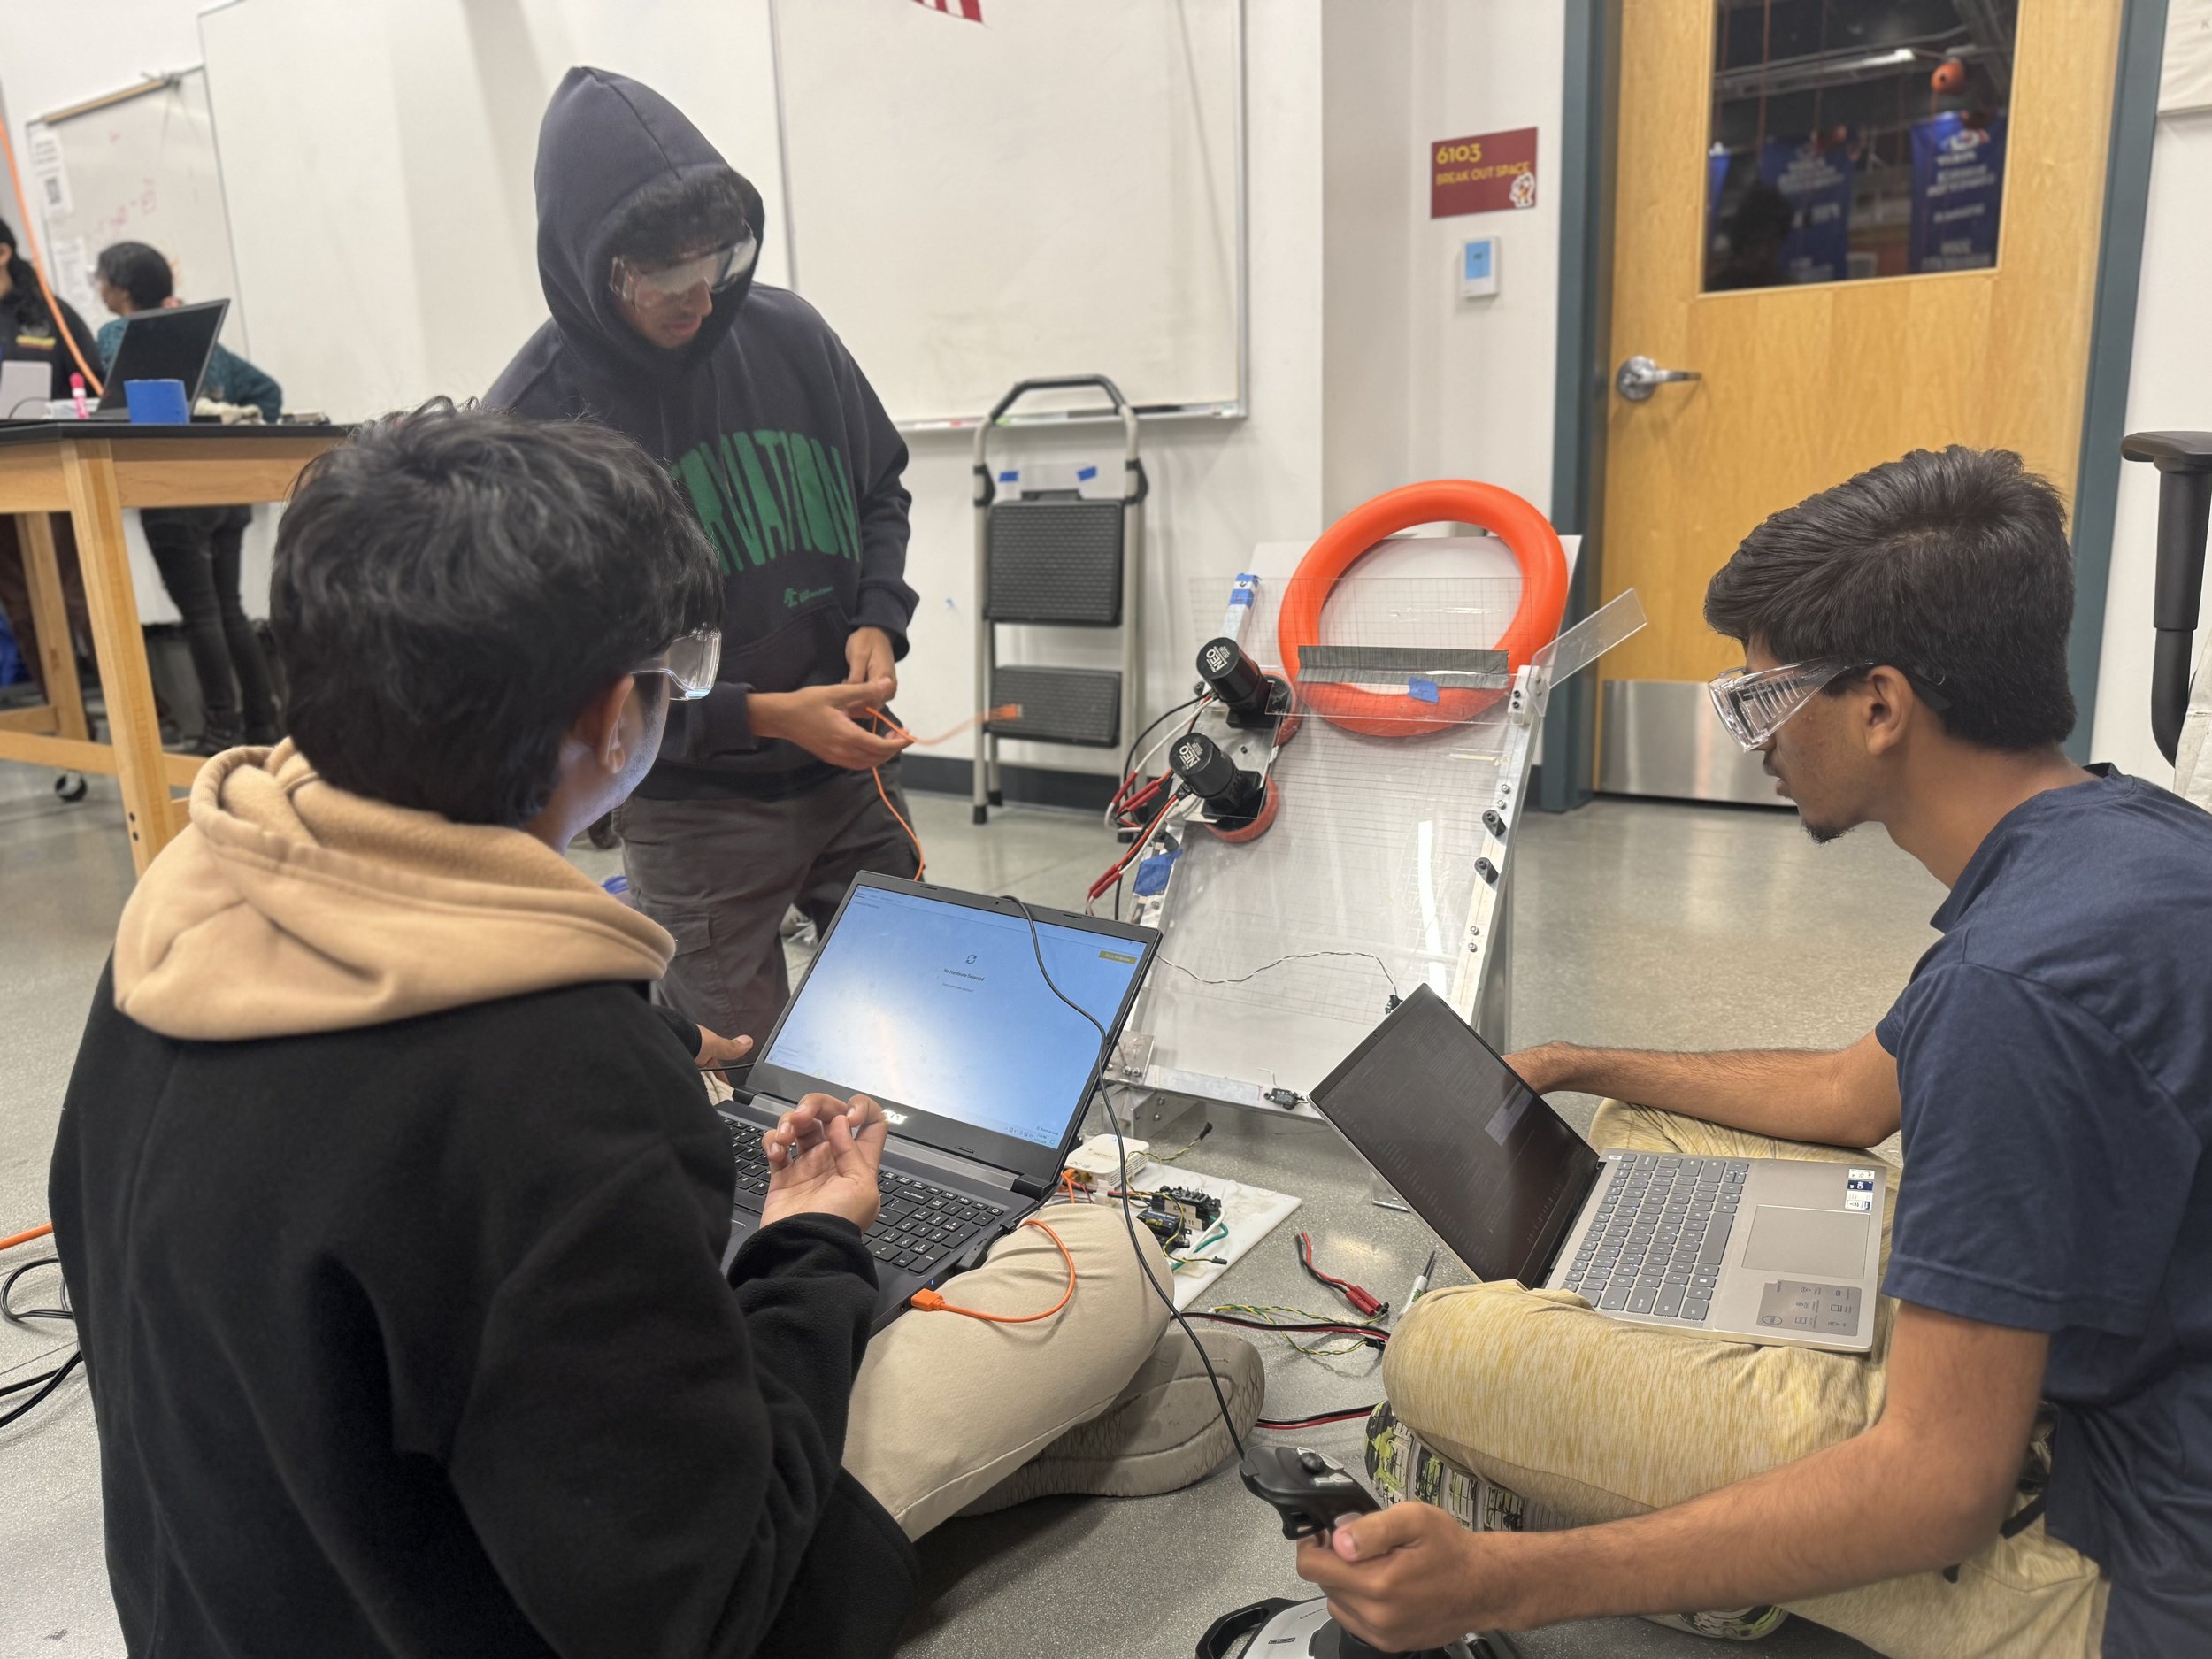
Software drive + mechs
DRIVE: The software drive team's goal for this season was to get a competitive swerve teleop and a 4 note autonomous on the robot. We created an algorithm using odometry that autonomously drove the robot along a series of points using an optimal deceleration rate so that we could minimize overshooting and time taken to complete the path. We also worked together with CV to use a similar algorithm for note and speaker alignment and drive-up. For our autonomous path chooser, we developed a flexible system of being able to decide the order in which we wanted to pick notes before each match and our code would use those values to run the robot. Additionally, we tested ways to increase the acceleration rate during teleop so the robot could reach its maximum velocity faster.

MBR ROBOT MECHS: The MBR Software Mech subteam worked on programming all the individual mechanisms that were to be mounted on the chassis. As lead of this subteam, I was responsible for making sure the teams made all deadlines and delivered the code on time to be tested and used for competition. Usually, we would start by drafting a logic diagram that describes how the mech works with certain states that describe each action. The diagrams would explain what action each of the states does and how it transitions between them depending on the input received. Our main form of input was a controller used by the driver that would initiate certain actions but we also used color and distance sensors to detect objects in our intake, and encoder values to control the pivot arm with a PID controller. This logic diagram usually goes through many changes and different versions until it gets finalized and approved by the leads and mentors. Once the logic has been approved we work on translating it to executable code. Writing the code is not as time-consuming but after that is done, we need to test the code and iron out any bugs or logic errors with the code. This testing is very time-consuming and can last weeks but it is one of the most important parts of the project. First, the code is tested on a Test-Rig with just a motor, then it is tested on the actual mech and then finally merged with the rest of the robot code and tested with the mech mounted on the robot.

SVR ROBOT MECHS: The code written for the mechs involves the integration of several FSMs for the shooter and chain mechanism. The shooter involves 2 NEO motors for both the upper and lower wheels being run simultaneously, all controlled by human controller inputs. When intaking the note, the motors are run inwards until the note reaches the bottom of the shooter and hits the limit switch, indicating the note is now cached in the shooter. This design is mainly used for quick source pickup. When outtaking the note from the shooter, the upper motor is revved up first for a short period of 0.5 seconds to ensure it reaches the optimal speed. After this, the lower motor is run. The note will then be forwarded by both wheels and shot into the speaker. The chain mech comprised of a left and right NEO motor that would run based on a human button press until the limit switch, indicating the point at which the hooks should stop retracting, was hit. The placement of the limit switches would ensure that the hooks would be low enough such that the robot was elevated off of the ground.

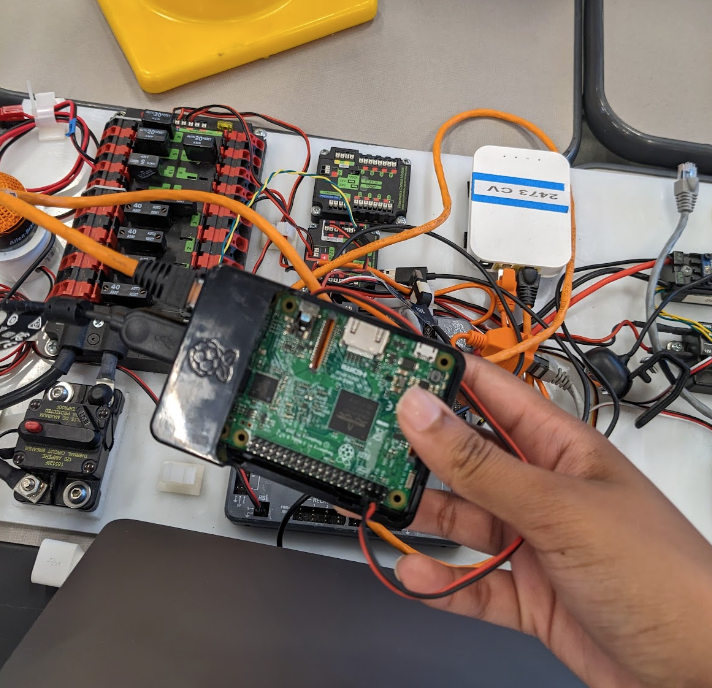
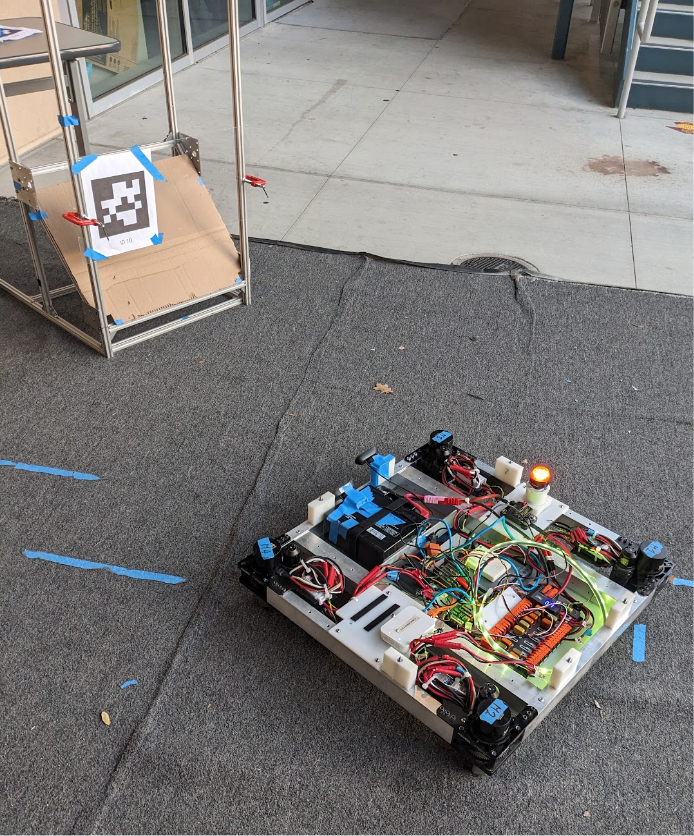
Computer Vision
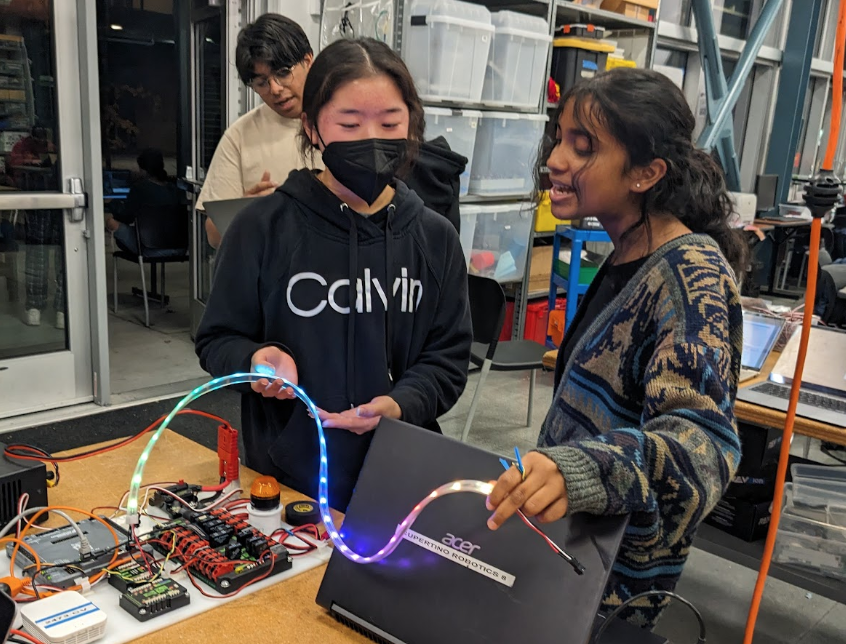
This season, CV worked on aligning the robot to different targets on the field, like the notes (rings) and apriltags. We implemented our brand new, self-developed RaspberryPI system for this object alignment. This involved writing traditional computer vision code in Python and setting up network protocols to send alignment data from Python to Java. We also implemented new cameras, switching from Logitech webcams to wider ArduCams. By the end of the season, we were able to rotationally align to the notes within 2 seconds! We also worked on bringing LEDs to the the robot, creating an API for them to be integrated with robotcode and working with electrical to get them mounted. (edited)
